Get started with the Coveo app for Shopify
Get started with the Coveo app for Shopify

This article explains how to get started with the Coveo AI Search & Discovery app, and how to add a Coveo-powered search interface to your Shopify storefront.
The setup process is mostly documented within the app itself, and it includes the following steps:
Each step has a corresponding tab in the app with the same functionality, although the interface can differ. All the screenshots in this article are from the guided setup process, but you can access any app function at any time from the relevant tab.
Coveo Platform prerequisites
The following items must be configured in your Coveo Platform before installing the Coveo AI Search & Discovery app.
-
A Coveo organization is required to index your Shopify products. If you’ve never used the Coveo Platform before, log in now.
 Notes
Notes-
You can’t use the Coveo AI Search & Discovery app with a trial Coveo organization.
-
Contact your sales representative to enable the following in your organization:
-
Coveo for Commerce extension
-
Coveo for Shopify integration
-
-
-
Ensure that you have the required privileges in your Coveo organization to link it to the Coveo AI Search & Discovery app and to perform the necessary actions during the setup process. The following table indicates the privileges required for your organization’s groups to view or edit elements of the Catalogs (platform-ca | platform-eu | platform-au) page and its associated panels (see Manage privileges and Privilege reference). The Commerce service is only available to organizations in which Coveo for Commerce features are enabled.
Action Service Domain Required access level View catalogs
Commerce
Catalogs
View
Content
Fields
View
Sources
View
Organization
Organization
View
Edit catalogs
Commerce
Catalogs
Edit
Content
Fields
View
Sources
View
Organization
Organization
View
Search
Execute queries
Allowed
|
|
Note
Granting the Edit access level on a domain also implicitly grants View on that domain. |
Shopify prerequisites
See the Prepare Shopify for Coveo article to set up Shopify for optimal Coveo compatibility.
App home page
The home page of the Coveo AI Search & Discovery app has several cards with useful information.

These cards include the following:
-
Setup guide
This is a checklist of the steps to set up the Coveo AI Search & Discovery app. When selected, each item displays its status and has a button which takes you to that step in the setup process.
Notes-
The Storefront step doesn’t display its status because the app can’t track whether you’ve implemented Coveo in your storefront.
-
The steps don’t check themselves off automatically. You can check them off manually to keep track of your progress.
-
-
Coveo Merchandising Hub
This card displays important data from the Coveo Merchandising Hub (CMH). The View all button takes you directly to the Search manager tool in your Coveo organization.
-
Revenue and Recorded events
These cards provide insight into key metrics for monitoring the health and performance of your Coveo-powered storefront. You can view these metrics over the last 24 hours, 7 days, or 14 days.
Once you’ve started logging some revenue and event data points, you’ll see a percentage next to the reported value. This represents the change between the first and last hour of the selected reporting period, not a comparison relative to another period. On the Revenue card, you’ll also see a small line graph that displays the hourly revenue over the selected reporting period.
ExampleYou’re on the app home page at 2:00 PM (14:00) UTC on January 20. You select Last 7 days from the dropdown menu.
The amount of revenue shown is $102,890, and the percentage shows an increase of 22%. However, the percentage isn’t directly related to the total revenue over the reporting period. Instead, it compares the hourly revenue values at the beginning and end of the period.
-
Hourly revenue at 2:00 PM UTC on January 13th: $550
-
Hourly revenue at 2:00 PM UTC on January 20th: $671
The increase of 22% represents the difference between these two hourly revenue values.
The View detailed revenue button takes you to the Overview dashboard on the Advanced Reports (platform-ca | platform-eu | platform-au) page of the Coveo Administration Console. The Manage events button takes you to the Events page of the Coveo AI Search & Discovery app.
-
Link organization
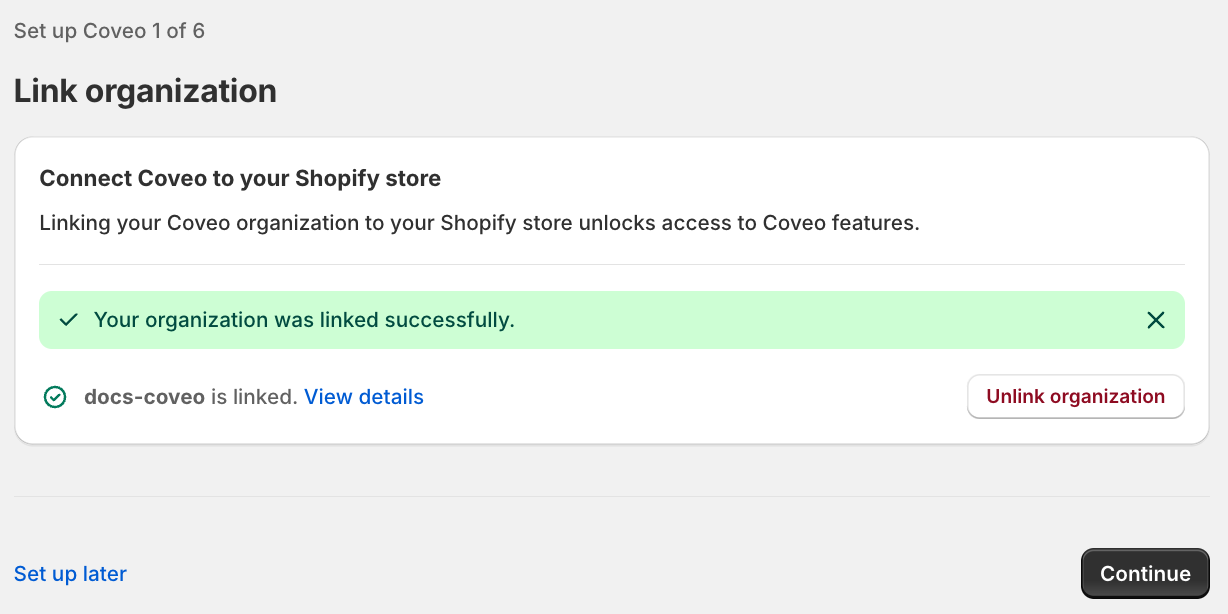
The first step is to link your Coveo organization to the Coveo AI Search & Discovery app. This step is mandatory, so you won’t be able to leave the Welcome page and access the app home page or the other steps until you complete it.


|
As noted in the prerequisites section, you can’t use a trial Coveo organization. Your organization also needs to have Coveo for Commerce features enabled. If you try to link an organization that’s not compatible, you’ll see an error message after you try to grant access and are redirected back to Shopify. |
After you click Link organization, a Choose organization region modal appears. Select your Coveo organization’s region and click Link organization again.
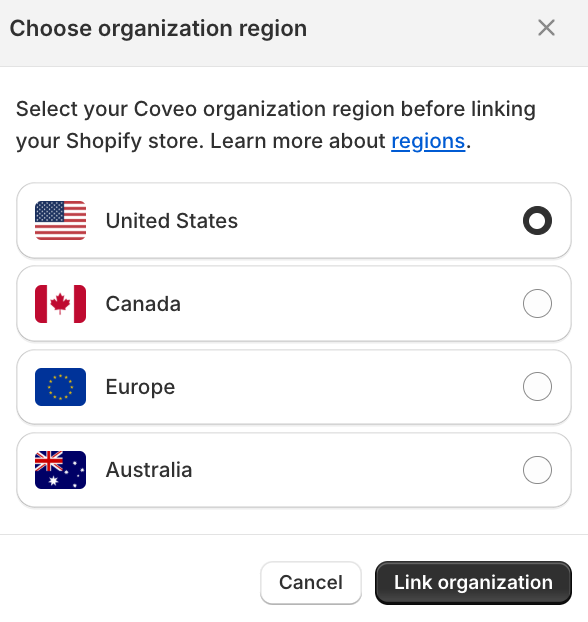
You’ll be redirected to the Coveo Platform login screen for your region. After you log in, select your Coveo organization from the dropdown menu and click Next. On the following screen, click Authorize to let the app access your organization, and you’ll be redirected to the Link organization step in the app.
Unlinking and relinking organizations
When you unlink a Coveo organization from the Coveo AI Search & Discovery app, all your Shopify-related resources will be deleted from the organization after 48 hours. If you relink to the same organization within 48 hours, these resources won’t be deleted and you won’t have to reconfigure your settings in the app.
If you link to another organization, all your Shopify-related resources in the first organization will be deleted immediately. You’ll have to sync your Shopify product catalog with the new organization and reconfigure your settings.
Catalog sync
The next step is to sync your Shopify product catalog. When you launch a sync, the Coveo AI Search & Discovery app indexes all products and variants that meet the prerequisites in your Coveo organization. It also deploys a web pixel the first time you sync your Shopify product catalog.
Before you launch the sync, consider selecting one or more custom fields to index. If you do, consider selecting them to use as filters (or facets in the Coveo Platform). You’ll set up your facets in the next step.
Later steps depend on your Shopify product catalog having been synced, and the other pages display a warning if you skip it.

When you sync your Shopify product catalog, the app creates the following resources in your organization:
Coveo web pixel
The Coveo AI Search & Discovery app deploys a web pixel the first time you sync your Shopify product catalog.
This web pixel must be initialized before it can log events. Initialize it as soon as possible, even before you set up your storefront, so that it can start logging events to power your Coveo ML models.
Collection sync
|
|
The collection sync feature is available in early access. Contact your Coveo account representative to request access. |
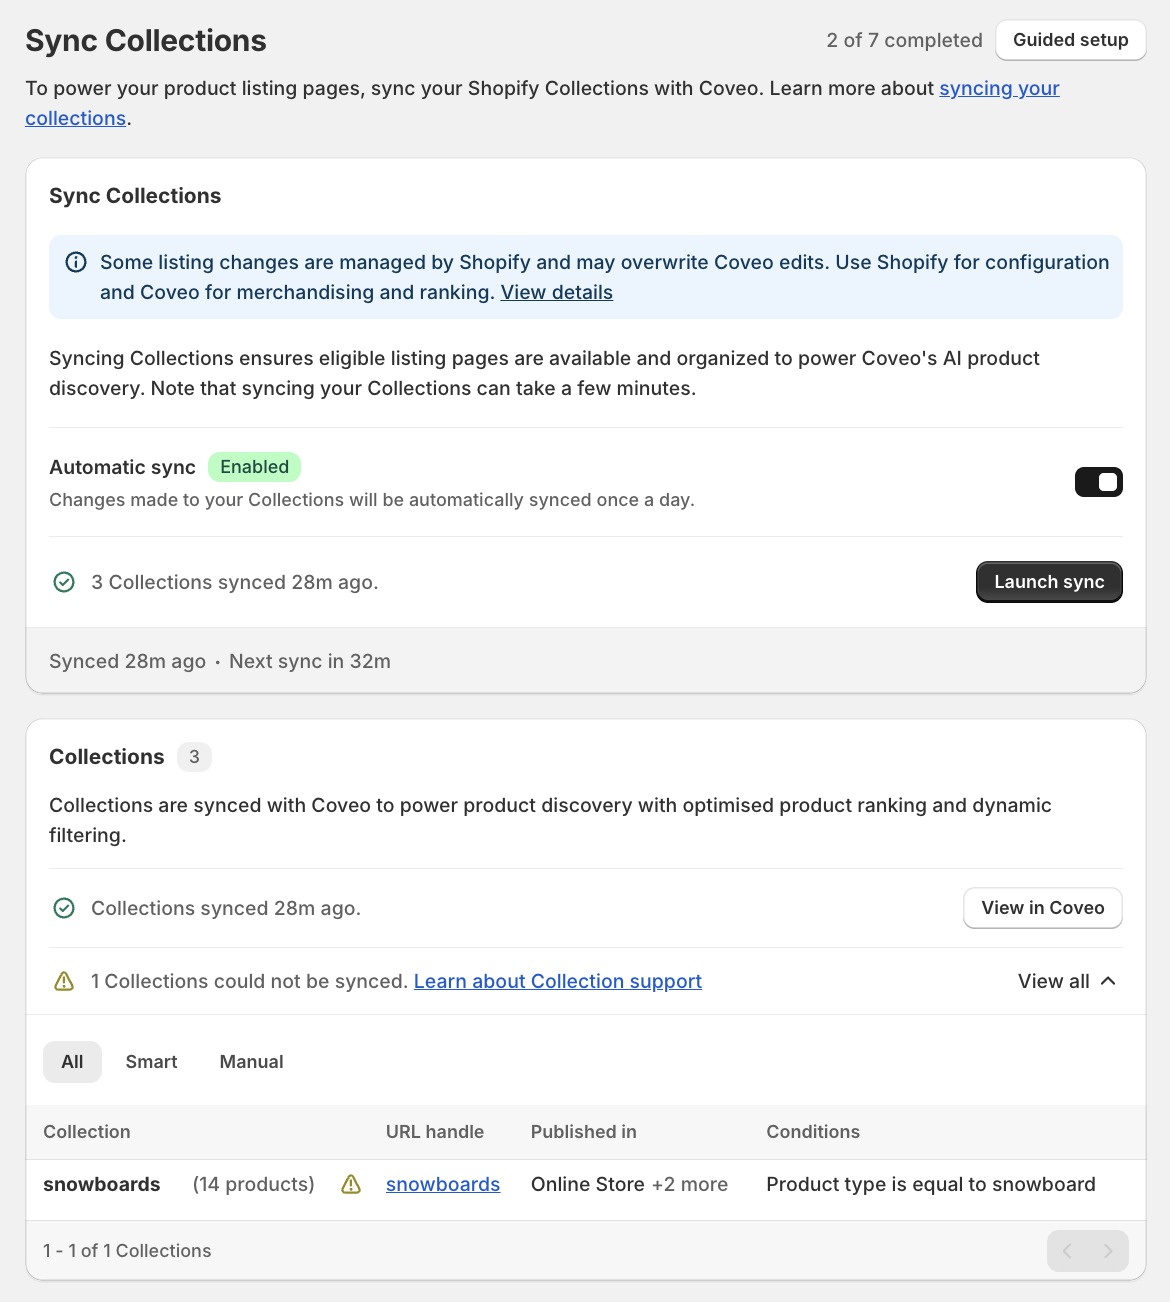
Once the product catalog is synced, you can sync your Shopify collections using the Collection page in the Coveo AI Search & Discovery app. Bringing your collections into the Coveo Merchandising Hub (CMH) allows you to add merchandising rules, ranking controls, and AI optimization to the collections, all of which will be reflected in the Shopify storefront. You also gain access to detailed reporting metrics.
The initial collection sync creates a product listing page (PLP) in the CMH for each Shopify collection. You can then add rules to the PLPs, which will be reflected in the Shopify storefront.
Subsequent syncs will update the Configuration tab of the collection PLPs with the most recent content from the Shopify collections. Any edits that have been made to the page settings in the CMH will be overwritten by the sync.
|
|
Note
To make updates to the page settings in the PLP’s Configuration tab, update the information in Shopify. It will be transferred to the CMH during the sync. |
Collection sync options
The Sync collection window gives you the following options:
-
Automatic sync: When enabled, this option initiates a collection sync every hour.
-
Manual sync: Click Launch sync to launch a manual collection sync. This can be done regardless of whether the
Automatic syncoption is active.
Collection sync status
The Collection window displays the existing Shopify collections as well as their sync status.
To view the PLPs corresponding to successfully synced collections, click View in Coveo.
Collections that aren’t syncing are identified as such, and a summary of the collection, as well as a quick diagnosis, is available by clicking View all.
Troubleshooting
Context and symptoms: A collection can’t be synced
Cause 1: The shp_collections_ids field is not available.
Collection sync relies on the shp_collections_ids field, which records which collections include each product.
If this field isn’t available in the Coveo Platform, collections can’t be synced.
Resolution 1
Ensure that the collection is published to your Shopify online store. Then sync your product catalog to make the field available in Coveo, and sync your collections again.
Information about indexing your Shopify product catalog is found in the indexing article.
Cause 2: The collection targets individual product variants.
Collections that target individual product variants aren’t supported. For example, a collection might include only the variants under a certain price or only a particular color variant. Because Coveo tracks collection membership at the product level, the app can’t accurately sync a collection that includes specific variants rather than whole products.
When a collection targets individual variants, it’s identified as unsupported on the Collection sync page and no corresponding PLP is created in the CMH.
Resolution 2
To sync the collection, rebuild it in Shopify so that it targets whole products, and then sync your collections again.
Storefront
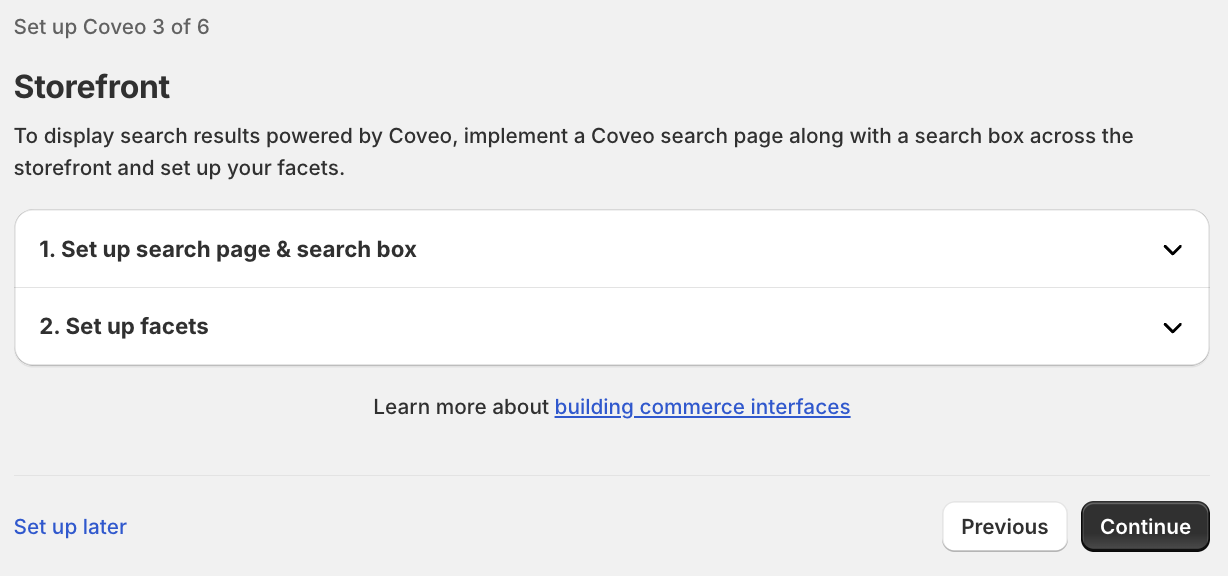
Once the Shopify collections have been synced, it’s time to set up your storefront. This step includes the following parts:
Set up search page & search box
You can’t build a search interface directly in the Coveo AI Search & Discovery app. Instead, the app directs you to documentation to help with your implementation.
|
|
Note
You won’t be able to track click and search events until you’ve implemented your search interface. |

Set up product listings pages
If you have synced collections, go to the Product Listing Page (PLP) manager in the CMH and add merchandising rules, ranking controls, and AI optimization to the collection PLPs.
These elements will be reflected in the Shopify storefront and allow you to control and optimize the visitor’s experience. You’ll also gain access to detailed reporting metrics.
|
|
Any updates made to the page settings in the PLP’s Configuration tab will be overwritten during the next collection sync. To edit this section, update the information in Shopify. It will be transferred to the PLPs during the sync. |
Set up facets
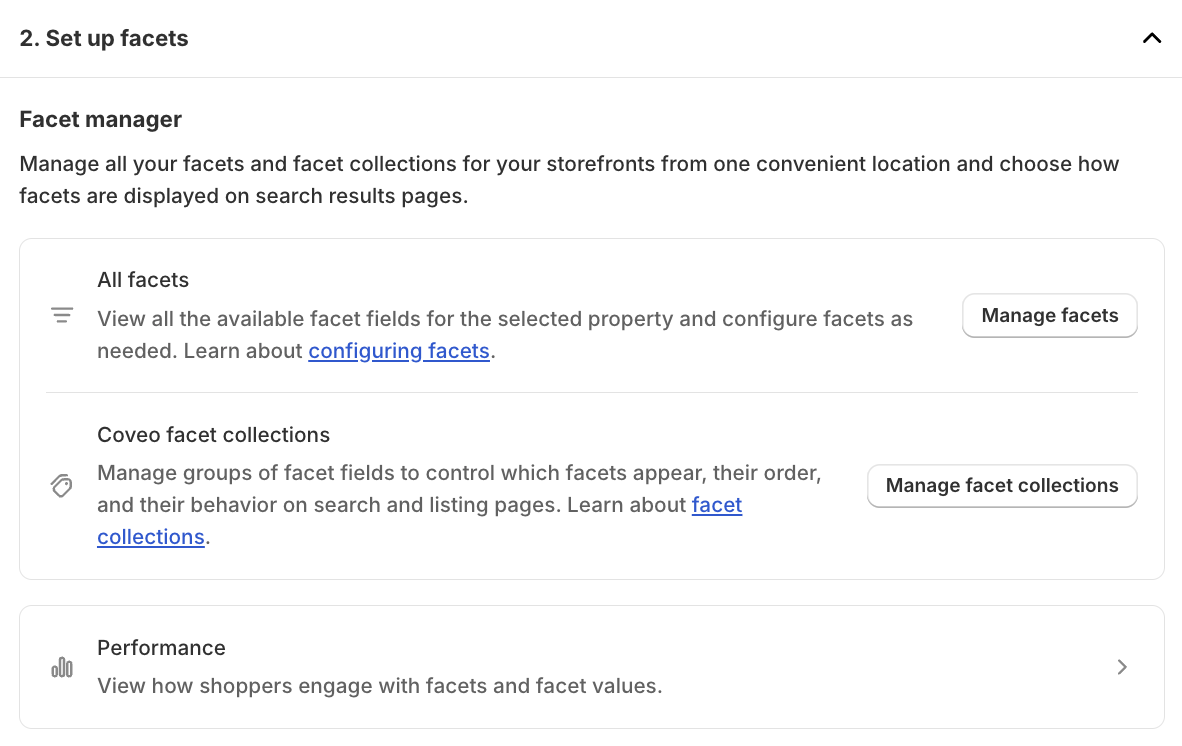
After you sync your Shopify product catalog, you must create a facet collection to display facets in product discovery.
However, you can’t manage facet settings or create facet collections directly in the Coveo AI Search & Discovery app. Instead, the app provides links to the relevant Facet manager tabs in the Coveo Merchandising Hub (CMH). It also provides links to helpful documentation resources.
Track events
Once all the items are synced, make sure that you’re tracking events for analytics reporting and to create AI models. All the Coveo AI models require certain events to be tracked, with the specific events required depending on the model.
In the app, you can view the number of events that were logged over the last 24 hours, 7 days, or 14 days.

For each event type, if any events have been logged for the selected reporting period, the View events button takes you to the Data Health (platform-ca | platform-eu | platform-au) page in the Coveo Administration Console. On the Data Health page, the date range will automatically match the period selected in the app.

|
Whenever you manually navigate to the Data Health (platform-ca | platform-eu | platform-au) page, it always defaults to displaying events from the past week, excluding the current day. |

Manage search rules
Add merchandising rules to determine how products are queried and displayed. This step isn’t mandatory, and you can move on to create AI models without setting up any rules.
The buttons on this page take you to the Coveo Merchandising Hub (CMH) Search manager tool in your Coveo organization, where you can review queries and create or modify rules.

Manage AI models
The final step is to create the AI models that will power your storefront’s search interface.

The buttons on this page take you directly to the creation tool for each type of model in the Coveo Administration Console.

Every model has its own set of events that must be tracked, and you can verify that you’ve recorded the necessary events in the collapsible Prerequisites section for each one.

Uninstall and reinstall the app
If you uninstall the Coveo AI Search & Discovery app without unlinking your Coveo organization and then reinstall the app within 48 hours (before the Shopify-related resources have been automatically deleted from your organization), your organization will still appear to be linked and your Shopify product catalog will initially appear to be synced.
However, each installation generates new API keys for authenticating with the Coveo Platform. You won’t be able to launch a manual sync or access the Events, Search, or Models pages of the app.

You’ll have to manually unlink and relink your organization to resolve the authentication error and begin using the Coveo AI Search & Discovery app again.