Create custom result actions
Create custom result actions
You can use the QuanticResultAction component to create custom actions that can be performed on search results.
These are similar to the actions that are available in a Quantic Insight Panel, but they can be used in any search interface.
Actions should be located in the actions slot in your result templates.
To have more than one result action appear in your search results, include them as children of the QuanticResultActionBar component.
<template>
  <c-quantic-result-template>
    <!-- ... -->
    <div slot="actions">
      <c-quantic-result-action-bar>
        <c-my-custom-result-action engine-id={engineId} result={result}></c-my-custom-result-action>
        <c-quantic-result-copy-to-clipboard engine-id={engineId} result={result}></c-quantic-result-copy-to-clipboard>
      </c-quantic-result-action-bar>
    </div>
    <!-- ... -->
  </c-quantic-result-template>
</template>
</c-quantic-result-action-bar>
</div>
<!-- ... -->
</c-quantic-result-template>
</template>Assuming that your component is named MyCustomResultAction, the resulting HTML element would be <c-my-custom-result-action>. |
|
The quanticResultCopyToClipboard component is a premade example of how you can create your own custom result action. |
Implement a custom result action
-
Open your project folder in the IDE of your choice. Create a new Lightning Web Component in
force-app/main/default/lwc.In the examples below, the component is named
MyCustomResultActionand the associated HTML element is<c-my-custom-result-action>. -
In the HTML file of your Lightning component, use the
QuanticResultActioncomponent. Its properties let you define how your custom action will look and behave.<template> <c-quantic-result-action result={result} event-name="my_custom_event" icon-name="utility:chat" label="My custom action" selected=false selected-label="My action is selected" loading={_loading}> </c-quantic-result-action> </template>In this example, the event
my_custom_eventwill be triggered whenever the user interacts with your custom result action button. Note
NoteThe
icon-nameattribute can be set to display any Salesforce Lightning Design System icon. -
In the JavaScript file of your Lightning component, create the logic for your custom event. The following code is a non-functional example. For a working implementation, see the
quanticResultCopyToClipboardcomponent JavaScript file.import { LightningElement, api } from 'lwc'; export default class MyCustomResultAction extends LightningElement { @api engineId = 'custom-result-action-engine'; /** * The result on which your custom result action is to be performed. * @api * @type {Result} */ @api result; _loading = false; connectedCallback() { this.addEventListener('my_custom_event',this.handleMyCustomEvent); } disconnectedCallback() { this.removeEventListener('my_custom_event',this.handleMyCustomEvent); } /** * Performs my custom action. * @param {CustomEvent} event */ handleMyCustomEvent = (event) => { event.stopPropagation();
this._loading = true;
// Execute the logic that performs your custom action.
this._loading = false;  };
}
};
}Stops the propagation of the event. Sets the loading state. Resets the loading state after the execution of the action. -
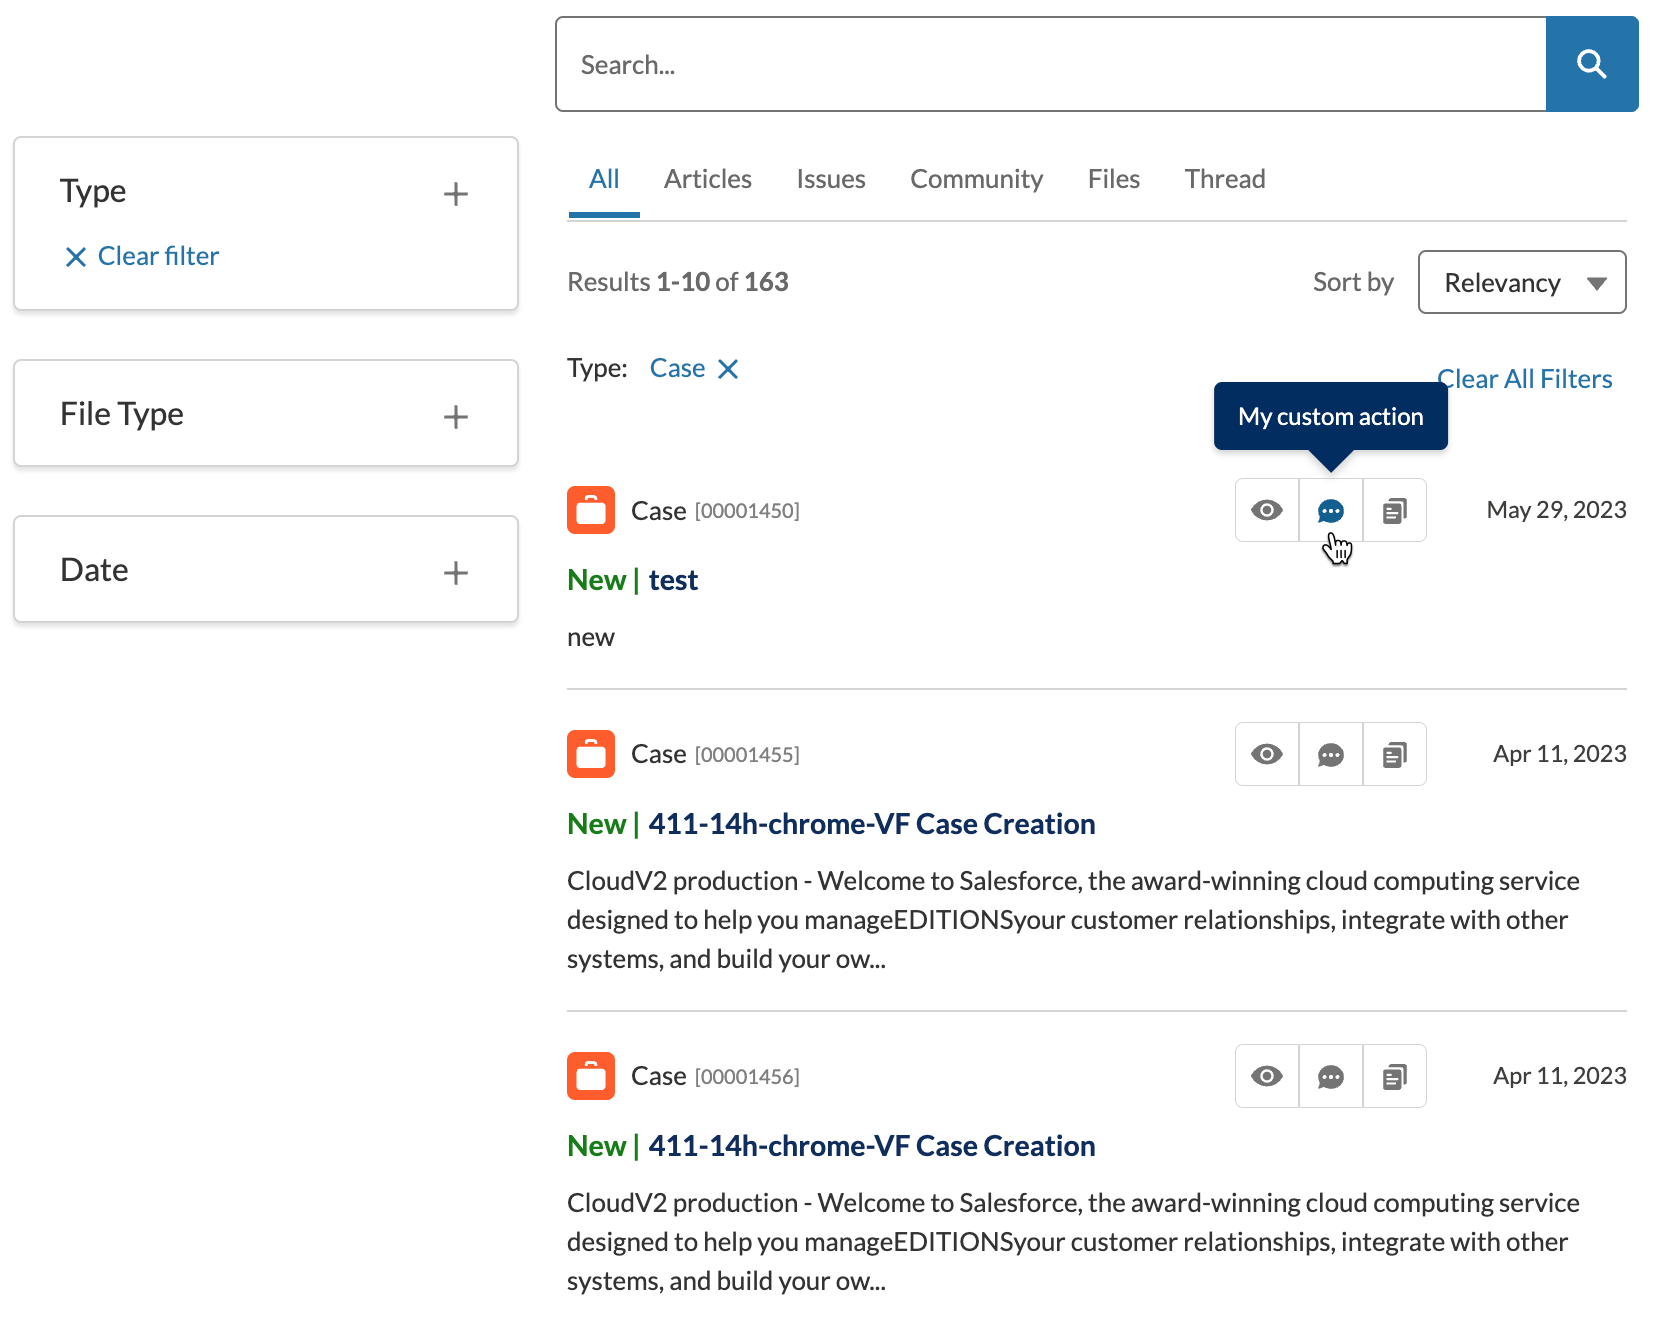
Add your new custom result action to your result templates. The following code is a modified version of the case template included in the Quantic
exampleSearchcomponent.<template> <c-quantic-result-template is-any-preview-open={isAnyPreviewOpen} result-preview-should-not-be-accessible={resultPreviewShouldNotBeAccessible}> <div slot="label" class="slds-grid slds-grid_vertical-align-center"> <div class="slds-m-right_xx-small"> <c-quantic-result-label result={result}></c-quantic-result-label> </div> <div style="font-size: 10px; color: grey">[{result.raw.sfcasenumber}]</div> </div> <div slot="badges" class="slds-grid slds-grid_vertical-align-center"> <div class="slds-m-right_xx-small"> <c-quantic-result-tag variant="recommended" result={result}></c-quantic-result-tag> </div> <c-quantic-result-tag variant="featured" result={result}></c-quantic-result-tag> </div> <div slot="actions"> <c-quantic-result-action-bar> <template if:true={resultHasPreview}> <c-quantic-result-quickview engine-id={engineId} result={result} preview-button-variant="result-action"></c-quantic-result-quickview> </template> <c-my-custom-result-action engine-id={engineId} result={result}></c-my-custom-result-action> <c-quantic-result-copy-to-clipboard engine-id={engineId} result={result}></c-quantic-result-copy-to-clipboard> </c-quantic-result-action-bar> </div> <p slot="date" class="slds-size_xx-small"> <lightning-formatted-date-time value={result.raw.date}></lightning-formatted-date-time> </p> <div slot="title" class="slds-truncate"> <span style="color: #157E19">{result.raw.sfstatus} |</span> <span class="slds-m-left_xx-small"> <c-quantic-result-link result={result} engine-id={engineId}></c-quantic-result-link> </span> </div> <div slot="excerpt"> {result.Excerpt} </div> </c-quantic-result-template> </template>This yields the following result: