Integrate a Coveo Case Deflection component
Integrate a Coveo Case Deflection component
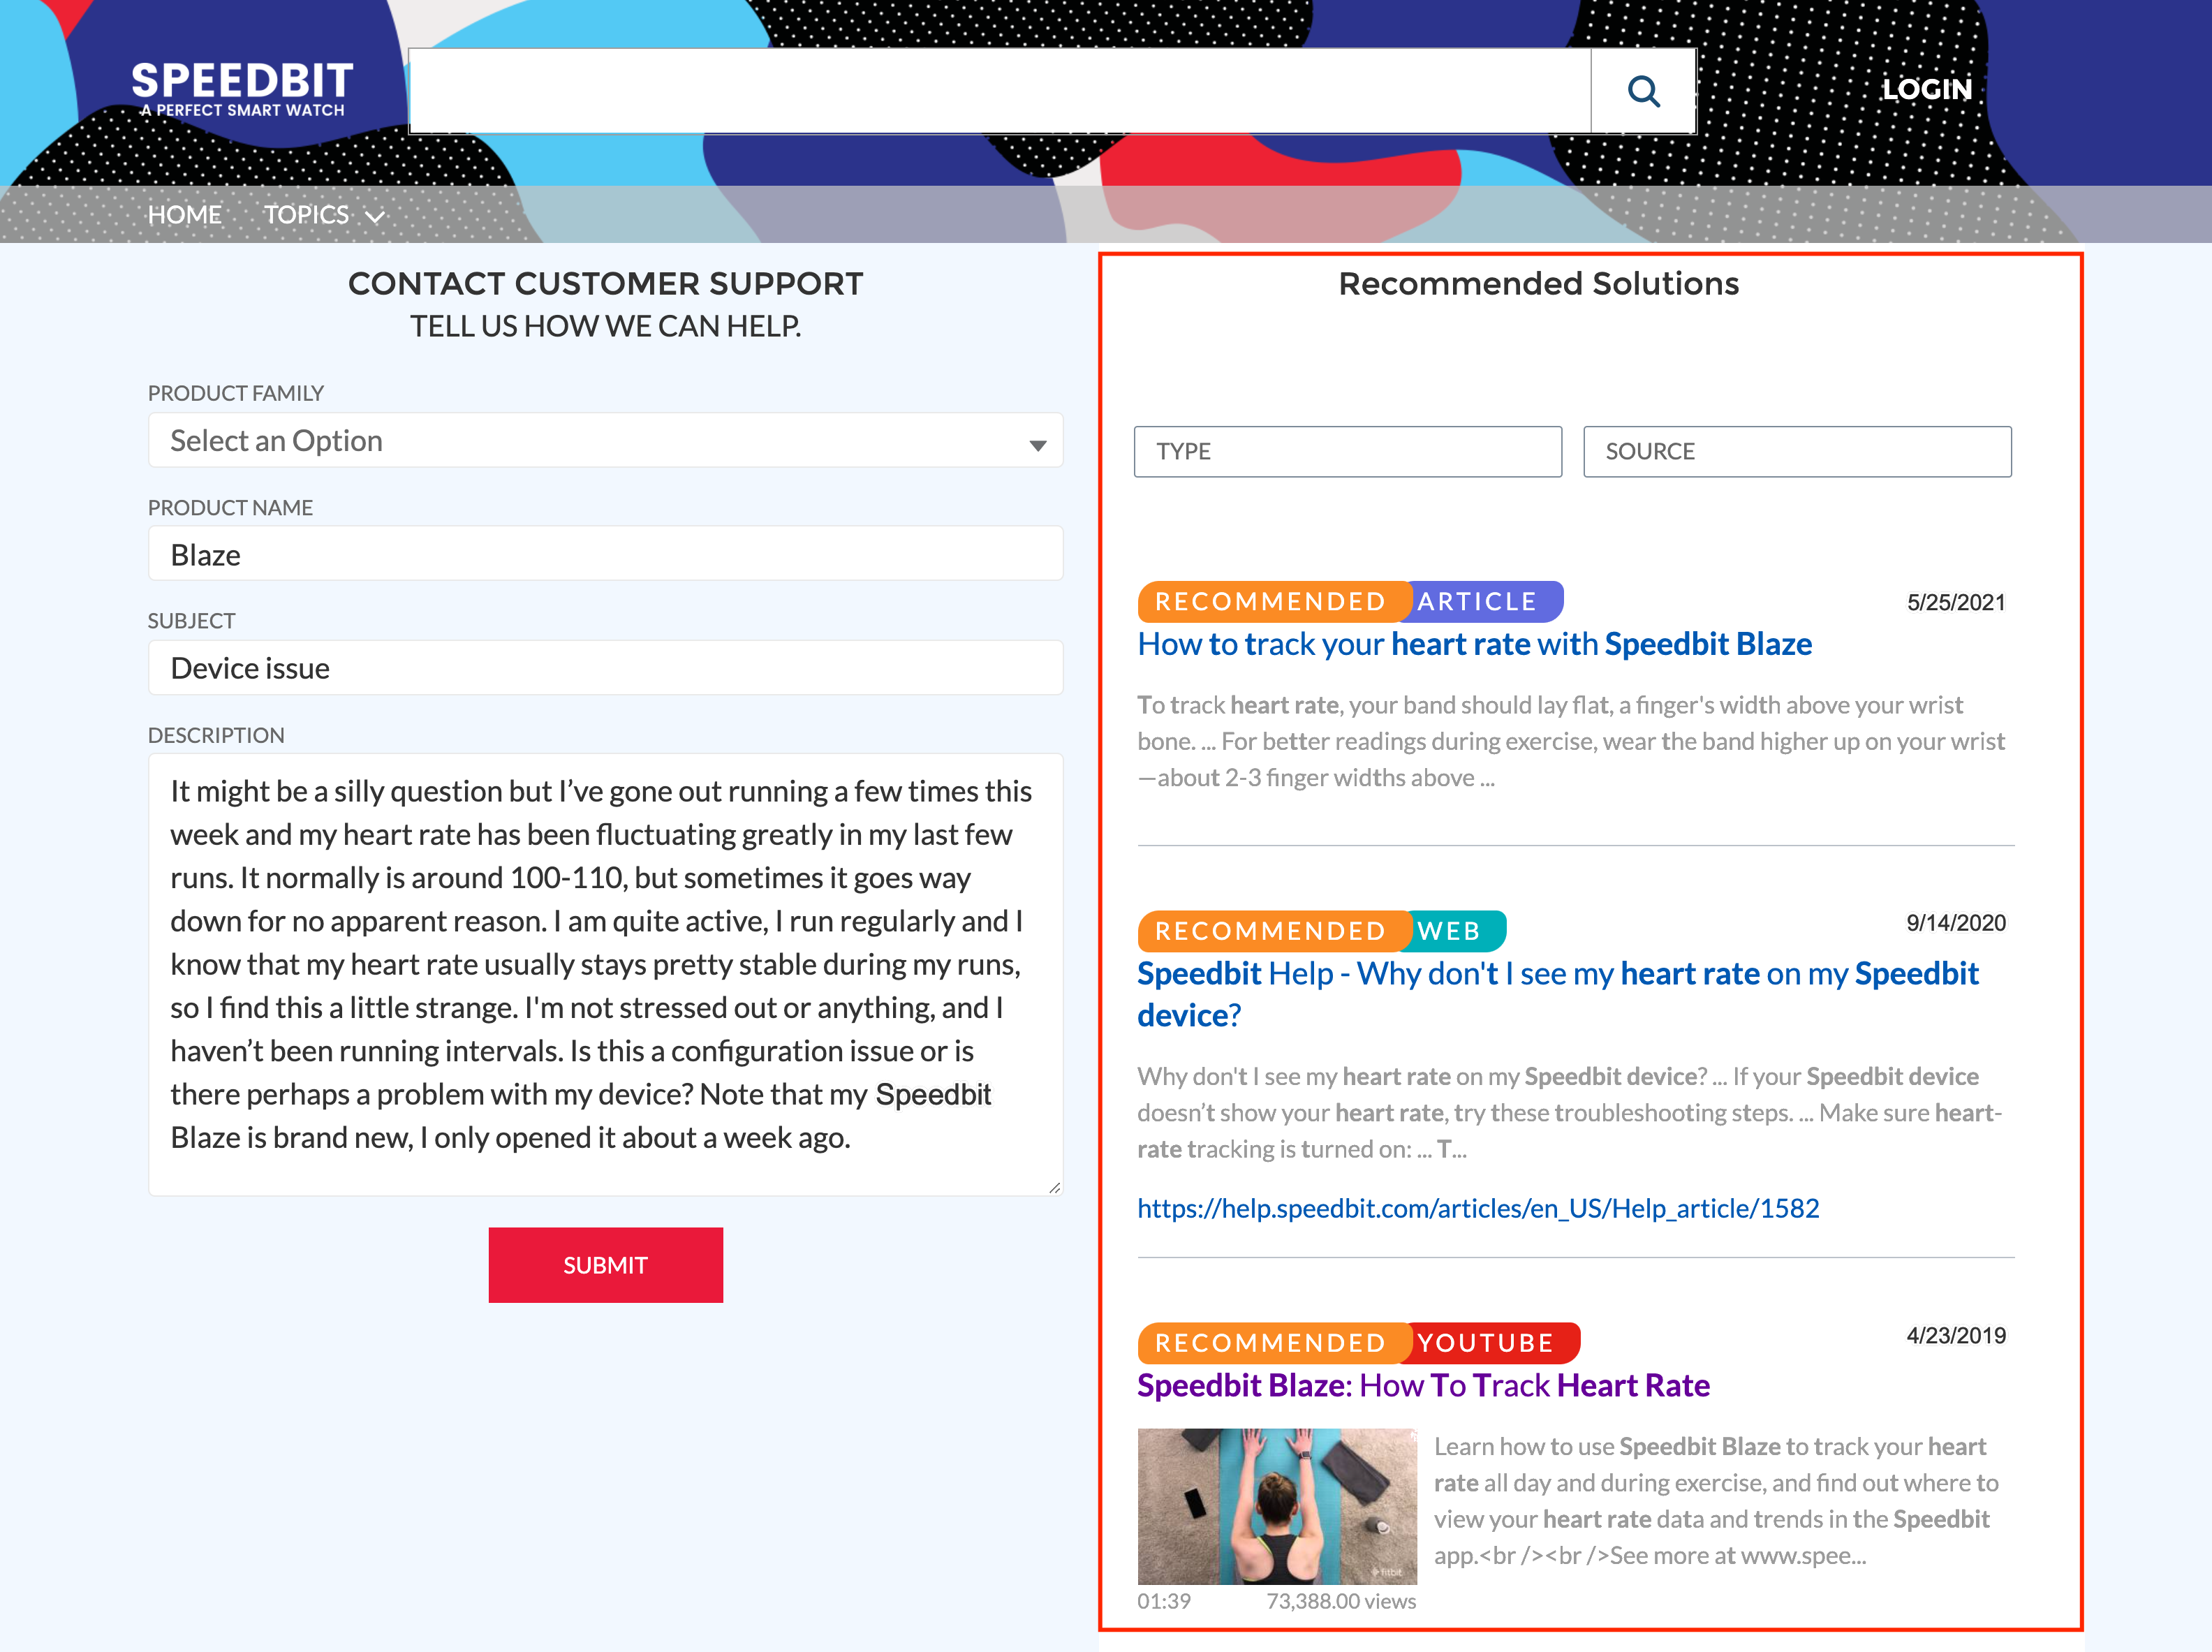
The Coveo Case Deflection component increases self-service in a Salesforce Community. As the user enters information into the Salesforce Create Case Form, the Coveo Case Deflection component automatically displays recommended solutions related to their issue.

|
|
Important
Since the |
Prerequisites
-
Log in to Salesforce using an administrator account.
-
Ensure that your Salesforce organization is linked to your Coveo organization (see Configure the Coveo for Salesforce application).
-
Ensure you’ve created a Coveo Machine Learning (Coveo ML) Automatic Relevance Tuning (ART) model and selected the Comply with Intelligent Term Detection (ITD) option. For instructions on how to create a Coveo ML ART model that’s optimized for case deflection, see Configure an Automatic Relevance Tuning model for Case Deflection or Case Assist Document Suggestions.
-
Ensure that you’ve created an Experience Cloud Site.
ImportantThe only supported template is Customer Service.
Step 1: Add the Coveo Case Deflection component in Salesforce
-
Access the page where you want to insert your Coveo Case Deflection component, typically the Contact Support page.
TipIf you choose the Contact Support page, you must delete the existing Salesforce Case Deflection component before adding the Coveo component.
-
In the left sidebar, select the Components tab.
-
On the Components tab, under Custom Components, drag the Coveo Case Deflection component to the right of the Contact Support Form, in the Sidebar section.
-
At the upper-right corner of the page, click Preview.
-
In the Coveo Case Deflection component, click Set Up a Search Page.
-
Choose the tabs you want to have in your panel, and then select Create Page. You can always change the tabs later.
Step 2: Configure your Case Deflection component in Coveo
To configure the Case Deflection component, you must set a query pipeline to link your component to your Coveo organization.
-
In your Coveo organization, select or create a query pipeline that will be used by your Case Deflection component.
TipTake note of the query pipeline name for a future step.
-
On the Query Pipelines (platform-ca | platform-eu | platform-au) page, click the query pipeline used by your Case Deflection component, and then click Edit components in the Action bar.
-
On the subpage that opens, select the Advanced tab, and then click Query parameters on the left side of the page.
-
On the Query Parameters tab, add rules overriding the basic query expression (
q) and large query expression (lq) parameter values:-
Click
, and then select Add query parameters rule with code.
-
On the Add a Rule With Code subpage, in the form editor box, enter the following rules:
override query q:"<@+ $context.subject +@>"override query lq:"<@+ $context.description +@>"ImportantIf you enabled query syntax, you must remove the
<@+and+@>markers from the query parameter rules overriding the basic query expression (q) as follows:override query q:"$context.subject" -
Click Add with Code.
-
Back on the Query Parameters tab, select the rules you created, and then click Edit in the Action bar.
-
On the Edit a Query Parameter Rule subpage that opens, under Condition, select or create a condition that applies when an empty query is performed.
-
Click Save.
Your Query Parameters rules should look like this:

-
-
Enable the partial match feature to allow the index to return items that don’t necessarily match all the keywords entered by the end user in the Subject box.
Step 3: Route queries to the desired query pipeline
Now that the query pipeline is configured to handle case deflection queries, ensure that every query originating from the Case Deflection component is routed to that query pipeline.
The most recommended and flexible query pipeline routing mechanism is condition-based routing.
In this scenario, search requests are authenticated with a search token that contains a searchHub parameter, and each query pipeline except the default one should have a distinct query pipeline condition based on a specific search hub value such as Search Hub is Case Deflection.
When using this routing mechanism, you ensure that search requests are routed according to the search interface from which they originate.
What’s next?
For instructions on how to configure a custom search token that’s generated server side for your Case Deflection component, see Configure the search token for a Case Deflection component.