Replace the Service Portal search page
Replace the Service Portal search page
A Coveo-powered search page not only matches keywords with items, it also leverages machine learning and usage analytics to ensure that the content returned to each user is the most relevant for them, based on their profile and inferred intentions. A Coveo-powered search page also makes it possible for users to search many content sources at once, which typical search engines don’t allow. Therefore, to take full advantage of Coveo for ServiceNow and leverage Coveo’s unique features to improve your users' search experience in your Service Portal, you should replace your Service Portal search page with a customizable Coveo-powered search page.
Replace your current Service Portal search page with a Coveo-powered search page
-
In the Now Platform UI of your ServiceNow instance:
-
Navigate to Service Portal > Pages.
-
Find and open your Service Portal search page record (typically, the record ID is
search).NoteIf you’re using Page Route Maps (Service Portal > Page Route Maps) to redirect references to the
searchpage to another search page, you must open the search page to which the redirect is routed. For example, if you redirectsearchtosp_search, you must open thesp_searchpage.Leading practiceYou should create a backup copy of the record by clicking Clone Page in the upper-right corner of the record form. When this is done, navigate back to the original record before proceeding on to the next step.
-
In the Related Links section, click Open in Designer.
-
-
In the Service Portal Designer:
-
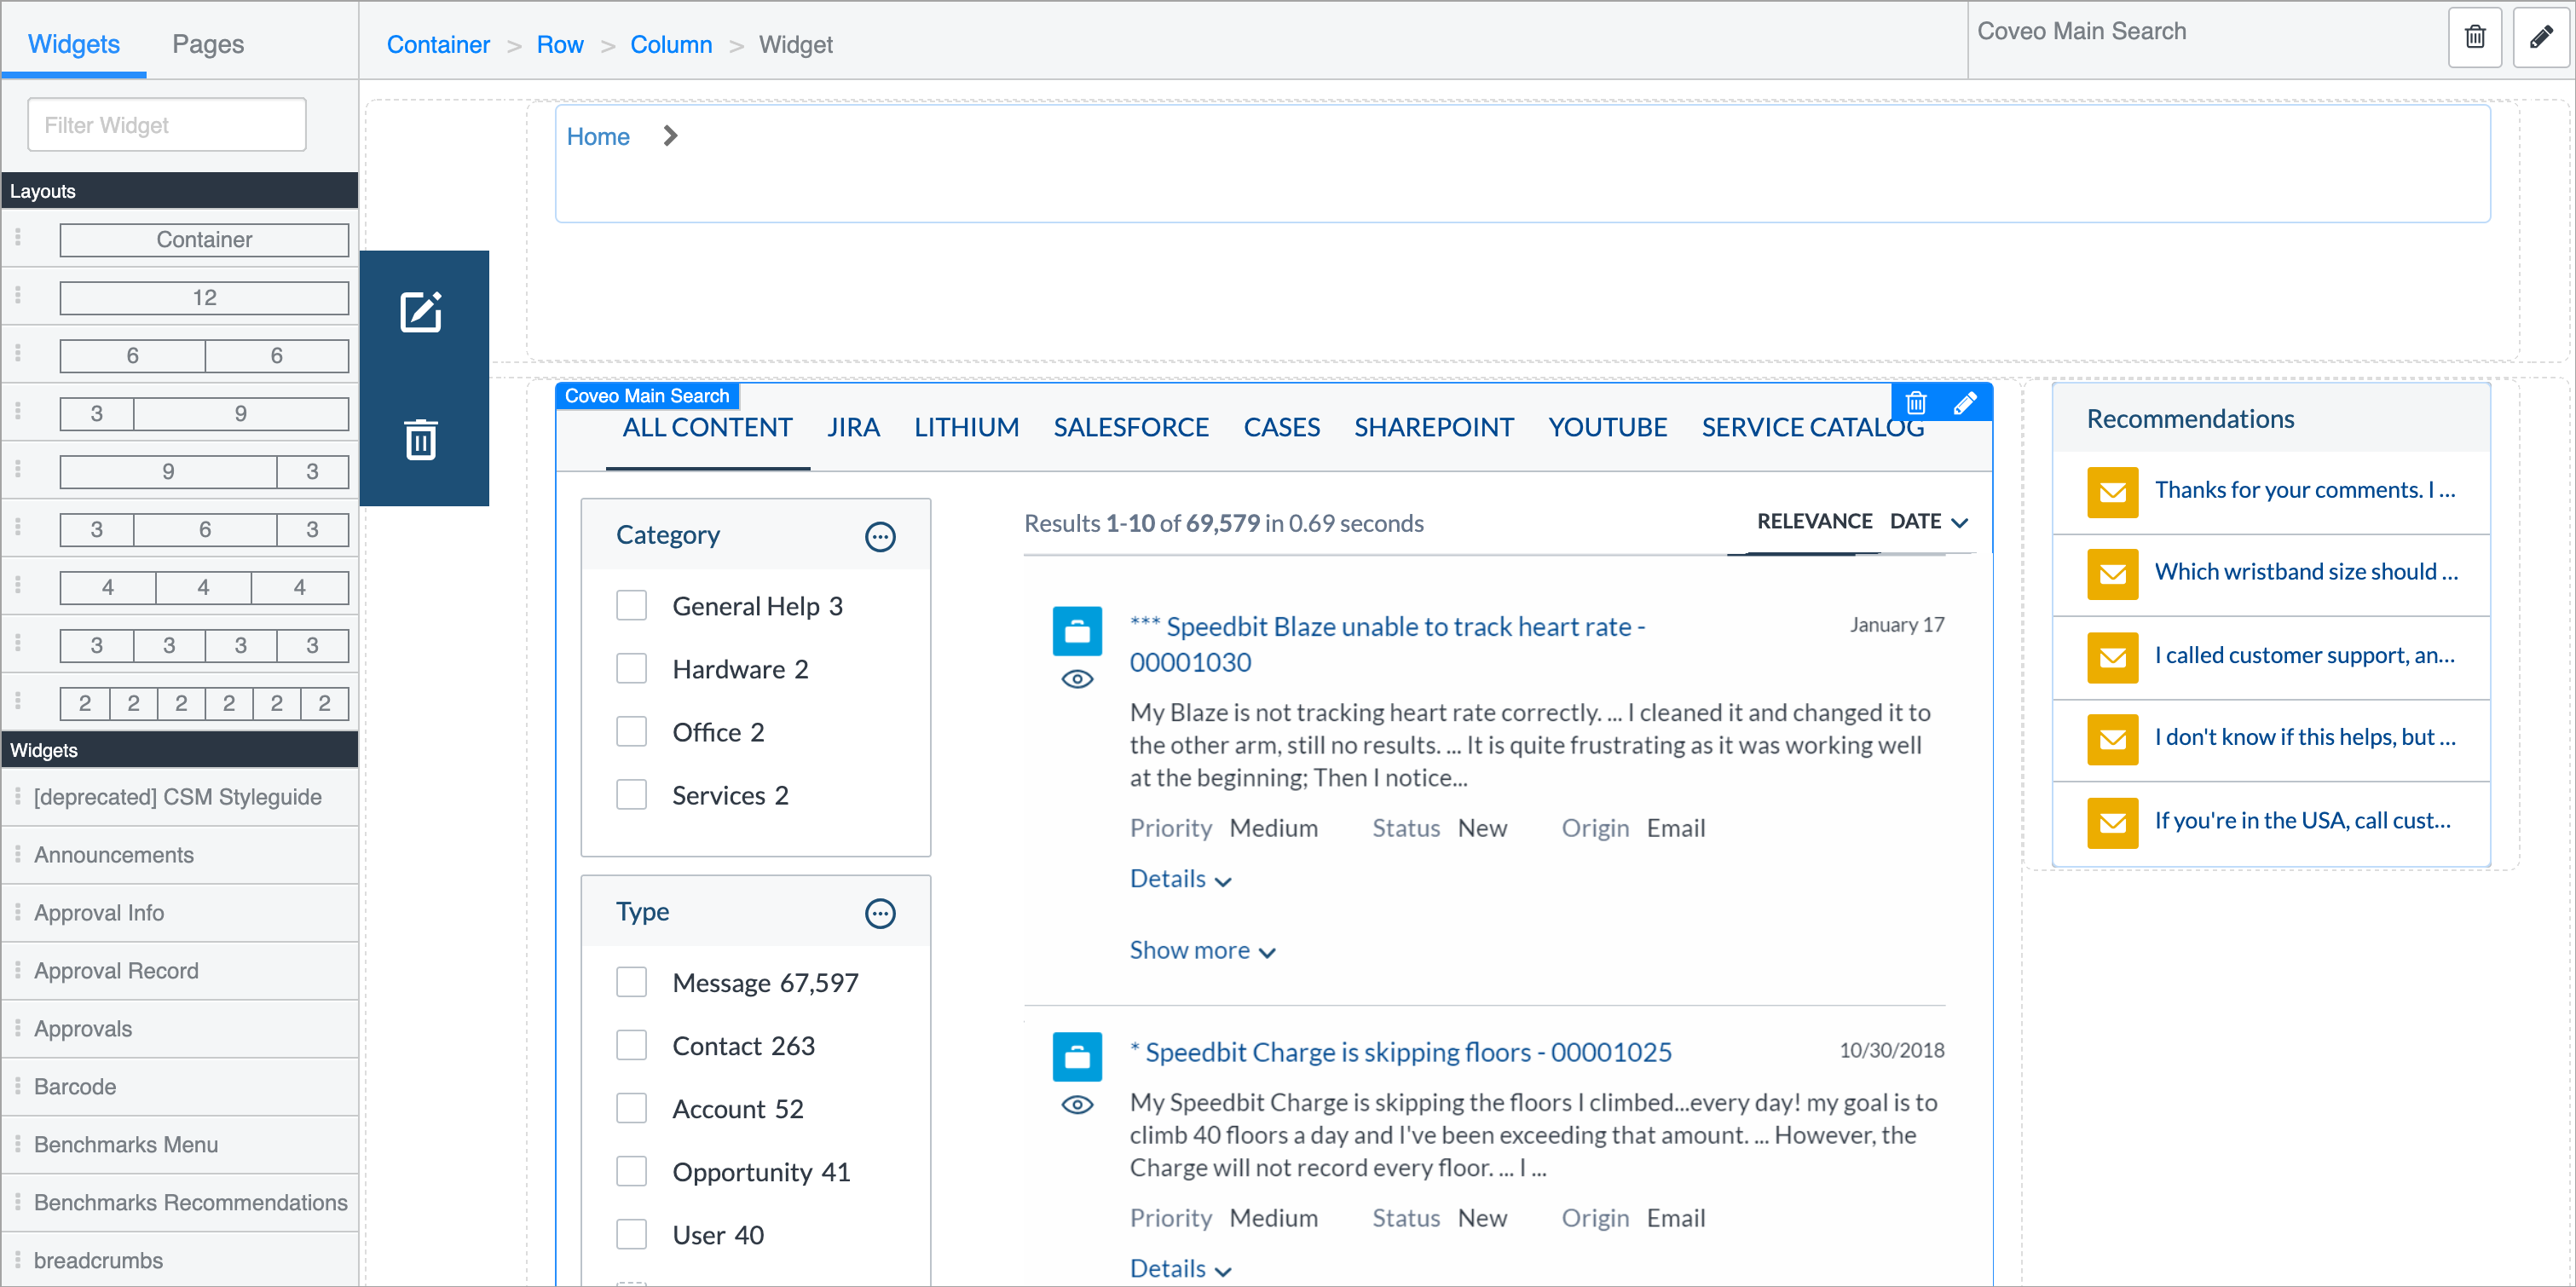
Delete all widgets and containers on the page, or reorganize them to make room for the large Coveo Main Search widget.
-
Add a one-column container, or a two-column container if you want to display personalized recommendations next to the search results list.
ExampleThe Main Search and the Recommendations widget in a two-column container:

-
Drag the Coveo Main Search widget inside the container (see Main Search).
NoteFor navigation purposes, you may also want to add a one-column container with a
breadcrumbswidget right above the container with the Coveo Main Search widget. -
Optionally, customize the Main Search widget. Thanks to the Scope and Component options, you can name your widget according to your convention.
-
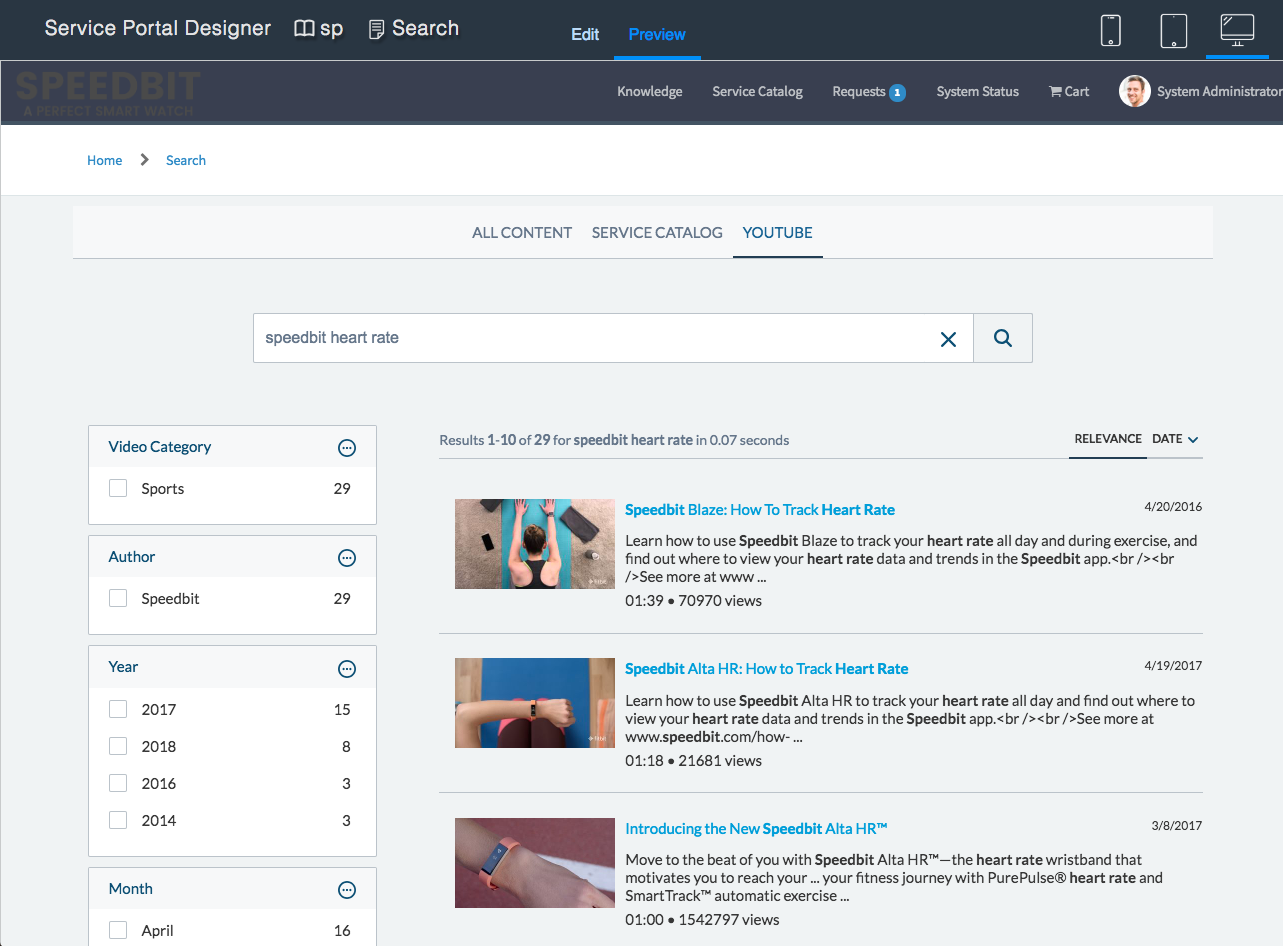
Click Preview to see how your Coveo-powered search page looks on different display sizes.

-
Customize your Coveo-powered search page
Once you’ve added the Coveo Main Search widget to your portal search page, you may want to customize the page that the widget displays. This step is however optional.
When customizing the search page for the first time:
-
In a new tab, access the Coveo Administration Console Search Pages (platform-ca | platform-eu | platform-au) page.
-
Create and customize a legacy search page. Note your new search page name, as you’ll need to enter it in the ServiceNow interface later.
-
Back in the Service Portal Designer, click
 in the upper-right corner of the Coveo Main Search widget.
 -
In the dialog that appears, under Hosted Search Page, enter the name you gave your custom search page when you created it in the Coveo Administration Console.
-
Click Save.
|
|
Note
To edit your Coveo-powered search page, on the Search Pages (platform-ca | platform-eu | platform-au) page, click the desired page, and then click Edit interface in the Action bar. |
Configure your query pipeline
Once you have implemented the widget in your ServiceNow instance, you must link it to a query pipeline in your Coveo organization.
-
On the Query Pipelines (platform-ca | platform-eu | platform-au) page of the Coveo Administration Console, do one of the following:
-
Click an existing pipeline, and then click Edit components in the Action bar.
-
Create a new pipeline for your Coveo for ServiceNow widget to use.
-
-
In the query pipeline panel, create a condition enforcing a specific search hub (
Search hub is) for the pipeline. The filter value to enter depends on your widget configuration:-
If you didn’t provide Scope and Component values in the widget options, enter
ServiceNow. -
If you provided a scope and a component, enter them in the following format:
Scope_Component.ExampleFor a widget with a
Portalscope and aMyWidgetcomponent, your condition value should bePortal_MyWidget. Your complete pipeline condition is thereforeSearch Hub is Portal_MyWidget.With such a condition, your pipeline will be used for all queries originating from the widget.
NoteIf your pipeline already has a condition, ensure to include this previous condition in your new one with an
ORoperator.For example, your pipeline has the following condition:
Search Hub is Portal_MyWidget. You want to link a new portal widget to this pipeline, so your new condition isSearch Hub is Portal_MyWidget OR Search Hub is Portal_MySecondWidget. With this condition, your pipeline will be used for all queries originating from one of these widgets.
-
What’s next?
Replace the current search boxes in your Service Portal pages with standalone Coveo search boxes in order to properly forward queries to your Coveo-powered search page, and to eventually provide Coveo Machine Learning (Coveo ML) query suggestions to your customers.