Customize the Insight Panel
Customize the Insight Panel
- Customize the Insight Panel search page
- Enable the User Actions feature for your Insight Panel search page
- Enable the Result Actions feature for your Insight Panel search page
- About domain separation
- Display attached results in the Attached Knowledge table
- Create a field blocklist
- Create a ServiceNow business rule for work notes
- What’s next?
|
|
If you’re using Coveo for ServiceNow v25.1.5+, we recommend using the Coveo Hosted Insight Panel to benefit from the latest features and improvements. For more information, see Integrate a Hosted Insight Panel. |
Once you’ve implemented the Coveo Insight Panel, you may want to perform one or more of the following additional configurations to enhance your workflow.
Customize the Insight Panel search page
By default, your Insight Panel uses a preconfigured search page. However, you can create a custom search page for each table in which you implemented the Insight Panel.
The procedure to use depends on if you’ve implemented the Insight Panel in a ServiceNow CSM Workspace or a form in the standard ServiceNow interface.
Insight Panel in a ServiceNow CSM Workspace
-
Access the Search Pages (platform-ca | platform-eu | platform-au) page in the Coveo Administration Console.
-
Use the Interface Editor to customize your new search interface.
-
If desired, in the Interface Editor, enable the User Actions feature for your search page.
-
Assign the newly created search page to the Insight Panel implementation by entering the search page name in the Hosted Search Page ID field (CSM Configurable Workspace), or the searchPageId field (CSM Agent Workspace).
Insight Panel in a form in the standard ServiceNow interface
-
Access the Search Pages (platform-ca | platform-eu | platform-au) page in the Coveo Administration Console.
-
Create a legacy search page, and name it
ClassicInsightPanel_<tablename>. Using this naming convention automatically assigns the search page to the Insight Panel in the specified table.Example-
For an Insight Panel in the
sn_customerservice_casetable, the search page name must beClassicInsightPanel_sn_customerservice_case.
-
-
Use the Interface Editor to customize your new search interface. Your changes apply immediately.
-
If desired, in the Interface Editor, enable the User Actions feature for your search page.
Enable the User Actions feature for your Insight Panel search page
The Insight Panel User Actions feature lets agents see the items customers clicked and the terms they queried before they created the incident or case.
To use the User Actions feature in a custom search page, you must enable the feature as follows:
|
|
Note
The User Actions feature is enabled by default in the preconfigured default search page for the Insight Panel. |
-
In the Coveo Administration Console, on the Search Pages (platform-ca | platform-eu | platform-au) page, click the desired page, and then click Edit interface in the Action bar.
-
Select the Code View tab.
-
Add the following component to the search page HTML template:
<div class="user-actions-column"> <div class="CoveoUserActions"></div> </div> -
Click Save. Your changes apply immediately.
Enable the Result Actions feature for your Insight Panel search page
The Result Actions feature lets agents quickly attach or copy search results directly from the Insight Panel.
To use the Result Actions feature in a custom search page, you must enable the feature as follows:
|
|
Note
The Result Actions feature is enabled by default in the preconfigured default search page for the Insight Panel. |
-
In the Coveo Administration Console, on the Search Pages (platform-ca | platform-eu | platform-au) page, click the desired page, and then click Edit interface in the Action bar.
-
Select the Code View tab.
-
Add the following component to the search page HTML result template:
<div class="CoveoResultActionsMenu" style="margin-top: 0; right: 10px;"> <div class="CoveoAttachResult"></div> <div class="CoveoQuickview"></div> <div class="CoveoCopyToClipboard"></div> </div> -
Click Save. Your changes apply immediately.
About domain separation
If you’re customizing a form, you’re likely working across different domains. Coveo therefore recommends reviewing the FAQ section on domain separation.
Display attached results in the Attached Knowledge table
By default, the results attached by Coveo for ServiceNow don’t show up in the Attached Knowledge table and are viewable only within the Insight Panel. To include attached knowledge base articles in the Attached Knowledge table, which allows the articles to be linked to cases and incidents, do the following:
-
In the Now Platform UI of your ServiceNow instance, navigate to Coveo > Properties.
-
Enable the knowledge article option.

-
Ensure that the
snsysidproperty is present on the search results returned. If it’s not, addsnsysidin thedata-fields-to-includeparameter for theCoveoResultListtemplate for your search page as follows:-
In the Coveo Administration Console, on the Search Pages (platform-ca | platform-eu | platform-au) page, click the desired page, and then click Edit interface in the Action bar.
-
Select the Code View tab.
-
Add
data-fields-to-include="@snsysid"to theCoveoResultListtemplate.div class="CoveoResultList" data-layout="list" data-wait-animation="fade" data-auto-select-fields-to-include="true" data-fields-to-include="@snsysid"
-
-
Click Save.
-
Reload the desired page to view the attached knowledge articles.
Create a field blocklist
By default, editing the content of any record form field triggers a query to Coveo, which in turn updates the Insight Panel. Moreover, the content of all form fields is sent as context information for Coveo Machine Learning (Coveo ML) purposes.
To avoid triggering a query when certain fields are edited frequently, contain irrelevant data, or if fields contain sensitive data that you don’t want to send to Coveo, you can specify the fields to ignore.
The procedure to use depends on if you’ve implemented the Insight Panel in a ServiceNow CSM Workspace or a form in the standard ServiceNow interface.
Insight Panel in the ServiceNow CSM Workspace
Perform the following steps if you didn’t specify fields to ignore when you implemented the Insight Panel, or to modify the list of fields to ignore.
CSM Configurable Workspace
-
In the Now Platform UI of your ServiceNow instance, navigate to Now Experience Framework > UI Builder.
-
In the My experiences page of the UI Builder, click the workspace experience that contains the Insight Panel.
-
Ensure that the record page that contains the Insight Panel is selected in the page management panel.
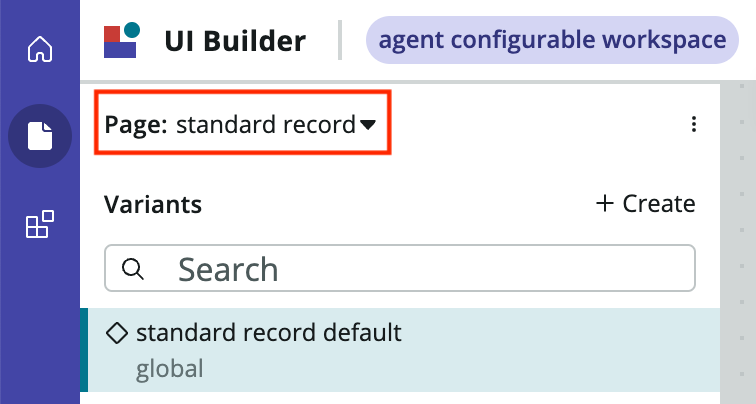
-
In the content tree of the page management panel, select the Coveo Agent Panel component.
-
On the Config tab of the component configuration panel, specify the fields to ignore in the fieldsToIgnore field as comma-separated values.
CSM Agent Workspace
-
In the Now Platform UI of your ServiceNow instance, navigate to Workspace Experience > Actions & Components > Contextual Side Panel.
-
On the Action Assignments page, open the action form that’s associated with the Insight Panel.
-
Under Related Links, click Advanced View.
-
Specify the fields to ignore in the fieldsToIgnore field as comma-separated values.
Insight Panel in a form in the standard ServiceNow interface
Create an extension using the getFieldsToIgnore function to specify the fields that shouldn’t trigger queries and be sent to Coveo.
Create a ServiceNow business rule for work notes
You can create a ServiceNow business rule to automatically add a custom work note when a user attaches or detaches a Coveo search result in the Insight Panel.
What’s next?
Add the Page View Tracker widget to your portal pages as it’s necessary to implement the Recommendations widget.