Configure the Insight Panel
Configure the Insight Panel
|
|
Important
If you’re using Coveo for ServiceNow v25.1.5+, we recommend using the Coveo Hosted Insight Panel to benefit from the latest features and improvements. For more information, see Integrate a Hosted Insight Panel. |
The Coveo Insight Panel is a search interface that you can add to a ServiceNow record, such as a support case or an incident report. The Insight Panel automatically leverages the information in the ServiceNow record, including the keywords the agent types, to proactively display the most contextually relevant content. This lets users search various sources of content directly on the page in which they’re working.
Typically, you add the Insight Panel to a Customer Service Management (CSM) Workspace in ServiceNow. However, you can also add the Insight Panel to a ServiceNow form so that the Insight Panel appears in the standard ServiceNow interface outside of a CSM workspace.
In addition to displaying the most contextually relevant content, the Insight Panel also includes additional features, such as Filters, User Actions, and Result Actions.
Implement the Insight Panel
You can add the Insight Panel search interface to a CSM workspace and add it to a ServiceNow form outside of a CSM workspace.
Add the Insight Panel to a CSM Workspace
You can implement the Insight Panel so that it appears in a specific record view, such as an incident or a case view, in a CSM Workspace interface in ServiceNow.

The Insight Panel supports both ServiceNow CSM workspace interfaces: CSM Configurable Workspace and CSM Agent Workspace. The Insight Panel features and functionality are the same in both workspaces. The only difference is how the Insight Panel is implemented.
Depending on the CSM workspaces in your ServiceNow instance, add the Insight Panel to one or more CSM Configurable Workspaces or CSM Agent Workspaces as required.
Configurable Workspace
Coveo for ServiceNow includes a Coveo Agent Panel component that you can use to add the Insight Panel to your CSM Configurable Workspaces.
The Insight Panel is optimized for use in a CSM Configurable Workspace record page.
Though you can add the Insight Panel to any type of page, Coveo recommends that you add it to a record-type page to leverage the record’s Fields data to proactively display the most contextually relevant content.
To add the Insight Panel to a CSM Configurable Workspace
|
|
Note
Given that CSM Configurable Workspace experiences are highly customizable, these instructions provide only general guidelines to accommodate various customizations. See the example for detailed instructions on how add the Insight Panel to the contextual side panel of a standard record page, which is the typical implementation. |
-
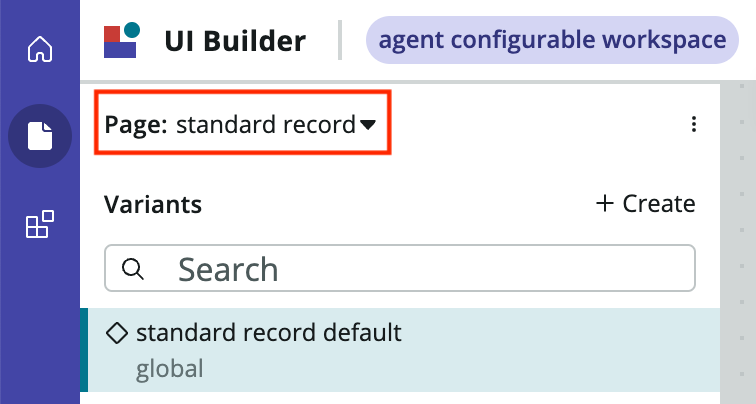
In the Now Platform UI of your ServiceNow instance, navigate to Now Experience Framework > UI Builder.
-
On the My experiences page of the UI Builder, click the workspace experience to which you want to add the Insight Panel.
-
Ensure that the record page you want to work in is selected in the page management panel.
-
Add the Coveo Agent Panel component to the desired container or component in your workspace experience.
 Note
NoteA component can be configured to appear based on certain conditions. For the Insight Panel to appear for a given record type, such as a case or incident, ensure that the visibility configuration of the component is configured accordingly. Depending on your configuration, the component can be the component in which the Insight Panel is added or the Coveo Agent Panel component itself. If you’re implementing the Insight Panel as a tab in a tab component, such as a contextual side panel, you can also set the visibility of the tab based on conditions.
-
In the content tree of the page management panel, ensure that the newly created Coveo Agent Panel component is selected.
-
In the Config tab of the component configuration panel, specify the following settings for the Insight Panel:
-
By default, the Scope and Component fields are set to
WorkspaceandAgentPanelrespectively. You can use the default values or enter the desired values to identify the Insight Panel. Take note of the values as you’ll need them when configuring the query pipeline for the Insight Panel. -
In the Hosted Search Page ID field, enter the name of the Coveo-powered search page that you want to use for the Insight Panel.
Notes-
If you leave this field empty, your Insight Panel uses a preconfigured default search page.
-
To create a custom search page for the Insight Panel, see Customize the Insight Panel Search Page.
-
To get the name of a previously created search page, access the Search Pages (platform-ca | platform-eu | platform-au) page in the Coveo Administration Console.
-
-
The User Actions feature displays the documents clicked and queries made by the customer who opened the incident or case. By default, the Insight Panel displays the actions associated to the user that’s specified in the
opened byrecord form field. To use a different form field for this purpose, specify it in the Table Creator Field field.
NoteDot-walking syntax is supported.
-
By default, editing the content of any record form field triggers a query to Coveo, which in turn updates the Insight Panel. Moreover, the content of all form fields is sent as context information for Coveo Machine Learning (Coveo ML) purposes. To avoid triggering a query when certain fields are edited frequently, contain irrelevant data, or if fields contain sensitive data that you don’t want to send to Coveo, you can specify the fields to ignore in the Fields To Ignore field as comma-separated values. To trigger a query only when certain fields are edited, and send only specific field content to Coveo, you can specify the fields in the Fields To Include field as comma-separated values.
-
-
Click Save to save your workspace.
Notes-
Depending on your workspace configuration, you may need to modify the CSS styling of the component in which you added the Insight Panel.
-
You can test your implementation using the test value URL.
-
To add the Insight Panel to the contextual side panel of a standard record page of a Configurable Workspace:
-
In the Now Platform UI of your ServiceNow instance, navigate to Now Experience Framework > UI Builder.
-
On the My experiences page of the UI Builder, click the workspace experience to which you want to add the Insight Panel.
-
Ensure that the record page you want to work in is selected in the page management panel.
-
In the content tree of the page management panel, click the Tab sidebar component.

-
In the Config tab of the component configuration panel, in the Tabs section, click + Add.

-
Click Start from an empty container, and then click Next.
-
Enter a descriptive name in the Tab label field, such as
Coveo search. -
Select an Icon for the tab.
-
Click Create.
-
In the content tree of the page management panel, click + Add component under the newly created tab.

-
In the Components dialog, search for and select the Coveo Agent Panel component.
-
In the content tree of the page management panel, ensure that the Coveo Agent Panel component is selected.

-
In the Config tab of the component configuration panel:

-
Leave the Scope and Component fields to the default values:
WorkspaceandAgentPanel. -
In the Hosted Search Page ID field, enter the name of the custom Coveo search page that you created for use with the Insight Panel, which is
Insight Panel Search. -
Leave the Table Creator Field field to the default value of
opened by. -
Don’t enter any Fields To Ignore or Fields To Include.
-
-
Click Save to save your workspace.
-
When testing the implementation using the test value URL, you notice that the Insight Panel isn’t displaying properly within the contextual side panel, so you adjust the component CSS as follows:
-
In the content tree of the page management panel, select the tab component that you created for the Insight Panel.

-
In the Styling tab of the component configuration panel, enable View and edit CSS.
-
Under External Layer, click Edit CSS.
-
In the CSS editor, enter the following:

-
Click Apply.
-
-
Click Save to save your workspace.
Agent Workspace
The ServiceNow Agent Workspace interface consists of three panels. When you add the Insight Panel to the Agent Workspace, it appears in the Contextual Side Panel on the right side.
-
In the Now Platform UI of your ServiceNow instance, navigate to Workspace Experience > Actions & Components > Contextual Side Panel.
-
On the Action Assignments page, click New.
-
In the new record form, in the Action Label field, enter a label for your new action record.
-
In the Action Name field, enter a unique name for your action.
-
In the Implemented as dropdown menu, select UI component.
-
In the Specify UI component field, look up and select
vsc-coveo-agent-panel. -
In the Icon field, look up and select an icon to represent the Insight Panel in the Contextual Side Panel menu, such as
magnifying-glass-outline. -
In the Tooltip field, enter the text that appears when a user hovers over the panel icon.
-
In the Table field, select the table for which the Insight Panel appears. If you select
global, the Insight Panel appears in the records of all tables. -
In the Order field, enter an integer representing where the Insight Panel icon should appear in the Contextual Side Panel menu. If you enter
0, this icon is the first in the menu, and the Insight Panel is loaded with the record. -
Under Related Links, click Advanced View.
-
In the Workspace field, select the workspace in which you want to add the Insight Panel. Leave the field empty to add the Insight Panel to all workspaces.
-
In the Component Attributes tab:
-
In the Scope and Component fields, enter the desired values to identify the Insight Panel. Take note of the values as you’ll need them when configuring the query pipeline for the Insight Panel.
-
By default, editing the content of any record form field triggers a query to Coveo, which in turn updates the Insight Panel. Moreover, the content of all form fields is sent as context information for Coveo Machine Learning (Coveo ML) purposes. To avoid triggering a query when certain fields are edited frequently, contain irrelevant data, or if fields contain sensitive data that you don’t want to send to Coveo, you can specify the fields to ignore in the fieldsToIgnore field as comma-separated values. To trigger a query only when certain fields are edited, and send only specific field content to Coveo, you can specify the fields in the fieldsToInclude field as comma-separated values.
-
In the searchPageId field, enter the name of the Coveo search page that you want to use for the Insight Panel.
Notes-
If you leave this field empty, your Insight Panel uses a preconfigured default search page.
-
To create a custom search page for the Insight Panel, see Customize the Insight Panel Search Page.
-
To get the name of a previously created search page, access the Search Pages (platform-ca | platform-eu | platform-au) page in the Coveo Administration Console.
-
-
The User Actions feature displays the documents clicked and queries made by the customer who opened the incident or case. By default, the Insight Panel displays the actions associated to the user that’s specified in the
Opened byrecord form field. To use a different form field for this purpose, specify it in the tableCreatorField field.
NoteDot-walking syntax is supported.
-
-
At the upper-right corner, click Update.
Disable the ServiceNow Agent Assist feature
If you’ve implemented the Insight Panel in a CSM Workspace, you may want to disable or remove the ServiceNow Agent Assist feature from the records in which you’ve added the Insight Panel.
Though the ServiceNow Agent Assist feature offers search, item suggestion, and attachment features comparable to that of the Insight Panel, its recommendations are limited to ServiceNow items and aren’t powered by Coveo Machine Learning (Coveo ML).
If you’re using the CSM Configurable Workspace, delete or hide the Agent Assist component from the record page.
If you’re using the CSM Agent Workspace:
-
In the Now Platform UI of your ServiceNow instance, navigate to Workspace Experience > Actions & Components > Contextual Side Panel.
-
On the Action Assignments page, open the Agent Assist action that’s associated with the table in which you’ve implemented the Insight Panel.
-
In the record, clear the Active box.
-
At the upper-right corner, click Update.
Add the Insight Panel to a form in the standard ServiceNow interface
You can implement the Insight Panel so that it appears in a ServiceNow form, such as an incident or case, when viewing the form in the standard ServiceNow interface outside of a CSM Workspace.
You can position the Insight Panel on the form as desired.

To add the Insight Panel to a ServiceNow form
-
In the Now Platform UI of your ServiceNow instance, switch to the Global application (see Application Picker). If the Global application isn’t accessible, you must create a single UI Formatter for every table in which you want to implement the Insight Panel.
-
Navigate to System UI > Formatters.
-
On the UI Formatters page, in the upper-left corner, click New.
-
In the new record form:
-
In the Name field, enter an appropriate name for your new formatter, such as
Coveo Insight Panel. -
In the Formatter field, enter
x_216814_coveo_1_0_coveo-agent-panel.xml. -
In the Table dropdown menu, select the table for which you want to make the Coveo Insight Panel formatter available, such as
caseorincident, or selectglobalto make the panel available to any form. You can add the Insight Panel formatter to a specific table later in these steps. -
Click Submit.
-
-
Switch back to your regular application.
-
Navigate to System UI > Formatters, and open the formatter you just created.
-
Click
 , and then navigate to Configure > Form Design.
 -
At the upper-left of the Form Design page:
-
Select the table in which you want to add the Insight Panel.
-
If required, select the desired table view.
-
-
In the menu on the left, scroll down to the Formatters list, and then drag the Insight Panel formatter you created to the desired location on the form.
-
If the form includes the
Contextual Search ResultsServiceNow formatter, remove the formatter from the form to replace the default ServiceNow results with the results provided by the Insight Panel. -
At the upper-right corner, click Save.
-
By default, your Insight Panel uses a preconfigured search page. To create a custom search page for the Insight Panel, see Customize the Insight Panel Search Page.
-
Test your changes:
-
Open a ServiceNow record in the form that contains the Insight Panel.
-
Ensure that the Insight Panel appears as expected. If it’s absent or if the case has an unexpected layout, you may be dealing with a domain-separated form or table view. See Domain Separation and/or the ServiceNow documentation for details.
-
Configure your query pipeline
Once you’ve implemented the Insight Panel in your ServiceNow instance, you must link it to a query pipeline in your Coveo organization.
-
On the Query Pipelines (platform-ca | platform-eu | platform-au) page of the Coveo Administration Console, do one of the following:
-
To use an existing pipeline, click the pipeline, and then click More > Edit in the Action bar.
-
Create a new query pipeline for your Insight Panel, and then refer to the following step to create the pipeline Condition in the Add a Query Pipeline panel.
-
-
In the Add/Edit a Query Pipeline panel, create a condition to enforce a specific search hub (
Search hub is) for the pipeline. The filter value you enter differs based on if the Insight Panel is in the ServiceNow Agent Workspace or a ServiceNow form.
NoteIf your pipeline already has a condition, you must create a new condition and include both values with an
ORoperator.For example, an existing pipeline has the following condition:
Search Hub is Portal_MyWidget. To link the Insight Panel to this pipeline, you create a new condition with the valueSearch Hub is Portal_MyWidget or Search Hub is Agent_WorkspaceInsight. With this condition, your pipeline is used for all queries that originate from either your widget or the Insight Panel.-
For an Insight Panel in the ServiceNow Agent Workspace:
-
If you didn’t provide Scope and Component values in the Insight Panel Action Assignment record, enter
ServiceNow. Your complete pipeline condition is thereforeSearch Hub is ServiceNow. -
If you provided Scope and Component values, enter them in the following format:
Scope_Component.ExampleFor a widget with an
Agentscope and aWorkspaceInsightcomponent, your condition value should beAgent_WorkspaceInsight. Your complete pipeline condition is thereforeSearch Hub is Agent_WorkspaceInsight.With such a condition, the pipeline is used for all queries that originate from the Insight Panel.
-
-
For an Insight Panel in a ServiceNow form, enter the name of the table in ServiceNow to which you added the Insight Panel. The expected pattern is
<tableName>_InsightPanel.ExampleIf you add the Insight Panel to the
incidenttable, your pipeline condition value must beincident_InsightPanel. Your complete pipeline condition is thereforeSearch Hub is incident_InsightPanel.With such a condition, the pipeline is used for all queries that originate from the Insight Panel.
-
-
Add a rule to override the large query expression (lq) parameter value so that it uses the textual data a user enters in the issue description field when creating the form:
-
At the upper-right corner, click
 , and then click Add rule with code.
-
In the Add a Rule With Code dialog, enter the following rule to set the large query expression (lq) to the
nameattribute of the issue description field in the case creation form, which iscomments:override query lq:"<@+ $context.comments +@>"
NoteDepending on the format of the catalog item, you may need to replace
commentswith the name attribute of the form input data that you want to send along with the search query. For example, to send theshort_descriptiondata along with the search query, your rule would be:override query lq:"<@+ $context.short_description +@>" -
Click Add with code.
-
-
Click the rule you just created, and then click Edit in the Action bar.
-
In the Edit a Query Parameter Rule panel, under Condition, select or add a
Query is emptycondition.
-
Insight Panel features
In addition to displaying the most contextually relevant content, the Insight Panel offers the following features:
Filters
Also known as facets in a regular Coveo for ServiceNow search page, the Insight Panel filters allow agents to further refine their search results by displaying only the items that match the selected criteria.
|
|
Leading practice
You can customize the filters in your custom search page. |

User Actions
The Insight Panel User Actions feature lets agents see the items customers clicked, and the terms they queried, before they created a ticket, such as an incident or case. This allows the agents to retrace the customer’s journey around your portal and adapt their approach accordingly.
|
|
Notes
|

By default, the User Activity Timeline displays the user actions prior to ticket creation in chronological order. You can click More Actions to see the user actions after the ticket was created. The data retention limit is 60 days and the latest 400 events (all sessions combined) can be displayed.

A Viewed by Customer label also identifies the items the customer accessed.

Result Actions
Result actions enable agents to quickly attach or copy a search result directly from the Insight Panel.
|
|
Note
If you’re using a custom search page for your Insight Panel, you must enable the Result Actions feature for the corresponding search page. The Result Actions feature is enabled by default in the preconfigured default search page for the Insight Panel. |
When an agent hovers over a search result, result action buttons appear:
-
Clicking Attach Result creates a comment with a link to the item for future reference.

 Leading practice
You can create a ServiceNow business rule to automatically add a custom work note when a user attaches or detaches a Coveo search result.
-
Clicking Copy copies the item title and URL to the clipboard. The agent can then paste this information in a separate document, a chat window, etc.

What’s next?
-
Further customize, or create a custom search interface for, your Insight Panel.
-
Add the Page View Tracker widget to your portal pages as it’s necessary to implement the Recommendations widget.