Use the legacy Interface Editor
Use the legacy Interface Editor
This is for:
Developer|
|
Tip
The Interface Editor is a reliable, time-tested tool. However, we recommend that you use the Interface Editor only when instructed to by the documentation. If you aren’t, you may want to try the new search interface builder instead. Thanks to its intuitive design, you can create a search interface for test and demo purposes. Search interfaces created with the new builder are also hosted by Coveo, which makes them immediately operational. |
The Interface Editor lets you create and customize feature-rich search interfaces using the Coveo JavaScript Search Framework. Since there are newer alternatives to the Framework, we recommend that you use the Interface Editor only when instructed to by the documentation.
The Interface Editor is available through the Search Pages (platform-ca | platform-eu | platform-au) page of the Coveo Administration Console.
UI view
The UI View provides a WYSIWYG editor useful for designing and testing search interfaces. This view is selected by default when you access the Interface Editor.
|
|
Tip
In UI View, hover over a 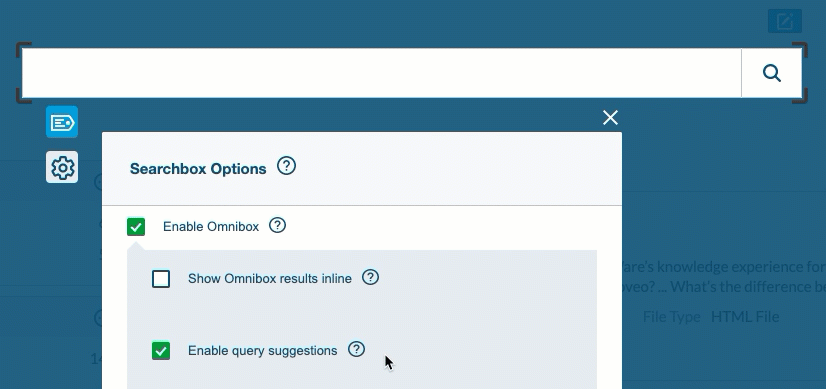
|
Adding components
Adding a dynamic facet
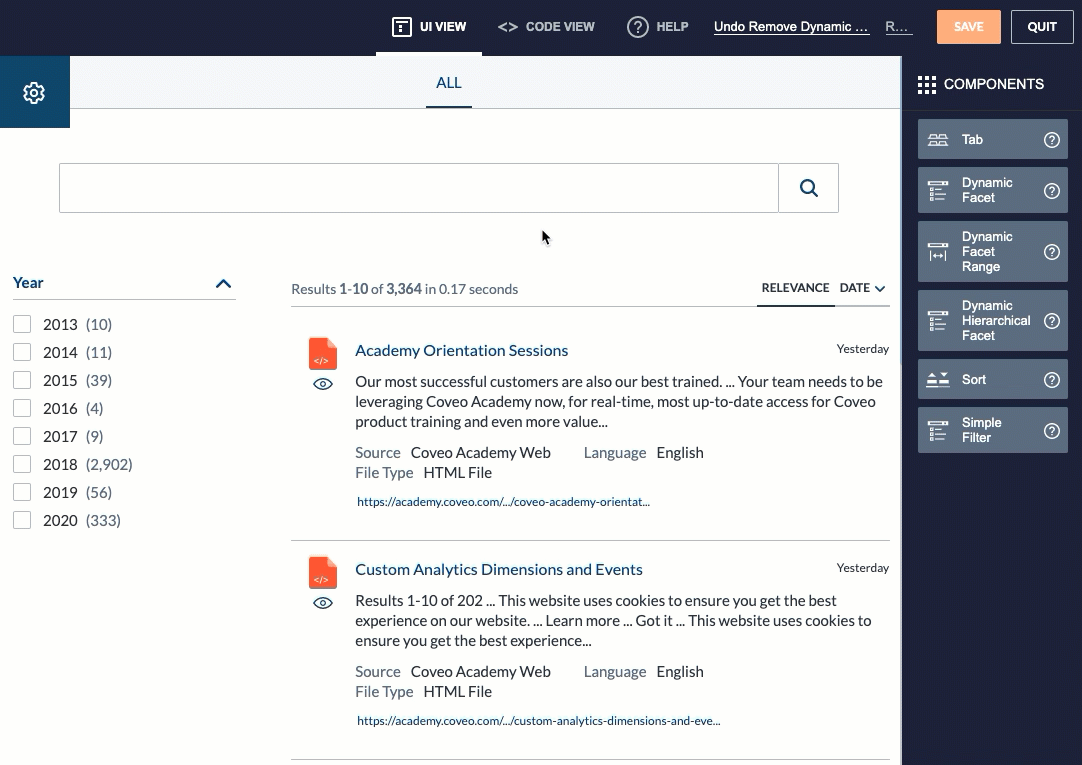
To add a component
-
On the right side, from the list of Components, drag the desired component and drop it where it should appear on the page. You can always move the component later.
-
In the panel that appears, configure the required component settings, and then click Ok.
The component is added and automatically selected in edit mode.
-
(Optional) Further customize the component using the available panels. You can always edit the component later.
-
Click Apply.
Moving components
Any search interface component you can add by dragging can be moved in the same fashion.
Moving a dynamic facet
Editing components
You can select a component and enter edit mode to review and modify its current configuration.
Editing a dynamic facet
To edit a component
-
Hover over the desired component instance, and then click
 .
. -
Use the available panels to make the desired modifications, and then click Apply.
Deleting components
Any search interface component you can add by dragging can also be removed.
Deleting a dynamic facet
To delete a component
-
Hover over the component instance, and then click
 .
. -
In the Delete a component dialog, click Yes.
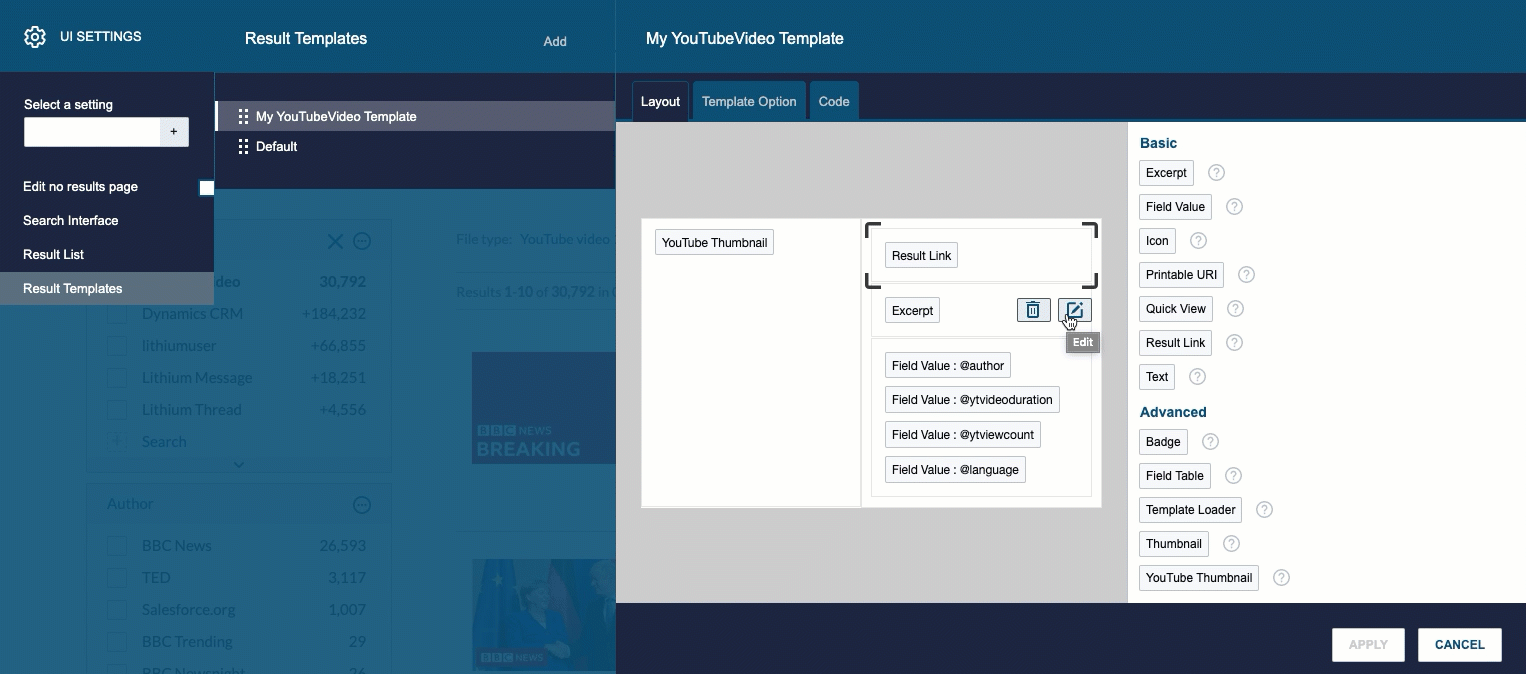
Managing result templates
When editing a result template, you can add, move, edit, and delete result template components (Field Value, Icon, etc.), just as you would with other search interface components (Facet, Tab, etc.). You can also visually edit result template cells and rows.
For more detailed information and examples, see Configure search result templates.
Designing a YouTube result template
Editing the no results page
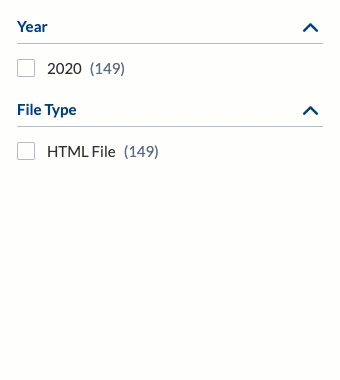
You can customize the content that gets displayed when a query doesn’t return any results.
-
Editing the no results message
-
Adding a custom HTML section to the no results message
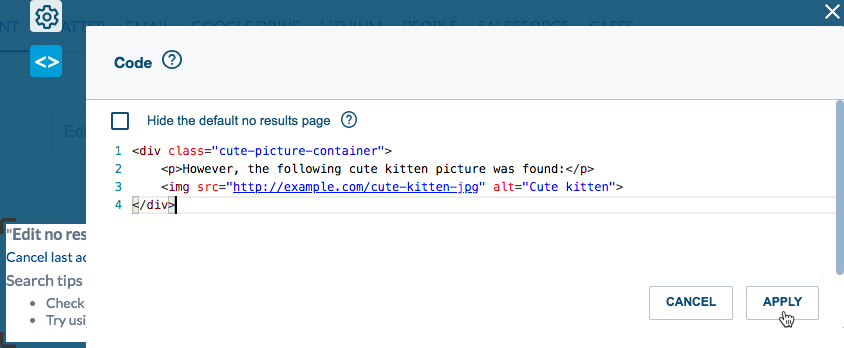
To edit the no results page
-
On the upper-left corner, click
 .
. -
Select Edit no results page.
-
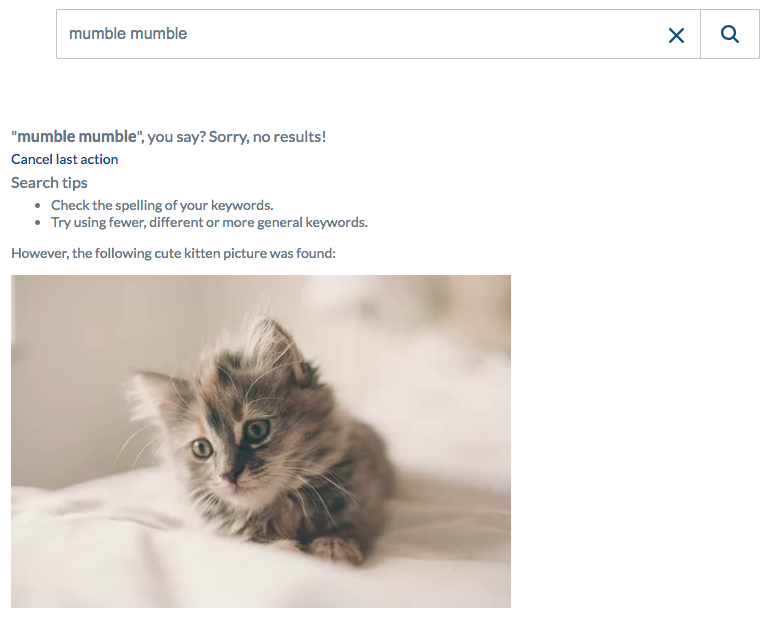
In the Query Summary Options panel that appears, enter the desired text in the Message to display input. You can use
${query}to insert the current query expression in the message (for example,${query}, you say? Sorry, no results!). -
(Optional) Set additional options as desired, possibly including a custom HTML section.
-
Click Apply.
Editing other settings
You can configure additional basic search interface options through the UI Settings (![]() ) menu.
) menu.
Modifying search interface and result list settings
Code view
Each modification you make in the UI View has an impact on the underlying markup configuration of the search interface. This markup configuration can be accessed by selecting the Code View.
Basics
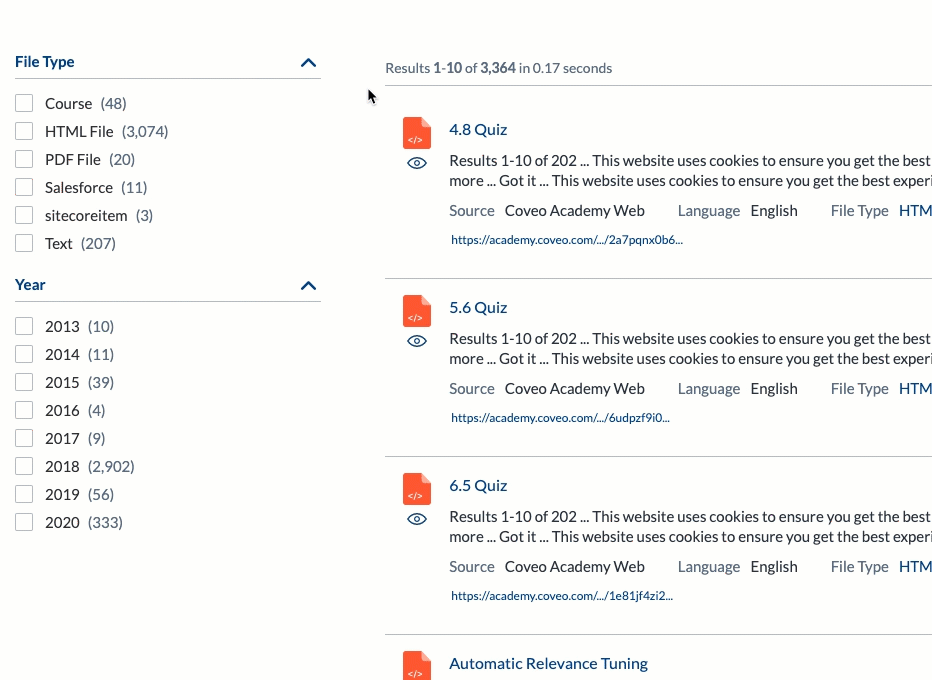
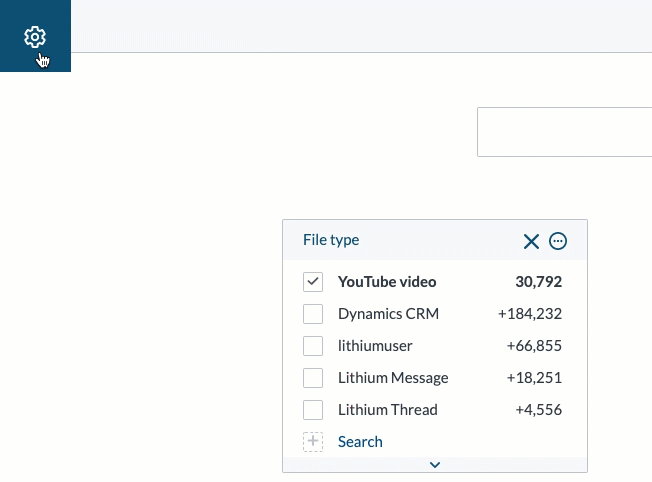
Dropping a new facet as shown in the Adding components example generates the following markup:
<div class="CoveoDynamicFacet"
     data-title="File Type"
     data-field="@filetype"
     data-tab="All"></div>
The location of each dynamic facet in a search interface is determined by its position in the div with the coveo-facet-column class:
<div class="coveo-facet-column">
  <!-- The "File Type" facet is rendered first -->
  <div class="CoveoDynamicFacet"
       data-title="File Type"
       data-field="@filetype"
       data-tab="All">
  <div class="CoveoDynamicFacet"
       data-title="Type"
       data-field="@objecttype"
       data-tab="All"></div>
  <div class="CoveoDynamicFacet"
       data-title="Author"
       data-field="@author"
       data-tab="All"></div>
</div>
Therefore, dropping a facet to a new location as shown in the Moving components example updates its position in the markup:
<div class="coveo-facet-column">
  <div class="CoveoDynamicFacet"
       data-title="Type"
       data-field="@objecttype"
       data-tab="All"></div>
  <div class="CoveoDynamicFacet"
       data-title="Author"
       data-field="@author"
       data-tab="All"></div>
  <!-- The "File Type" facet is rendered last -->
  <div class="CoveoDynamicFacet"
       data-title="File Type"
       data-field="@filetype"
       data-tab="All">
</div>
Modifying the configuration of a facet as shown in the Editing components example sets or updates the corresponding data-prefixed markup attributes:
<!-- The "File Type" facet has a new "data-number-of-values" attribute -->
<div class="CoveoDynamicFacet"
     data-title="File Type"
     data-field="@filetype"
     data-tab="All"
     data-number-of-values="3">
Removing a facet as shown in the Deleting components example deletes its corresponding div entirely:
<div class="coveo-facet-column">
  <!-- The "File Type" facet is gone -->
  <div class="CoveoDynamicFacet"
       data-title="Type"
       data-field="@objecttype"
       data-tab="All"></div>
  <div class="CoveoDynamicFacet"
       data-title="Author"
       data-field="@author"
       data-tab="All"></div>
</div>
Leveraging new and advanced features
The Code View is especially useful when you want to leverage JavaScript Search Framework components and options that aren’t fully supported by the UI View.
-
Adding a
Settingscomponent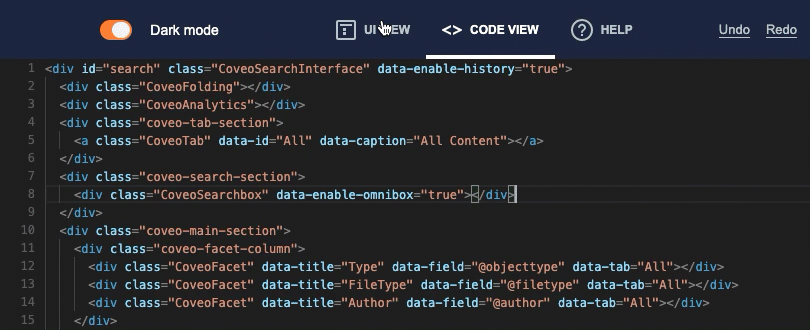
-
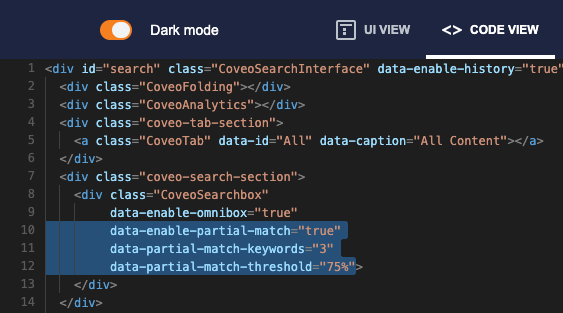
Enabling the partial match feature
Executing custom JavaScript code
In Code View, you can add script tags, typically after the closing div of the element with the CoveoSearchInterface class, to execute custom code.
-
Passing component options before the
initcall<div id="search" class="CoveoSearchInterface"> <!-- ... --> <div class="coveo-search-section"> <div class="CoveoSearchbox"></div> </div> <!-- ... --> </div> <script> document.addEventListener("DOMContentLoaded", () => { Coveo.options(document.getElementById("search"), { Searchbox: { enablePartialMatch: true, partialMatchKeywords: 3, partialMatchThreshold: "35%" } }); }); </script> -
Send custom context information
<div id="search" class="CoveoSearchInterface">
  <script type="text/context" class="CoveoPipelineContext"></script>
  <!-- ... -->
</div>

<script>
document.addEventListener("afterInitialization", () => {
  const context = Coveo.get(document.querySelector(".CoveoPipelineContext"));
  context.setContext({ "userRole": getUserRole() })

  function getUserRole() {
    // Implementation ...
  }
});
</script>
Limitation
Component options can’t be set in the init function call of a legacy hosted search page;
you must rather pass component options before the init call.
Required privileges
The following table indicates the privileges required to view or edit elements of the Search Pages (platform-ca | platform-eu | platform-au) page and associated panels, such as the Interface Editor (see Manage privileges and Privilege reference).
| Action | Service | Domain | Required access level |
|---|---|---|---|
View search pages |
Organization |
Organization |
View |
Search |
Search pages and IPX |
View |
|
Edit search pages |
Organization |
Organization |
View |
Search |
Search pages and IPX |
Edit |
|
Edit and make queries |
Search |
Search pages and IPX |
Edit |
Execute queries |
Allowed |