Create and manage hosted search pages with the search page builder
Create and manage hosted search pages with the search page builder
A Coveo hosted search page created with the search page builder is a lightweight and feature-rich search interface that you can quickly add to your intranet, community portal, or any website that needs a search interface.
This search page is customizable and provides users with access to relevant content.
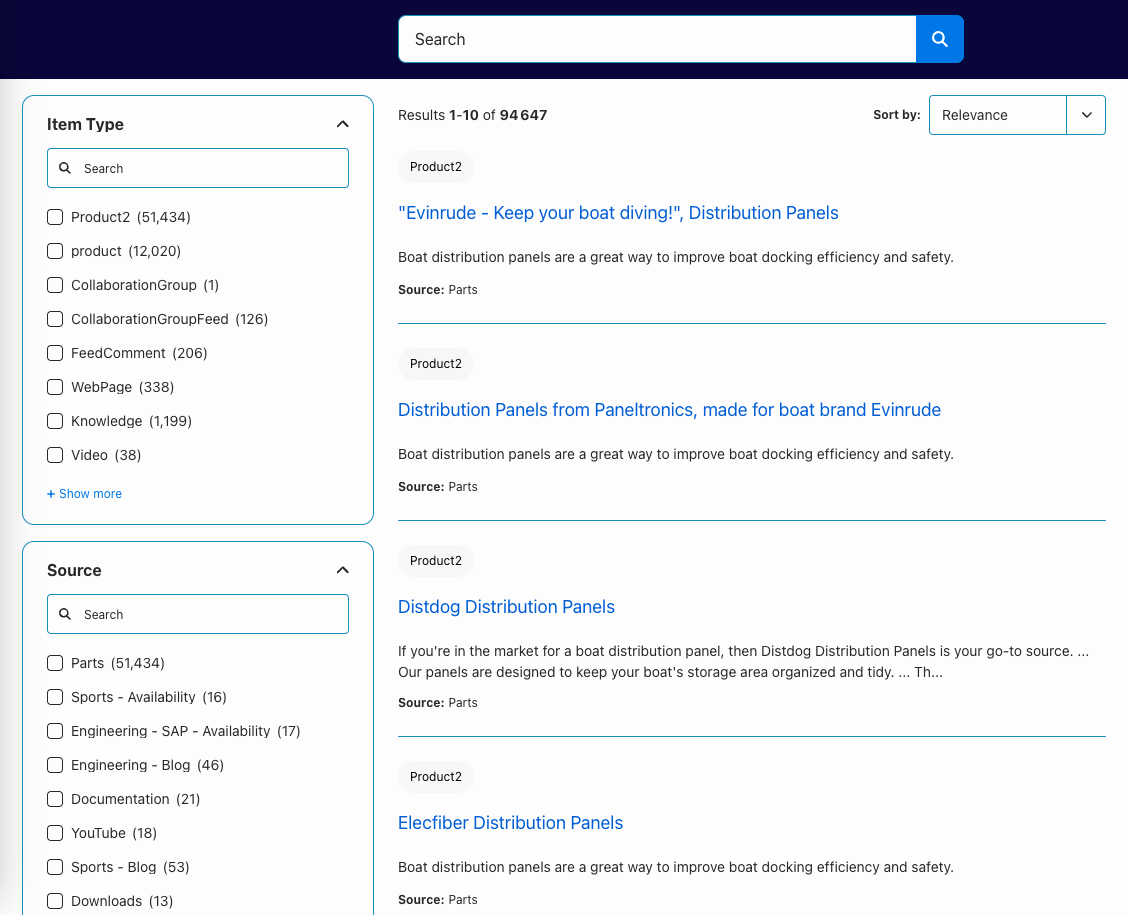
A hosted search page automatically records Coveo Usage Analytics (Coveo UA) events. This lets you enhance the relevance of search results in your search interfaces using Coveo Machine Learning (Coveo ML). Usage analytics events also let you generate reports to gain insight on how users are interacting with your search pages.
Deploy a hosted search page (Overview)
To successfully deploy the search page you created in the builder, you must meet the following minimum requirements and configuration.
Requirements
A Coveo organization with at least one source.
|
|
You can configure your search page to either use the same generic search token to authenticate all users, or a distinct search token for each authenticated user in your search page. A generic search token is meant to grant access to publicly available content only. This means that search page users will only have access to indexed content that’s accessible to everyone, while indexed content that’s secured via a repository’s permissions system won’t appear in search results. However, you can use a distinct search token for each user if some or all of your indexed content is secured via a repository’s permissions system. This means that each authenticated user sees only the secured content that they’re allowed to access. For more information, see Add a simple hosted search page to a website. |
Create a search page
This section details how to create a hosted search page with the search page builder.
|
|
Note
The search page builder is Coveo’s latest hosted search page solution, and it leverages Coveo’s Headless and Atomic libraries. Hosted search pages based on the Coveo JavaScript Search Framework are now referred to as legacy search pages. You must edit them through the Interface Editor rather than the search page builder. Legacy search pages appear with a Legacy Editor badge on the Search Pages (platform-ca | platform-eu | platform-au) page. 
To help you decide which search page solution is best for you, see Choose the right approach. |
-
On the Search Pages (platform-ca | platform-eu | platform-au) page, click Add search page.
-
In the Add a search page panel that opens, select Simple builder.
-
Enter a descriptive name for your search page configuration, and then click Add.
NoteYou may be required to log in to the builder using the credentials you used to log in to the Coveo Administration Console.
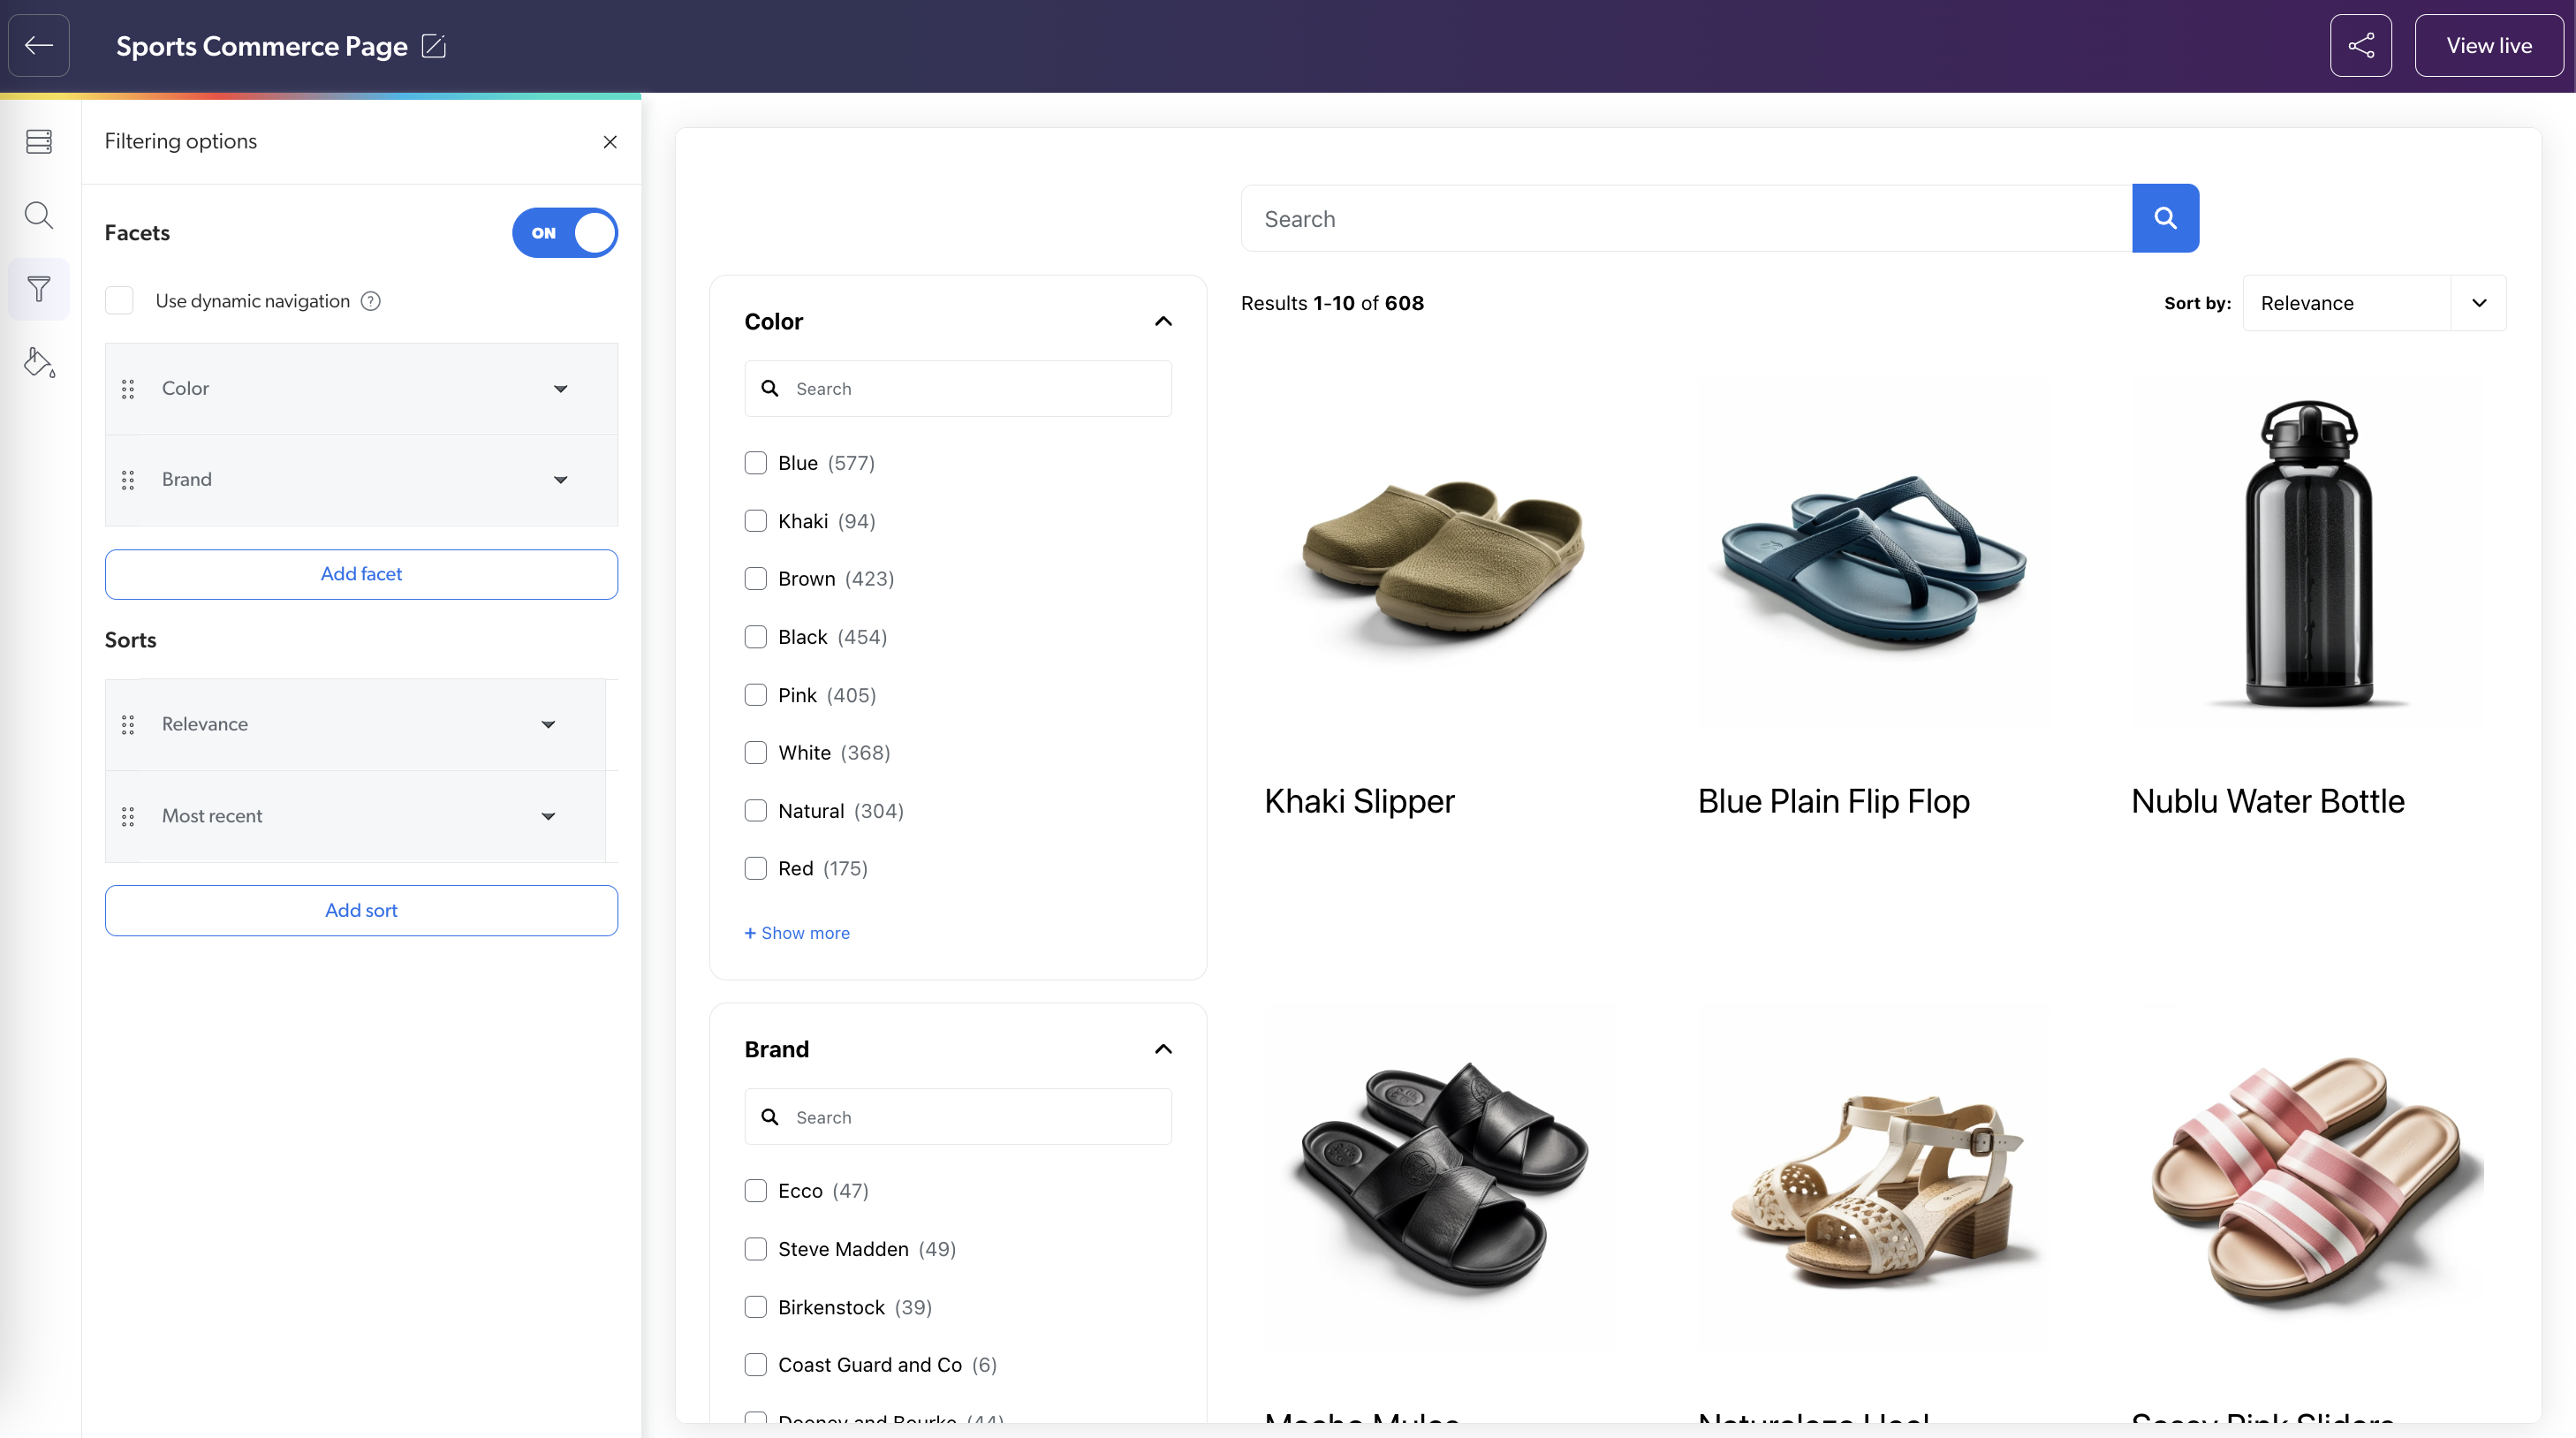
Live builder preview
The search page builder includes a live preview that automatically updates based on the configuration options.
Besides showing you how your search page looks, the preview is also fully interactive so you can perform actions such as searches, use facets, and click search results. Use the preview to see your search page customizations and functionality in real time.
Customize your search page
This section details how to set up and customize a search page using the search page builder.
|
|
Note
To edit a legacy search page built with the JavaScript Search Framework, see Edit a legacy hosted search page. |
From the search page builder, you can:
Access the search page builder
The search page builder lets you customize a search interface configuration. After you create a search page, you can access its configuration settings at any time.
|
|
Note
To edit a JavaScript Search Framework interface and use the legacy Interface Editor, see Edit a legacy hosted search page instead. See Choose the right approach for a comparison of the two tools. |
-
On the Search Pages (platform-ca | platform-eu | platform-au) page, click the search interface that you want to edit.
-
Click Edit in the Action bar.
You may be required to log in to the builder using the credentials you used to log in to the Coveo Administration Console.
Select a page layout
You can either display search results as a list, or as a grid. Typically, you would use a list layout for text-based content, and a grid layout for image-based content.
-
In the search page builder, select the Search results display tab.
-
Under Page layout, select either List or Grid.
-
Click Save at the upper-right corner of the builder to save your interface.
Manage result templates
Result templates set how individual query results appear in the search interface based on certain conditions. For example, you can display results for PDFs and web pages differently.
You can:
Result templates are evaluated in the order they appear in the Search results display tab. This means that if a query result meets the conditions found in multiple templates, the first applicable template in the list is used.
Create and edit result templates
-
In the search page builder, select the Search results display tab.
-
Do one of the following:
-
To create a new template, click Add template.
-
Click the result template that you want to edit.
-
-
Specify the template settings:
-
Enter a descriptive Name for your template.
-
Under Result layout, select whether you want to:
-
Display an icon corresponding to the item type (for example,
PDF,YouTube,Word) in the search result. -
Display a short search result description.
-
-
Under Usage, set the conditions for when to use the template:
-
Click Add condition to add a new condition, or click an existing condition that you want to edit.
-
In the Select a field dropdown menu, select the desired field (for example,
source). -
In the Select a condition dropdown menu, select the desired operator (for example,
Must match). -
In the Values field, specify at least one value (for example,
YouTube). Use a comma-separated list to specify multiple values. -
Click Done to apply your changes.
-
-
Under Colored badge, select what’s displayed for the colored badge above the search result:
-
Select a field to show its data in the badge.

-
Select a color for the badge.
-
-
Under Additional information, set the information to display below the search result:
-
Click Add details to add new information, or click the existing information that you want to edit.
-
Select a field to display the corresponding metadata value.

-
(Optional) To include a label for the selected field, select the Include label checkbox, and then enter a custom label or keep the default field name.
-
Click Done to apply your changes.
Change the order in which the information appears by clicking
to drag a details card to its new location in the list.
-
-
-
Click Done to save the result template.
-
Click Save at the upper-right corner of the builder to save your search page.
Reorder result templates
Result templates are evaluated in the order they appear in the Search results display tab. This means that if a query result meets the conditions found in multiple templates, the first applicable template in the list is used.
|
|
Note
The Default template can’t be reordered. |
-
In the search page builder, select the Search results display tab.
-
In the Result templates section, click
on a template card to drag it to its new location in the list.
-
Click Save at the upper-right corner of the builder to save your search page.
Delete a result template
-
In the search page builder, select the Search results display tab.
-
In the Result templates section, click the result template you want to delete.
-
Click Delete.
-
Click Delete again to confirm the action.
Enable one-click result actions
When enabled, one-click actions allow users to perform actions on search results.
Enable Quick view to allow users to view the content of a search result without leaving the search page.
When this option is enabled, an eye icon (![]() ) appears on each search result card.
Clicking the icon opens a preview of the result’s content.
) appears on each search result card.
Clicking the icon opens a preview of the result’s content.

Manage facets
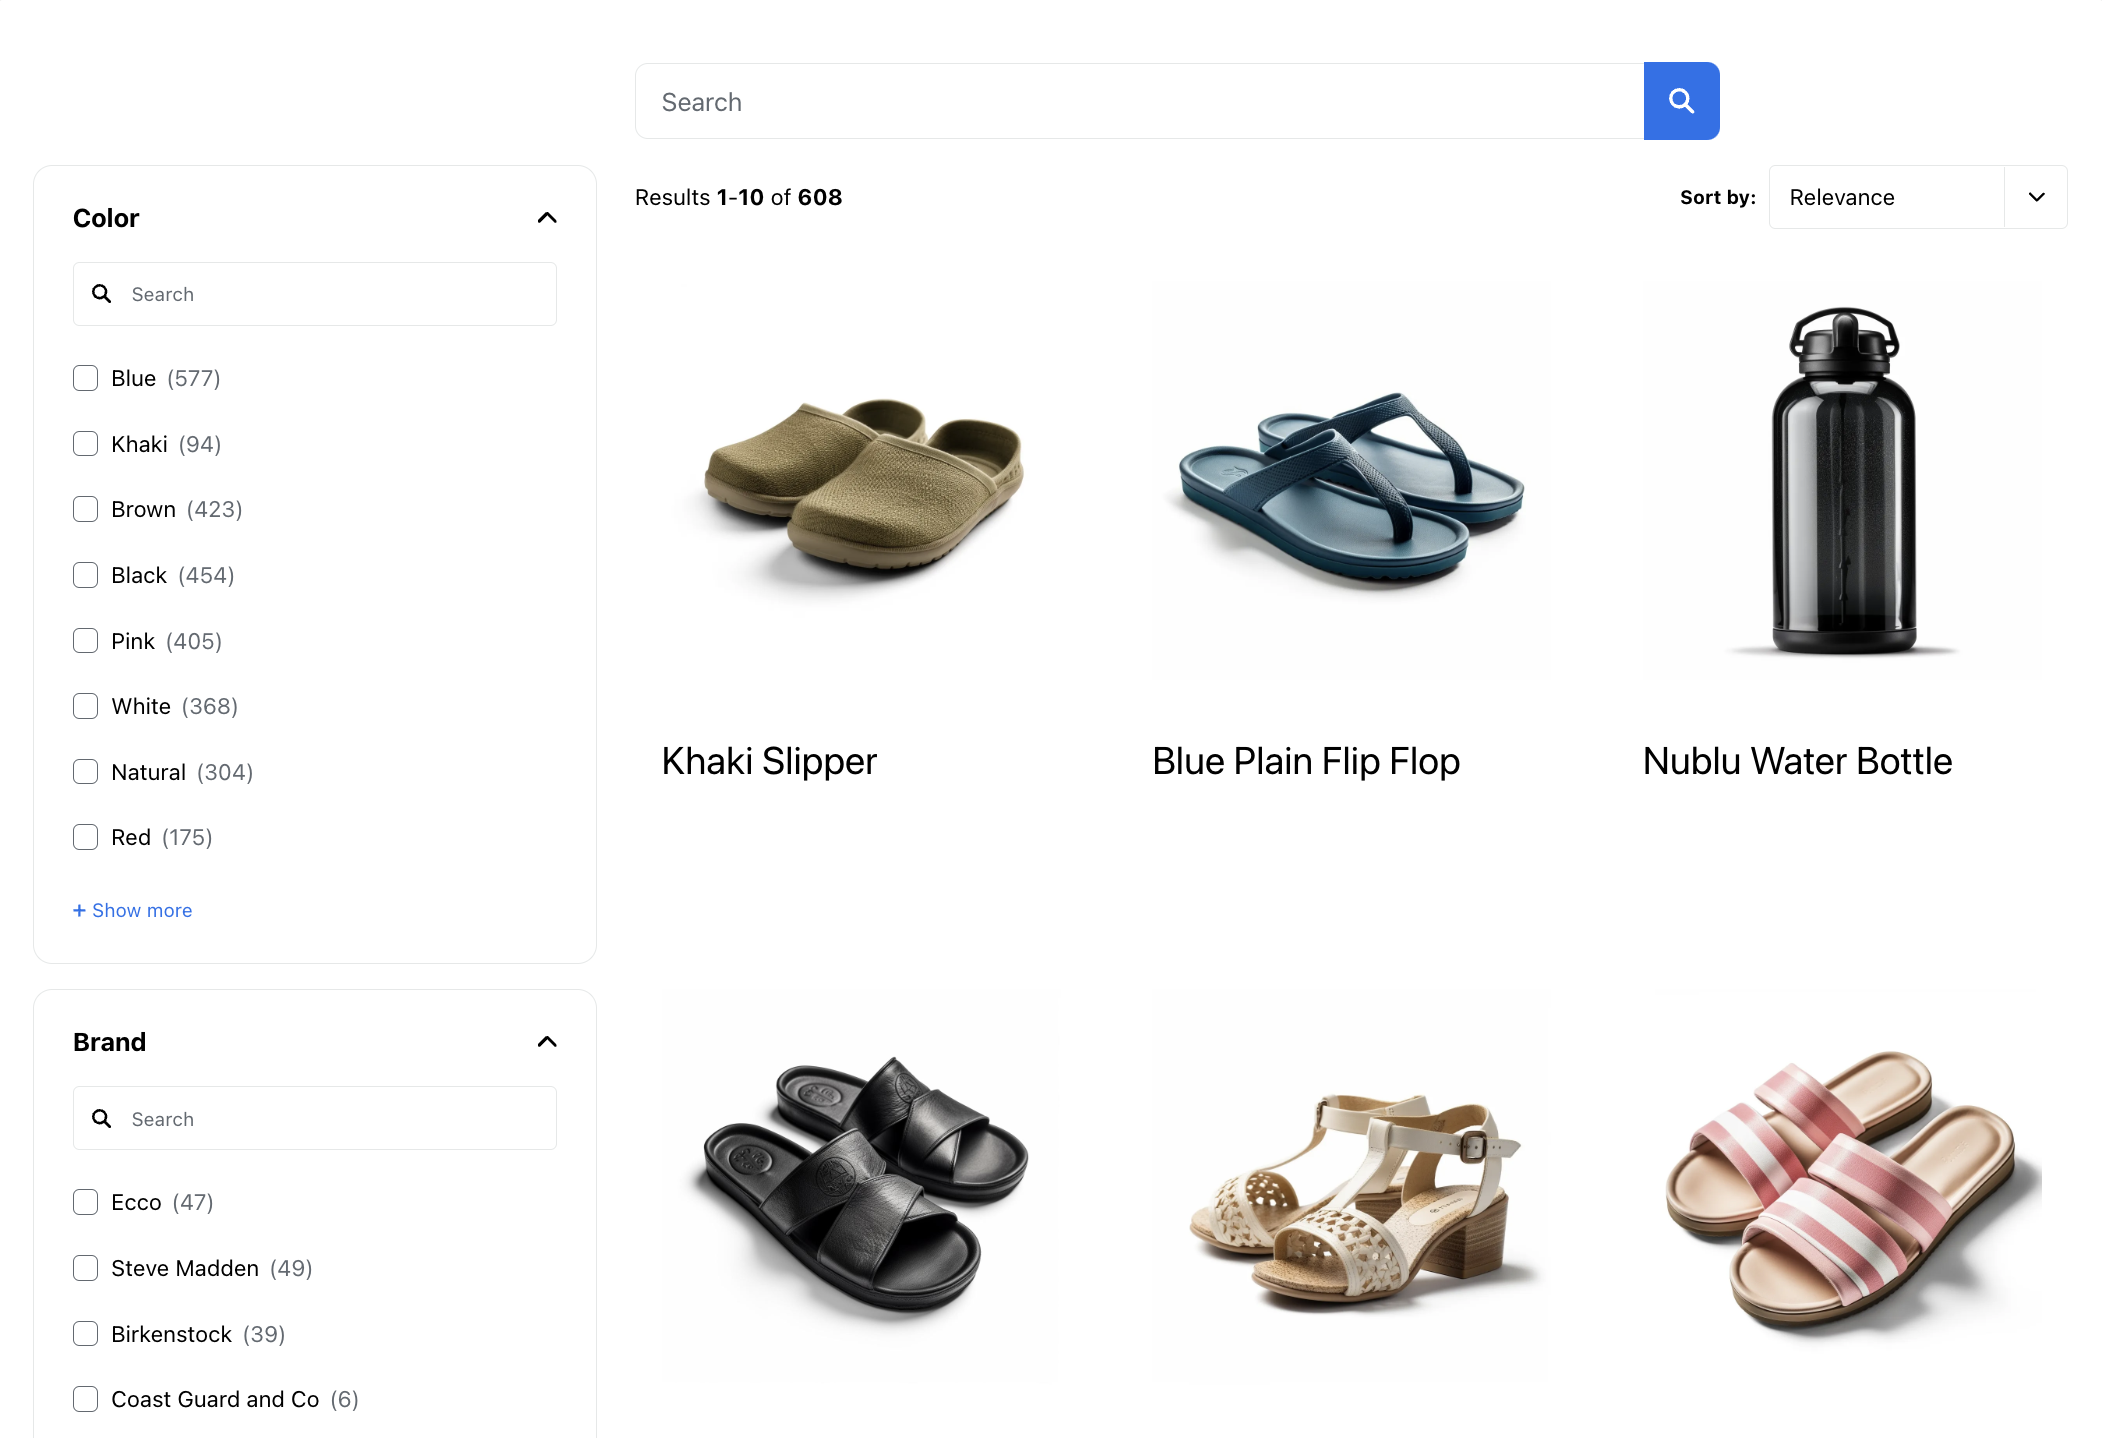
When facets are enabled, they appear left of the result list.
You can:
Enable or disable facets
When facets are enabled, they appear left of the result list.
|
|
All existing facets will be permanently deleted if you disable facets and then click Save at the upper-right corner of the builder to save your interface. |
-
In the search page builder, select the Filtering options tab.
-
To enable or disable all facets, click On or Off respectively in the Facets section.
-
Click Save at the upper-right corner of the builder to save your interface.
Create and edit facets
-
In the search page builder, select the Filtering options tab.
-
Do one of the following:
-
To create a new facet, click Add facet.
-
Click the facet that you want to edit.
-
-
Specify the facet settings:
-
Select the Field to use for the facet (for example,
yearordocumenttype). -
Enter the Name to display for the facet in the search interface.
-
Depending on the selected field, a Display section may appear. If so, select whether to display the facet options As checkboxes or As links.
-
-
Click Done to apply your changes.
-
Click Save at the upper-right corner of the builder to save your interface.
Reorder facets
-
In the search page builder, select the Filtering options tab.
-
In the Facets section, perform one of the following tasks:
-
To reorder facets and their values based on a user’s query so that the most relevant options appear at the top, select the Use dynamic navigation box.
TipYou can enable this option in advance even if you haven’t yet created a DNE model or associated it with your main query pipeline. However, without a properly configured DNE model, this option has no effect.
To configure a DNE model for use with your search page, see Configure query pipelines and machine learning.
-
To reorder facets manually, clear the Use dynamic navigation box, click
on a Facet card, and then drag and drop the card in the desired order.
-
-
Click Save to apply your changes.
Delete a facet
-
In the search page builder, select the Filtering options tab.
-
Click the facet that you want to delete.
-
Click
.
-
Click
again to confirm.
-
Click Save at the upper-right corner of the builder to save your interface.
Manage sorting options
At the upper-right corner of the search page, you can select a sorting option to change the order in which results are displayed.
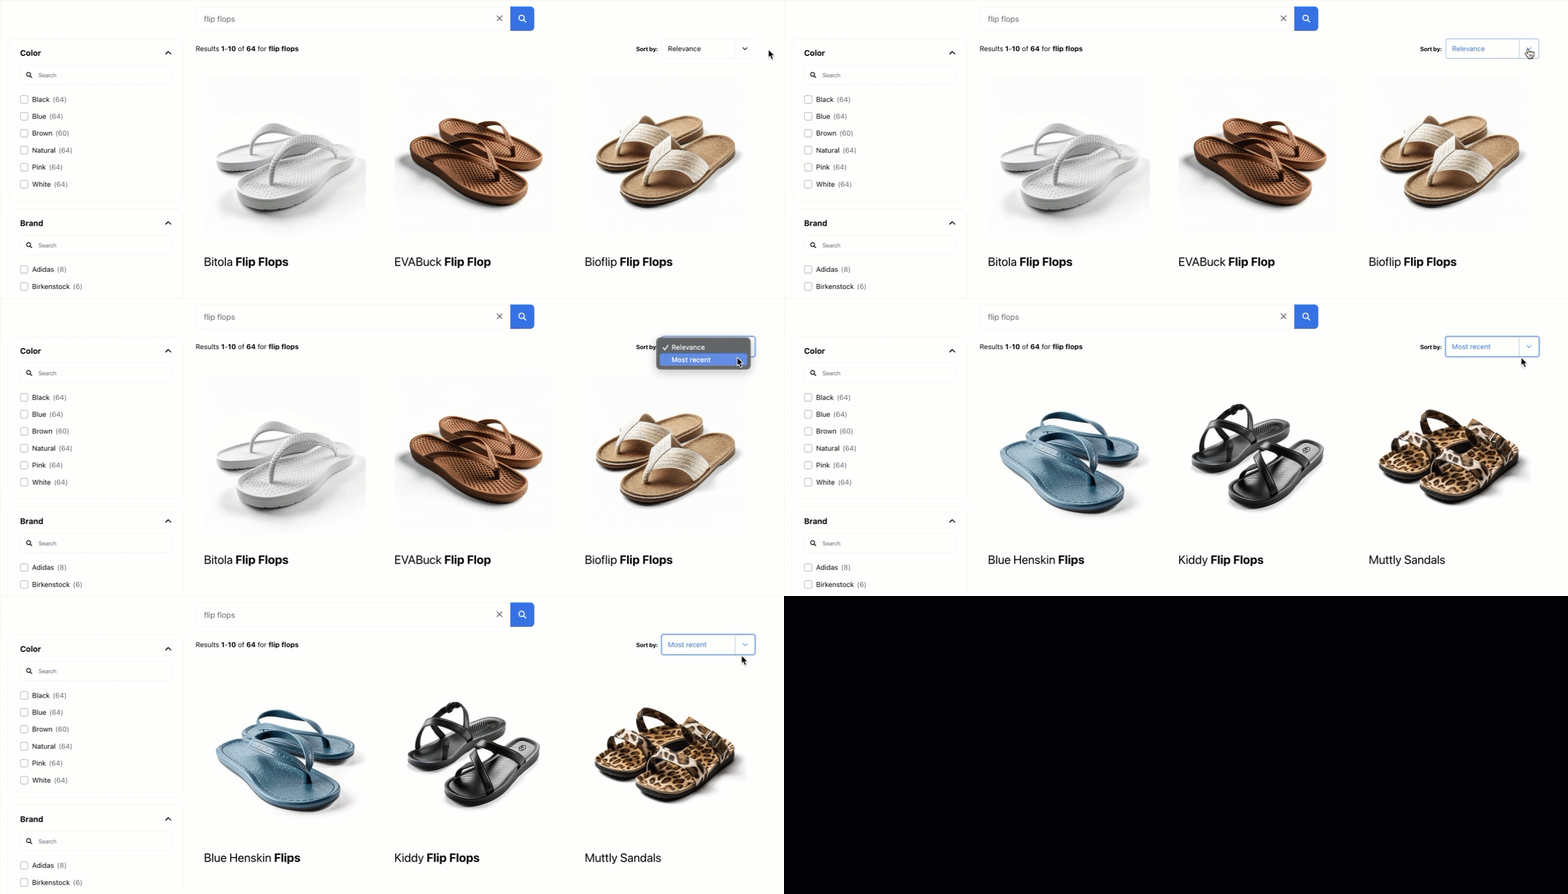
By default, results are sorted by relevance. You can add additional sorting options to the list.
-
In the search page builder, select the Filtering options tab.
-
Do one of the following:
-
To create a new sorting option, click Add sort.
-
Click the sort that you want to edit.
-
-
Specify the sort settings:
-
Select the Field to use for the facet (for example,
priceordate). -
Enter the Label to display in the sort menu.
-
Under Order, select whether results should appear in ascending or descending order.
-
-
Click Done to apply your changes.
-
Click Save at the upper-right corner of the builder to save your interface.
Set colors and text font
You can customize the colors and text of your search interface as desired or to match the website or application in which you’ll add the interface.
-
In the search page builder, select the Style tab.
-
Under Theme, customize your search page’s colors.
-
The Text font CSS property sets the prioritized list of supported generic and specific font families for your search interface. By default, the most common fonts are included in the list. The search interface will use the first font in the list that’s supported by your website. If required, modify the font family list to match the site or application in which you’ll add the search page.
NoteThe builder’s live preview won’t display a font if it’s not a font that’s currently available in your web browser.
-
Click Save at the upper-right corner of the builder to save your search page.
Access the page’s search hub value and loader snippet
Your search page configuration includes a dedicated search hub value and loader snippet script.
The search hub value is the identifier for your search page that’s used for query pipeline routing and enabling Coveo Machine Learning features. The search hub value is based on the name of your search page configuration and can’t be modified.
The loader snippet script is required when adding your search page to websites and applications.
Alternatively, you can use the live search page URL.
This address ends with /html.
To retrieve the search hub value or loader snippet
-
In the search page builder, select the Settings tab.
-
In the Search hub or Loader snippet section, click
to copy the search hub value or loader script respectively.
-
If retrieving a loader snippet, under Placement, enter a CSS selector to target the HTML element on your web page where you want your search page to appear. Then, click Save at the upper-right corner of the builder to save your search page.
Enable Smart Snippets
Search pages support Coveo Machine Learning (Coveo ML) Smart Snippets. Smart Snippets provide users with answers to their queries directly on the results page by displaying a snippet of the most relevant result item.

For more information, see About Smart Snippets.
|
|
Enabling the Smart Snippets option allows Smart Snippets to appear in your search page, but only if you have a Smart Snippet model that’s associated with your page’s main query pipeline. You can enable this option in advance even if you haven’t yet created a Smart Snippet model or associated it with your main query pipeline. However, without a properly configured Smart Snippet model, this option has no effect. To configure a Smart Snippet model for use with your search page, see Configure query pipelines and machine learning. |
-
In the search page builder, select the Settings tab.
-
Under Result page, select the Smart Snippets option.
-
Click Save at the upper-right corner of the builder to save your interface.
Enable "People also ask"
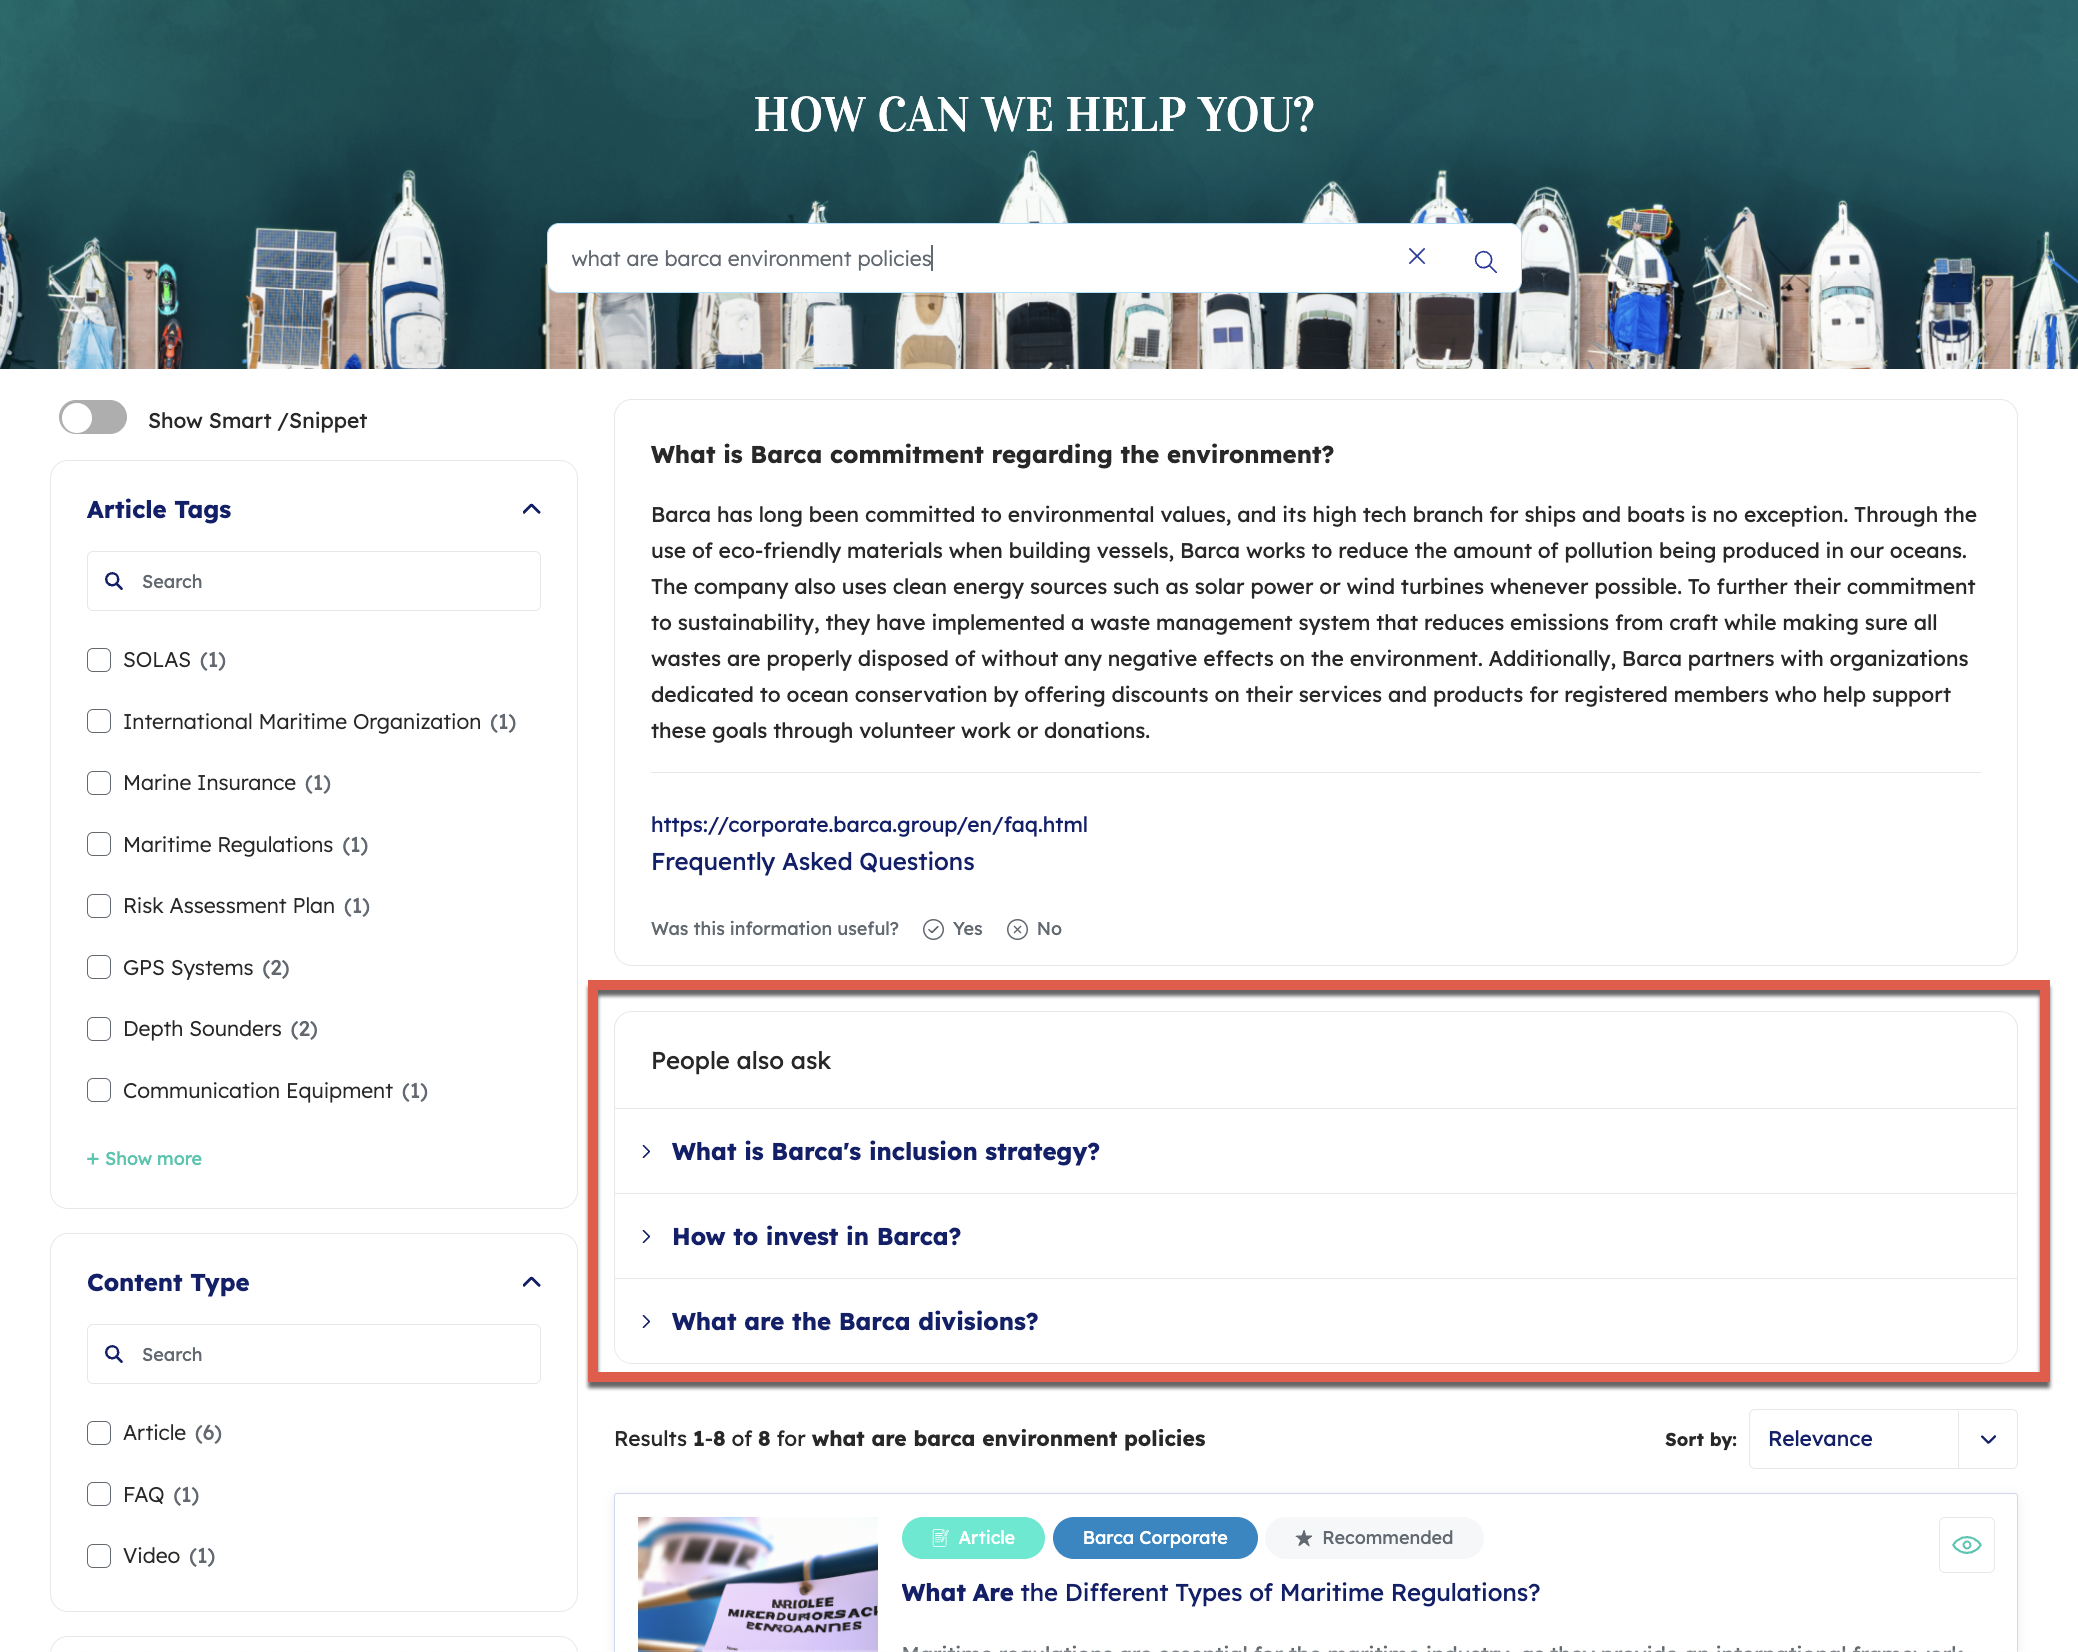
Once you’ve enabled Smart Snippets, you can click People also ask to display another recommendation box. This box contains questions related to the user’s query. The user can click a question to display its answer.
Enable Relevance Generative Answering (RGA)
Enabling Relevance Generative Answering (RGA) adds the RGA component to your search interface. This component appears above the search results list.
RGA uses generative AI technology to generate answers for natural language queries. The answers are generated based on your enterprise content and permissions, and are displayed in the search interface along with the search results. See About Relevance Generative Answering (RGA) for more information.
-
In the search page builder, select the Settings tab.
-
Under Result page, check the Relevance Generative Answering box.
-
Click Save at the upper-right corner of the builder to save your interface.
|
|
Note
When enabling RGA, you must also associate an RGA model with your search page’s query pipeline. |
Show query suggestions
Search pages support Coveo Machine Learning (Coveo ML) query suggestions. Query suggestions appear under the search box as the user types a query.
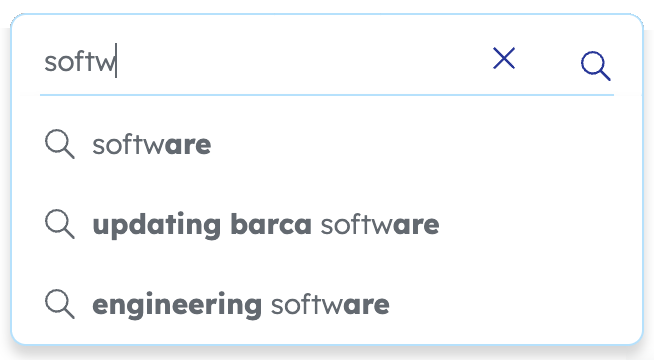
For more information, see About query suggestions.
|
|
Enabling the Show query suggestions option allows suggestions to appear under the search box as the user types a query, but only if you have a Coveo ML QS model that’s associated with your page’s main query pipeline. You can enable this option in advance even if you haven’t yet created a QS model or associated it with your main query pipeline. However, without a properly configured QS model, this option has no effect. To configure a QS model for use with your search page, see Configure query pipelines and machine learning. |
-
In the search page builder, select the Settings tab.
-
Under Search box features, select Show query suggestions.
-
Click Save at the upper-right corner of the builder to save your interface.
Show query history
When enabled, the query history appears under the search box as the user types a query. It shows the user’s previous queries.
-
In the search page builder, select the Settings tab.
-
Under Search box features, select Show query history.
-
Click Save at the upper-right corner of the builder to save your interface.
View your page live
When you’ve saved your search page, you can view it live.
In the search page builder, select the View live at the upper-right corner of the builder. The page will open in a new tab.
Share a search page
Sharing a search page makes it available to other users, for example for testing purposes.
-
In the search page builder, click
at the upper-right corner of the builder.
-
In the Share a search page panel that opens, you have several sharing options:
-
Enter the email address of the users with whom you want to share the search page. Coveo will send them an email with a link to the search page.
-
Next to Anyone at {your domain} with the link, select Can view. Once you share the link to the page, anyone logging in with an email address that belongs to your domain will be able to access it.
-
Next to Anyone with the link, select Can view. Once you share the link to the page, anyone with the link will be able to access it. This means that unexpected users may be able to access the page, if the people you share the link with also share it with others.
-
-
If you selected Can view for at least one of the options above, click Copy link to copy the link to the search page to your clipboard. This is the link that you can share with other users.
-
Click Save. Your changes apply immediately.
Delete a search page
|
|
Deleting a search page is irreversible. |
-
Ensure that the search interface you want to delete is no longer included in any page of your website or application. Otherwise, the console will display a 404 error when the browser attempts to load the script.
-
On the Search Pages (platform-ca | platform-eu | platform-au) page, click the search interface you want to delete, and then click Delete in the Action bar.
-
Click Delete to confirm.