Configuring the Admin Service After Install
Configuring the Admin Service After Install
Coveo for Sitecore (April 2017) On-Premises only
Since April 2017, it’s possible to configure the Admin Service connection parameters directly from the Coveo Search Configuration panel in the Sitecore Control panel. Therefore, if you didn’t configure it to connect to a secured Admin Service during the initial install, you can do so without having to run the installation wizard again.

To configure the Coveo Admin Service
- From your Sitecore Desktop, open the Start Menu and click Control Panel.
- Under the Coveo Search section, click Configuration.
- In the Coveo for Sitecore Configuration panel, under Admin Service Connection, click Configure.
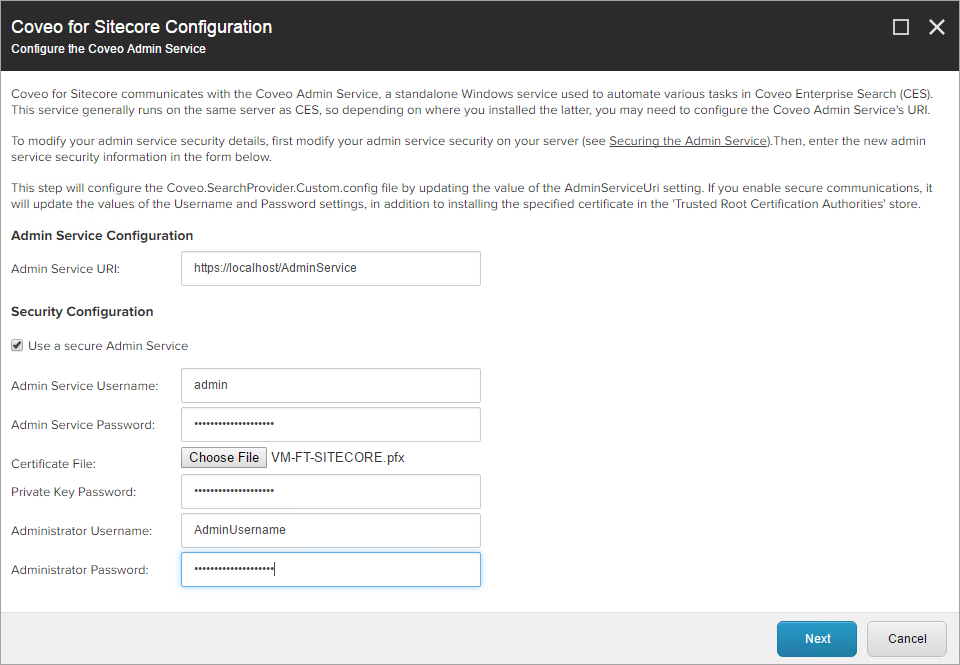
- In the Configure the Coveo Admin Service sub-panel:
- In the Admin Service Configuration section:
-
Set the Admin Service URI to the actual path of the Admin Service.
Default path for a local installation is
http://localhost/AdminServiceorhttps://localhost/AdminService
-
- In the Security Configuration section:
- Select the Use a secure Admin Service checkbox to enable security.
-
Enter the credentials for the Admin Service that you previously set during the CES 7 installation.
The admin service password entered on this screen is encrypted and saved in the
Coveo.SearchProvider.Custom.config.examplefile. -
In Certificate File, click Choose File and navigate to the .pfx certificate you exported during CES 7 installation.
Default path is
\Program Files\Coveo Enterprise Search 7 - In Private Key Password, enter the password you entered during the CES 7 installation when you exported the certificate.
- In Administrator Username and Administrator Password, enter the administrator credentials for CES 7.
- Click Next, and then click Close.
- In the Admin Service Configuration section:
- Click OK.
The Admin Service security is now correctly configured in your Coveo for Sitecore settings.
If you have problems accessing the Admin Service, see Troubleshooting.