Add the Coveo Hosted Search Page component to your site
Add the Coveo Hosted Search Page component to your site
|
|
Coveo ended support for the Coveo Hosted Search Page package in February 2023. This package should no longer be used. For recipes on how to index Adobe Experience Manager content and add search interfaces in your AEM websites, see Coveo for Adobe. |
You now have a classic hosted search page. The next step is to insert the Coveo Hosted Search Page component in a web page to pull the HTML from your classic hosted search page and inject it into the web page.
Install the package
To install the Coveo Hosted Search Page Beta package
-
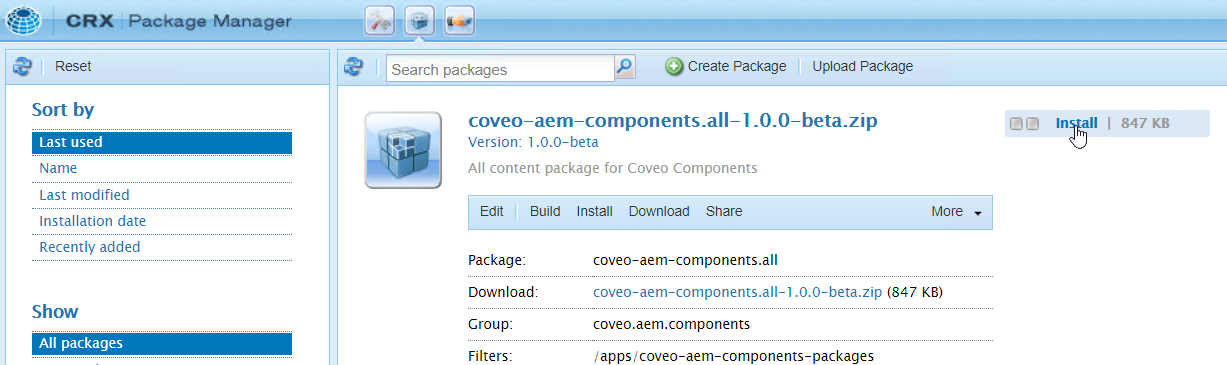
In the author instance CRX Package Manager, upload and install the
coveo-aem-components.all-<VERSION>.zippackage.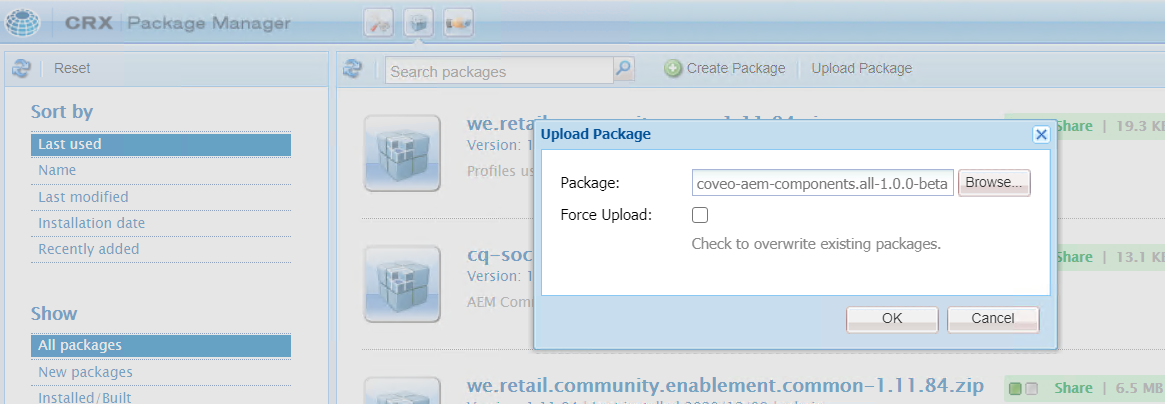
-
In order for the hosted search page to work on your publish instance, replicate the
coveo-aem-components.all-<VERSION>.zippackage.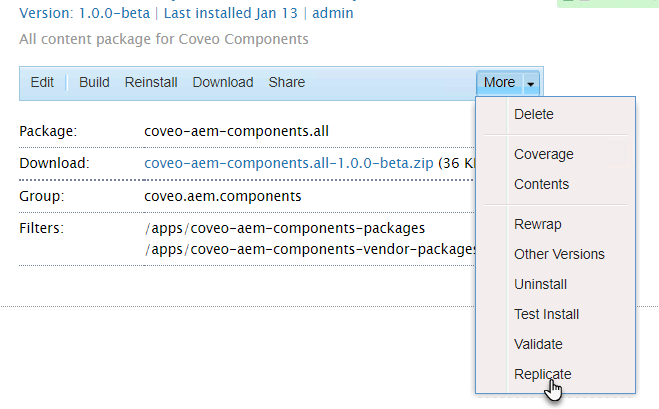
Add the component to allowed components on a template
Once the package installed, you can add the Coveo Hosted Search Page component as an allowed component on the template you’ll use to create your main search page, whether an existing template or a duplicate of an existing template.
-
In the author instance user interface, open the template you want to allow the Coveo Hosted Search Page component on.
-
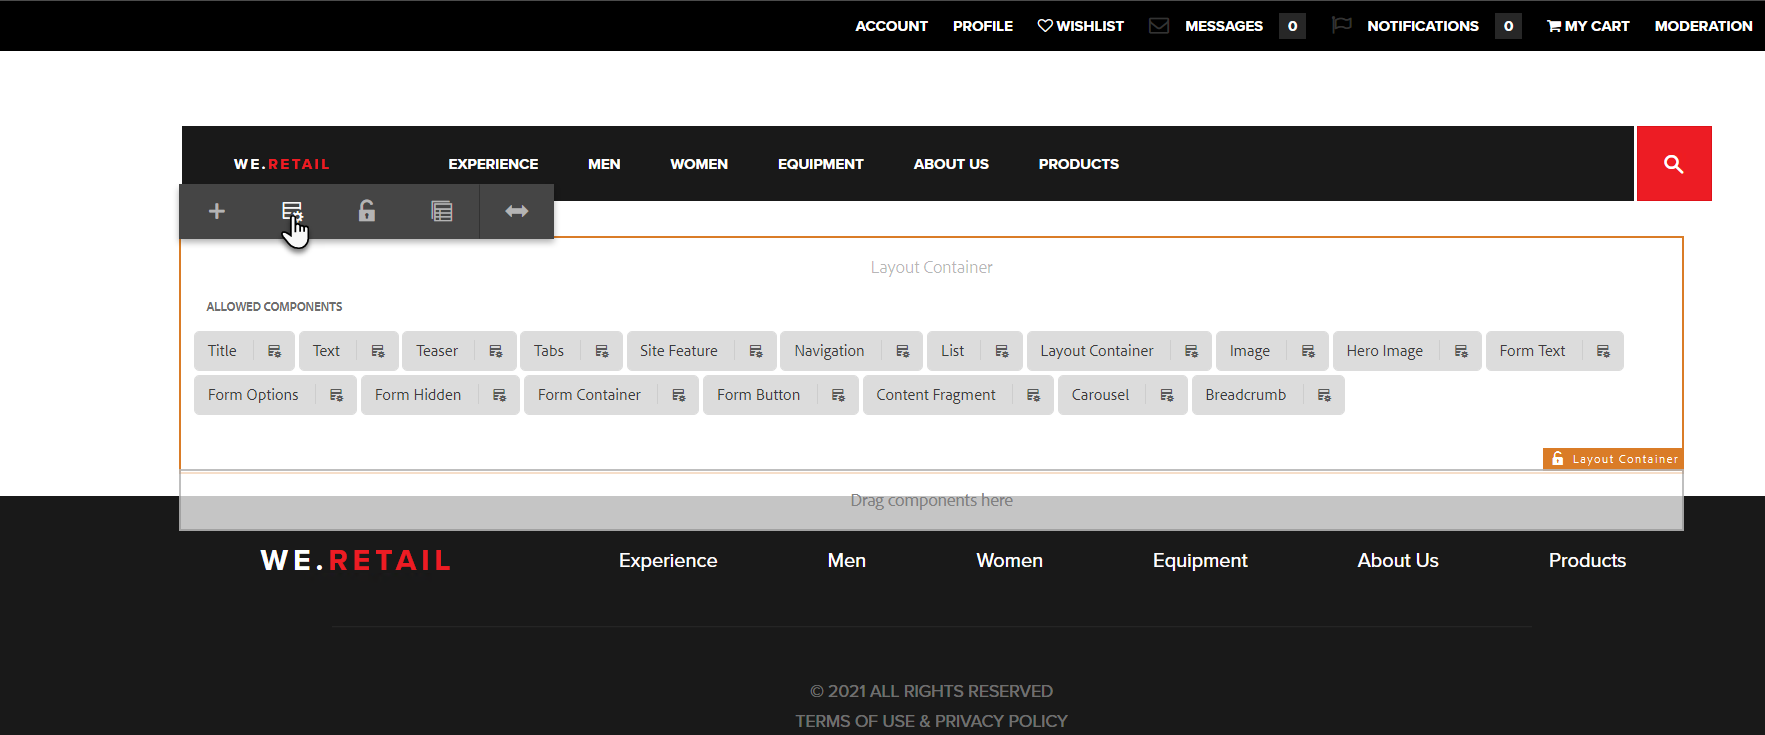
Select the Layout Container, and then select the Policy option.
-
Under Properties, on the Allowed Components tab, select Coveo Components - Content. Click
 in the upper-right corner to save your changes.
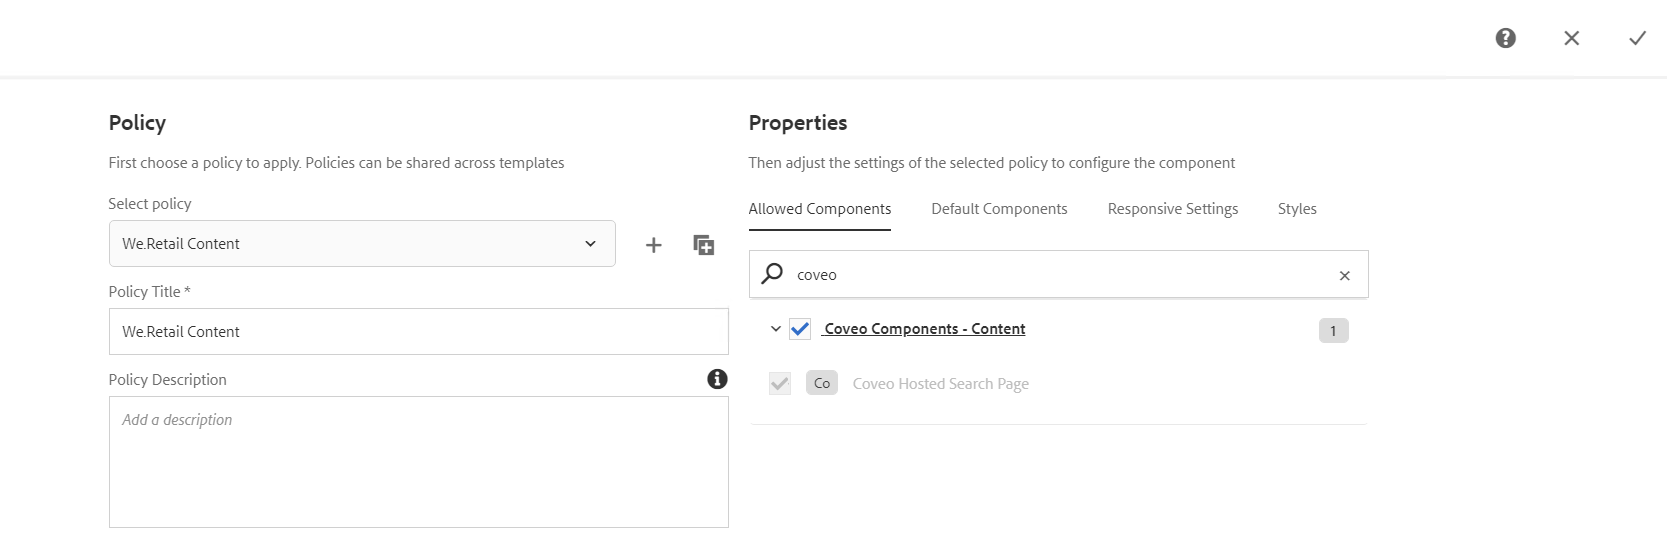
Create API keys and collect component configuration IDs
To retrieve your Coveo organization hosted search page code and to run search queries, the Coveo Hosted Search Page component needs to be configured with the following information:
-
The Coveo endpoint URI
-
Your organization ID
-
An access API key
-
A search API key
-
The classic hosted search page ID
The following steps explain how to create and configure the two API keys. While in your organization, you’ll also collect the five component configuration parameters.
-
Open the API Keys (platform-ca | platform-eu | platform-au) page in your Coveo organization.
-
Click Add key in the upper-right corner of the page.
-
In the Add an API key dialog, on the Configuration tab, set the Key name to
Access API Key.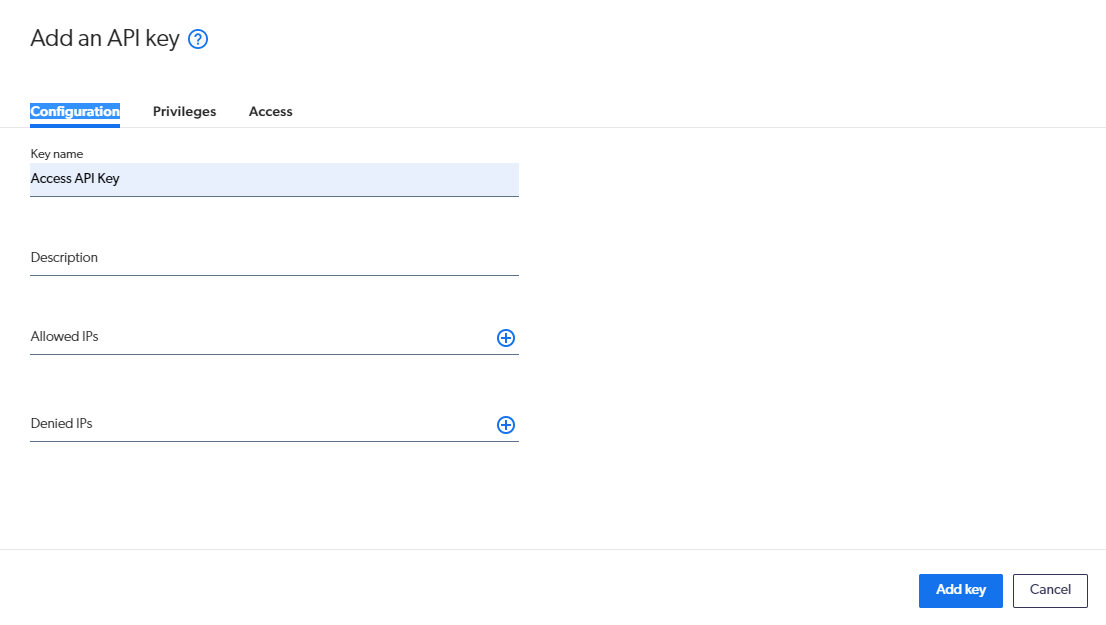
-
Select the Privileges tab.
-
Select the Search domain on the left side, and then set the Search pages resource access level to
View all.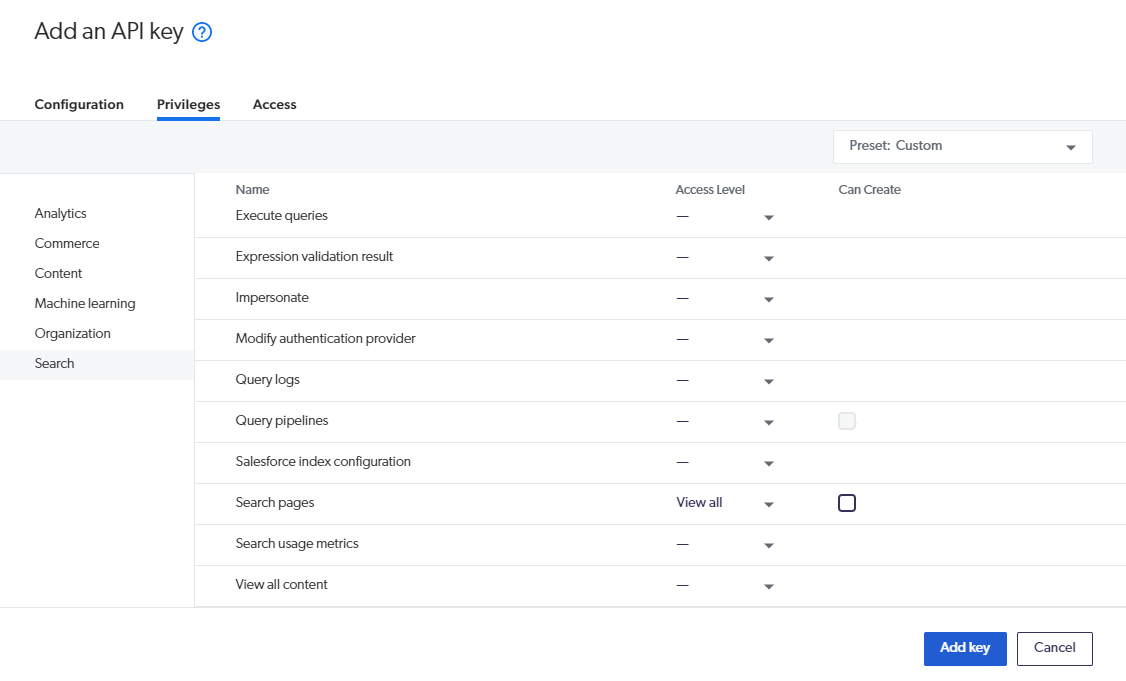
-
Click Add key.
-
In the Your API Key dialog, click Copy.
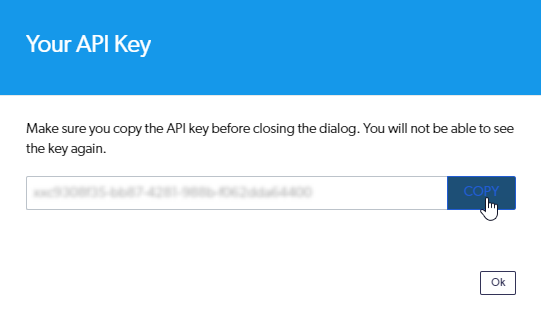
-
Paste your access API key in a safe location. This is the first of five parameters required to configure your Coveo Hosted Search Page component.
-
Repeat the previous steps to create the search API key. Name it
Search API Keyand, on the Privileges tab, provide the following access levels:Domain Resource Access level Search
Execute queries
Allowed
Search
Impersonate
Allowed
 Leading practice
To follow leading security practices, you should limit the scope of your search API key to a given search hub before clicking Add API key.

-
Copy your search API key and paste it in a safe location.
-
On the Search Pages (platform-ca | platform-eu | platform-au) page, click the classic hosted search page you want to use, and then click Copy ID in the Action bar.
-
Paste the hosted search page ID in a file so you can retrieve it later.
-
Get the organization ID from the URL and paste it in a file so you can retrieve it later.
ExampleA user is viewing the Search Pages page. The URL is
https://platform.cloud.coveo.com/admin/#/ourorgkkkybs20/search/search-pagesThe organization ID is
ourorgkkkybs20. -
Get the platform endpoint URL and paste it in a file so you can retrieve it later.
ExampleA user is viewing the Search Pages page. The URL is
https://platform.cloud.coveo.com/admin/#/ourorgkkkybs20/search/search-pagesThe platform endpoint URL is
https://platform.cloud.coveo.com.
Encrypt the API keys
We recommend that you encrypt your Coveo organization API keys in all your instances. Since encryption keys are instance specific, this can be achieved by doing one of the following:
-
(Recommended) Encrypt the Coveo organization API keys on the author instance and share the author instance encryption keys with the publish instances.
-
Encrypt the Coveo organization API keys directly in the publish instances.

Opting to encrypt Coveo organization API keys directly in the publish instances has an important drawback. You’ll need to re-encrypt your API keys each time you publish the author instance Adobe Experience Manager page, as this overwrites the Coveo Hosted Search Page component configurations on the publish instance.
To encrypt the Coveo organization API keys on the Adobe Experience Manager author instance and share the author instance encryption keys
-
In your Adobe Experience Manager instance, open page
https:<AUTHOR_DOMAIN>/system/console/crypto. -
Paste your
Access API Keyin the Plain Text field. -
Click Protect.
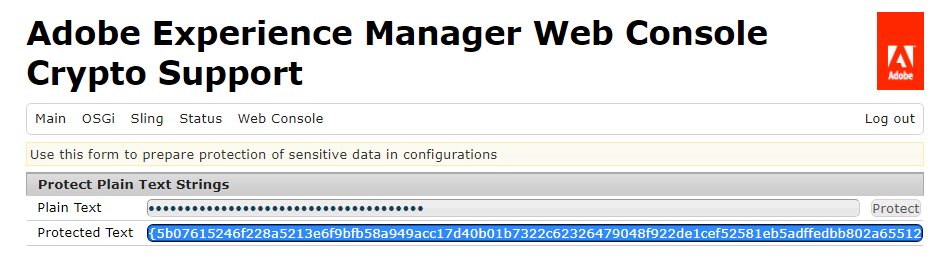
-
Copy and paste the content of the Protected Text field in the same location you used for the other Coveo Hosted Search Page component configuration parameters.
-
Repeat the previous steps but, this time, to encrypt the
Search API Key. -
Copy the
hmacandmasterfiles of thecom.adobe.granite.crypto.filebundle from the author instance to the publish instances. If necessary, see Make Sure You Properly Replicate Encryption Keys When Needed for further details.
Add and configure the component
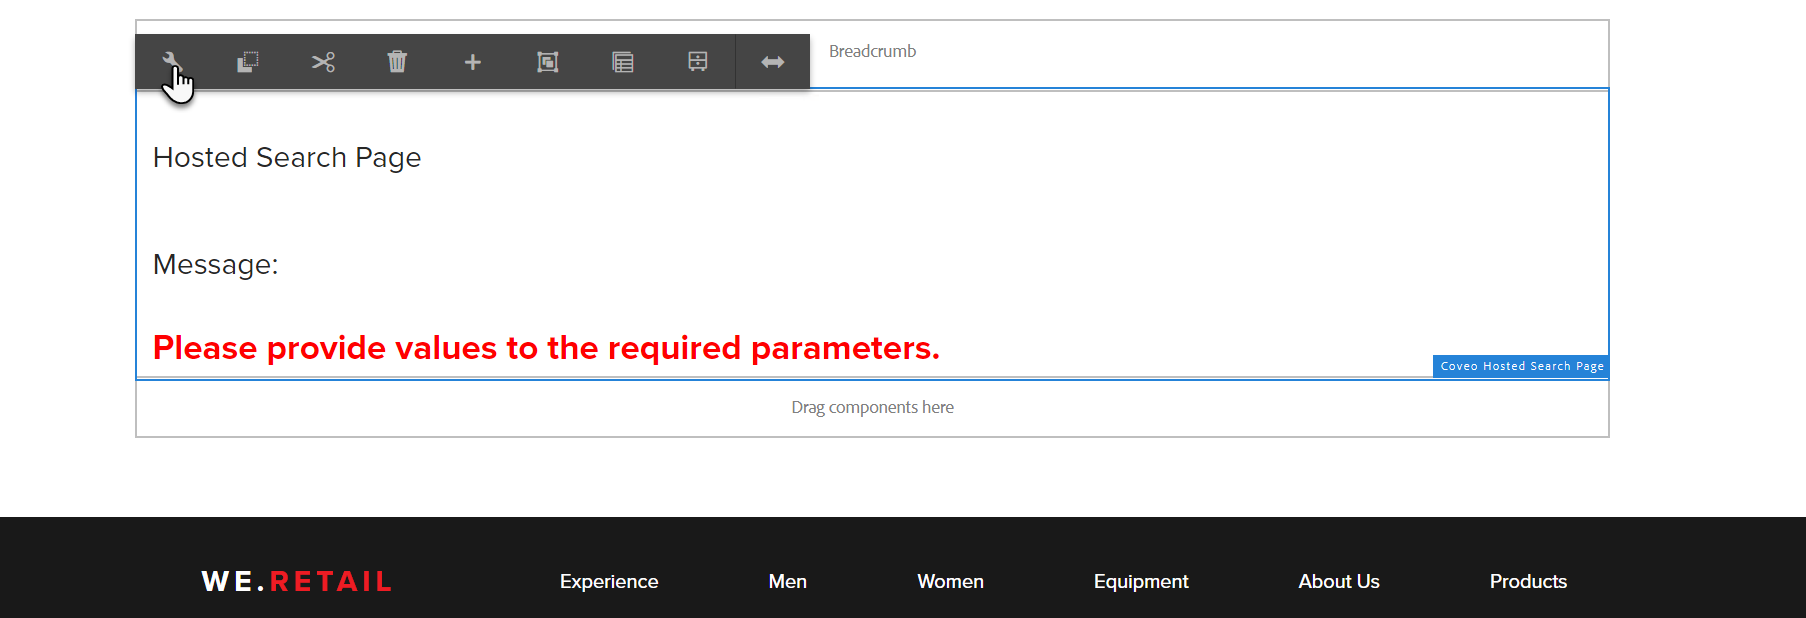
You can now create a page using the template in which you allowed the Coveo Hosted Search Page component. The Coveo Hosted Search Page component also needs to be configured with the information you collected to access your Coveo organization hosted search page.
The following instructions assume that you’ve replicated the encryption keys from your author instance to your publish instances.
-
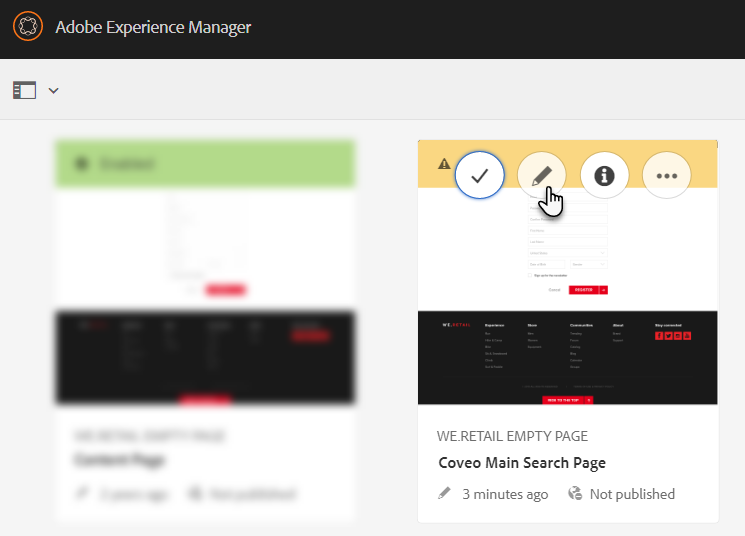
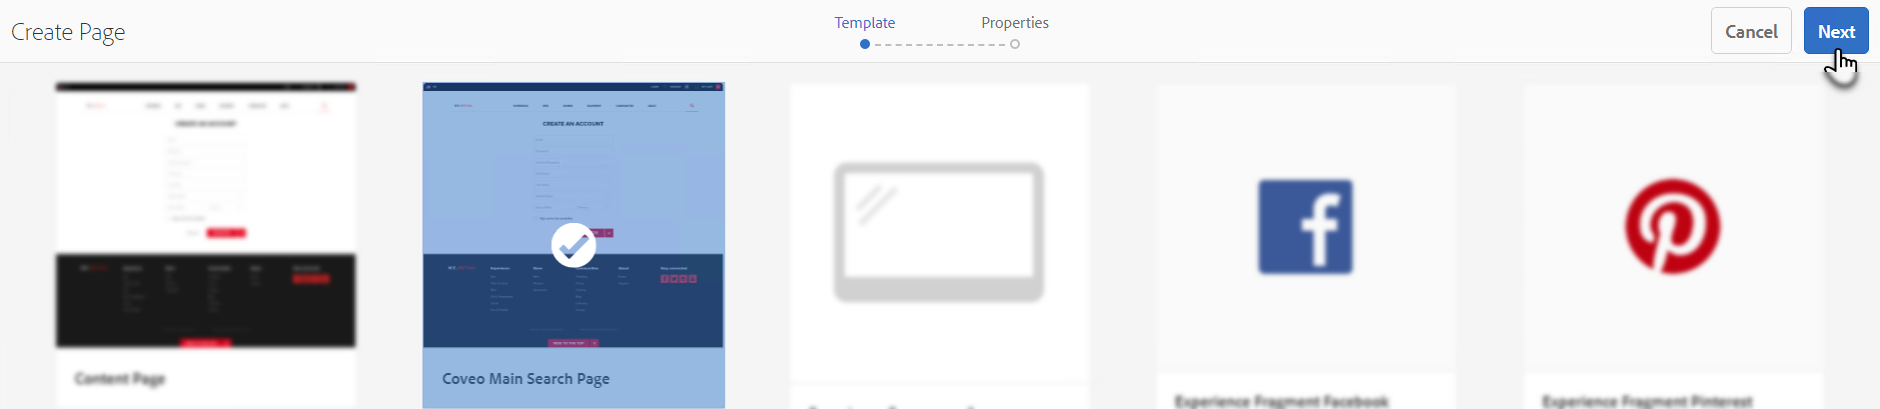
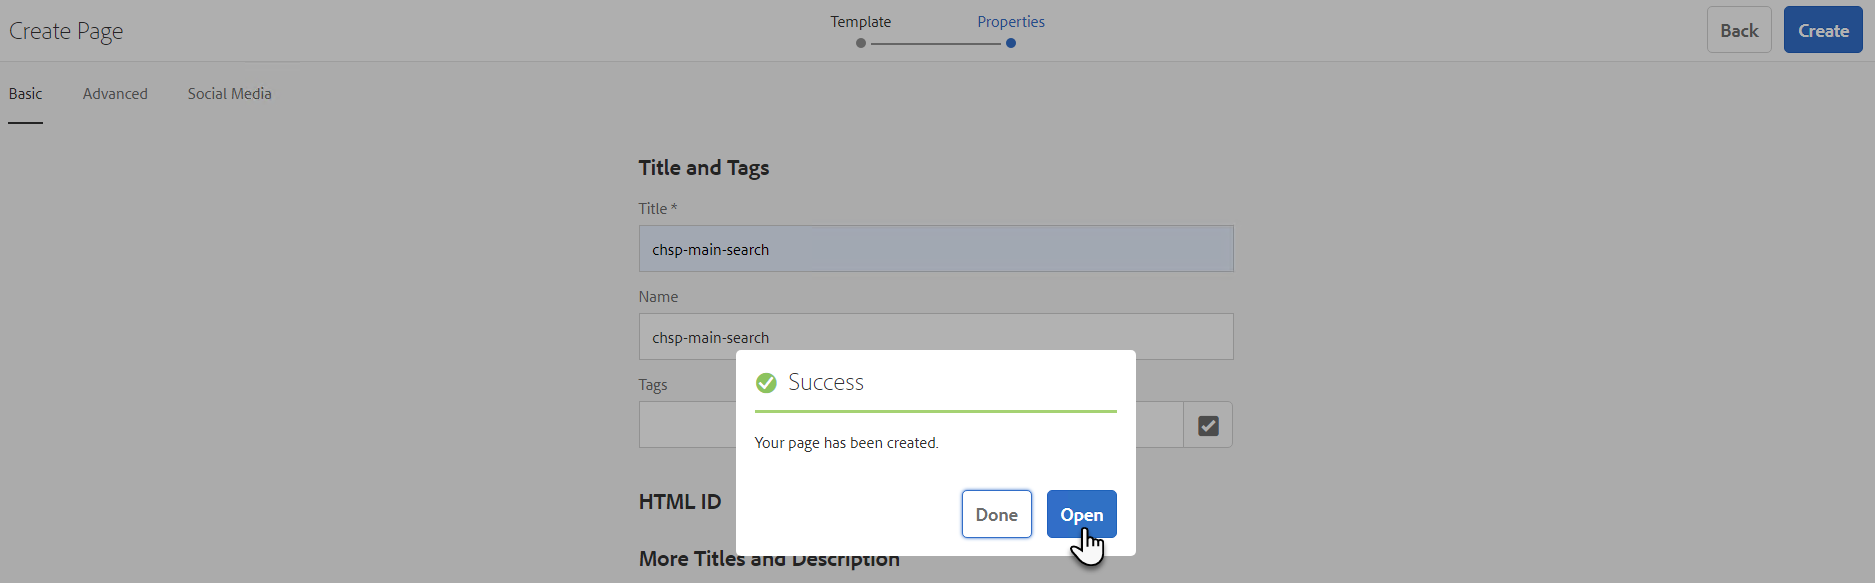
In the author instance, in the Adobe Experience Manager UI, create a page using the template you created or updated.
-
Once created, open your page.
-
On the page, select the Layout Container, and then select Insert component.

-
In the Insert New Component dialog, select the Coveo Hosted Search Page component.
-
On the page, select the Coveo Hosted Search Page component, and then select the Configure option.
-
In the Properties dialog, use the parameter values you copied in the Create API keys and collect component configuration IDs section to set the component property values. Click
to save your changes.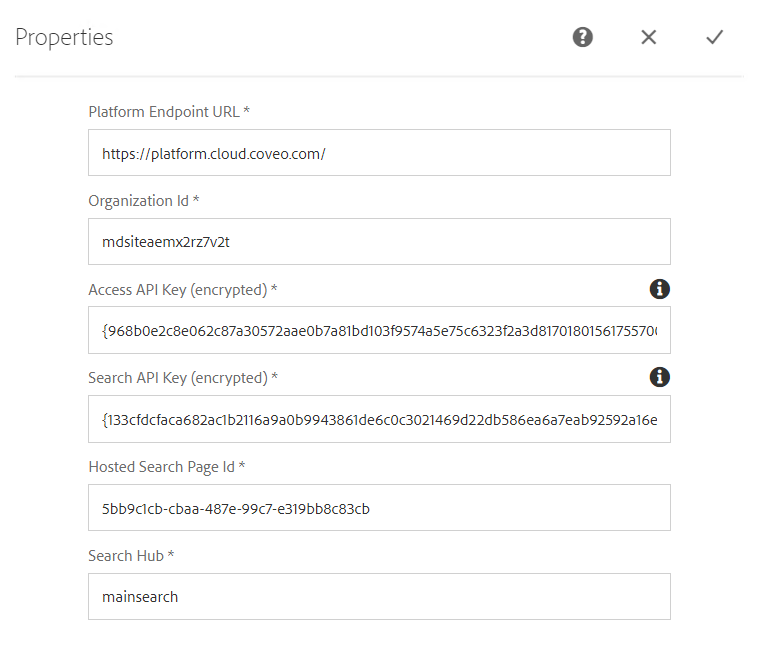
Set a meaningful search hub value (see Set the search hub).
-
Refresh your page.
You should now see your Coveo organization hosted search page in your Adobe Experience Manager web page.

Ensure the search result hyperlink URLs reflect the DNS of your public site.
If, instead, you see an error message, start by checking the following:
-
Ensure the
Hosted Search Page Idproperty value you set is your Coveo organization hosted search page ID, and not its name. -
Ensure your API key privileges are set as specified in the Create API Keys and Collect Component Configuration IDs section.
-
-
Publish your page.
Your published page should render without errors. If there are errors, ensure that there isn’t an API key encryption issue.
What’s next?
All the Coveo magic happens behind the scenes, between the moment a user performs a search in a Coveo-powered search interface and when the results are displayed. You’ll want to leverage the power of Coveo to the fullest extent, especially the Query pipeline and Coveo Machine Learning (ML) features.