Creating a Hierarchical Facet Component Using the Coveo for Sitecore Legacy Search UI Framework
Creating a Hierarchical Facet Component Using the Coveo for Sitecore Legacy Search UI Framework
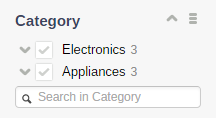
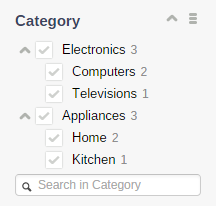
Coveo for Sitecore comes shipped with a few types of facet by default. These facets are implemented using the standard Facet component coming from the JavaScript Search Framework V1.0 . It turns out that the Framework also has a HierarchicalFacet component. However, Coveo for Sitecore doesn’t implement anything equivalent. The reason is that there’s no field that matches the required value format by default, requiring you to manually create a computed field. This tutorial demonstrates how to create the required classes, files, and items. Specifically, you will learn how to create a category and subcategory hierarchical facet, as shown below:
Requirements
This tutorial assumes that:
-
Your Sitecore instance is installed in
C:\inetpub\wwwroot\<SITECORE_INSTANCE_NAME>\. -
You installed the Coveo for Sitecore 4.0 or newer package and integrated it into one of your Sitecore layouts.
-
You have items with the Category and Subcategory fields of type
Single-Line Text.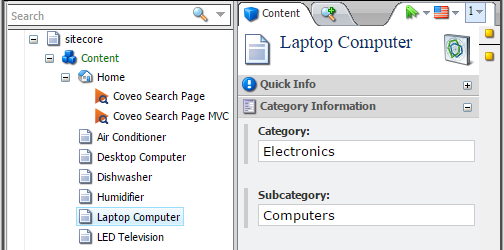
We recommend that you use project-specific folders for this tutorial.
The steps below use Custom as the folder name .
Step 1: Create the Computed Field Class
To display a hierarchical facet, the JavaScript Search Framework needs a field with its data in a specific format. To generate the required data format, a computed field must be created.
-
Create a new C# project named
Coveo.Customthat targets the .Net Framework 4.5. -
Add references to the
Sitecore.ContentSearch,Coveo.Framework, andCoveo.SearchProviderBaseassemblies located in the<SITECORE_INSTANCE_ROOT>\Website\binfolder. -
Create a new class named
HierarchicalCategoryComputedFieldthat inherits from theConfigurableComputedFieldclass as in the code sample below.using System; using Coveo.Framework.CNL; using Coveo.Framework.Items; using Coveo.SearchProvider.ComputedFields; using Sitecore.ContentSearch; namespace Coveo.Custom { public class HierarchicalCategoryComputedField : ConfigurableComputedField { /// <inheritDoc /> public override object ComputeFieldValue(IIndexable p_Indexable) { Precondition.NotNull(p_Indexable, () => () => p_Indexable); IItem item = new ItemWrapper(new IndexableWrapper(p_Indexable)); string hierarchicalCategory = null; string categoryFieldValue = item.GetFieldValue("Category"); if (!String.IsNullOrEmpty(categoryFieldValue)) { hierarchicalCategory = categoryFieldValue; string subcategoryFieldValue = item.GetFieldValue("Subcategory"); if (!String.IsNullOrEmpty(subcategoryFieldValue)) { hierarchicalCategory += ";" + categoryFieldValue + "|" + subcategoryFieldValue; } } return hierarchicalCategory; } } } -
Compile the project.
-
Copy the resulting assembly (
Coveo.Custom.dll) to theC:\inetpub\wwwroot\Instance\Website\binfolder.
Step 2: Configure the Computed Field
To have a field that contains the hierarchical category with the required format, you must configure it in Coveo for Sitecore.
-
Using a text editor, open the
<SITECORE_INSTANCE_ROOT>\Website\App_config\Include\Coveo.SearchProvider.Custom.configfile. -
Locate the
defaultIndexConfigurationelement. -
Add a computed field named
hierarchicalcategory.<defaultIndexConfiguration type="Coveo.Framework.Configuration.CoveoIndexConfiguration, Coveo.Framework"> <fields hint="raw:AddComputedIndexField"> <field fieldName="hierarchicalcategory">Coveo.Custom.HierarchicalCategoryComputedField, Coveo.Custom</field> </fields> </defaultIndexConfiguration> -
Add the
hierarchicalcategoryfield as a facet and multi-value field in thefieldMap.<defaultIndexConfiguration type="Coveo.Framework.Configuration.CoveoIndexConfiguration, Coveo.Framework"> <fieldMap type="Coveo.Framework.Fields.CoveoFieldMap, Coveo.Framework"> <fieldNames hint="raw:AddFieldByFieldName"> <fieldType fieldName="hierarchicalcategory" isFacet="true" isMultiValue="true" settingType="Coveo.Framework.Configuration.FieldConfiguration, Coveo.Framework" /> </fieldNames> </fieldMap> </defaultIndexConfiguration> -
Save and close the file.
Step 3: Re-Index the Items
Sitecore items need to be re-indexed in order to compute the new field and store its value in the Coveo index.
-
Re-index only the sections of the Sitecore Content Tree that you know contain the items with the
CategoryandSubcategoryfields. You can also optionally rebuild your entire search index (see Coveo for Sitecore Indexing Guide). -
Validate that the computed field now exists in the Coveo index:
-
Open the CES Administration Tool.
-
Access the Index Browser (Content > Index Browser).
-
In the Coveo index, locate a Sitecore item that contains the
CategoryandSubcategoryfields. These fields should be named something like@fcategory12345and@fsubcategory12345(see Finding Documents Using the Index Browser). -
Examine the other fields of this item by expanding the Details > Fields tab.
-
Validate that the hierarchicalcategory field now exists.
-
Step 4: Create the Layout and View Files
To display a hierarchical facet, the JavaScript Search Framework needs a div element with CoveoHierarchicalFacet as the value of its class attribute.
In Coveo for Sitecore, facet components are implemented using a layout (Web Forms) or a view (MVC) file.
You must also create such files when you implement a hierarchical facet.
Web Forms
-
Access your Sitecore instance
layoutsfolder (<SITECORE_INSTANCE_ROOT>\Website\layouts). -
Create a subfolder named
Custom. -
Copy the
<SITECORE_INSTANCE_ROOT>\Website\layouts\Coveo\CoveoFacet.ascxsublayout file to theCustomlayouts folder. -
Rename it to
CustomCoveoHierarchicalFacet.ascx. -
Open it in a text editor.
-
Change the value of the
classattribute fromCoveoFacettoCoveoHierarchicalFacetas in the code sample below.<div class="CoveoHierarchicalFacet" data-title='<%= Model.Title %>' ...></div> -
Save and close the file.
MVC
-
Access your Sitecore instance
viewsfolder (<SITECORE_INSTANCE_ROOT>\Website\Views). -
Create a subfolder named
Custom. -
Copy the
<SITECORE_INSTANCE_ROOT>\Website\Views\Coveo\Web.configfile to theCustomviews folder. -
Copy the
<SITECORE_INSTANCE_ROOT>\Website\Views\Coveo\FacetView.cshtmlview file to theCustomviews folder. -
Rename the copied file to
CustomHierarchicalFacetView.cshtml. -
Open the file in a text editor.
-
Change the value of the
classattribute fromCoveoFacettoCoveoHierarchicalFacetas in the code sample below.<div class="CoveoHierarchicalFacet" data-title='@Model.Title' ...></div> -
Save and close the file.
Step 5: Create the Sublayout and Rendering Items
To be able to add and configure hierarchical facets in a search page layout details, a sublayout (Web Forms) and a rendering (MVC) must be created.
-
Log into the Sitecore Desktop.
-
Open the Content Editor (Sitecore Start Menu > Content Editor).
-
For Web Forms:
-
In the left side of the panel (Content Tree), select the
/sitecore/Layout/Sublayoutsitem. -
Create a sublayout folder named
Custom. -
Copy the
/sitecore/Layout/Sublayouts/Coveo/Coveo Facetsublayout to theCustomsublayout folder (Right-click > Copying > Copy To). -
Rename the copied sublayout to
Custom Coveo Hierarchical Facet.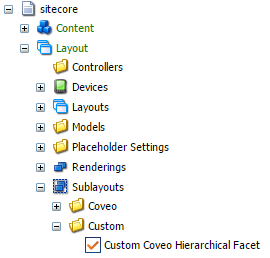
-
Select the
/sitecore/Layout/Sublayouts/Custom/Custom Coveo Hierarchical Facetsublayout. -
In the right side of the panel, select the Content tab.
-
Change the value of the layout Ascx file field to
/layouts/Custom/CustomCoveoHierarchicalFacet.ascx.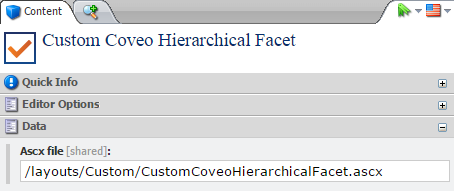
-
Save the sublayout.
-
-
For MVC:
-
In the left side of the panel (Content Tree), select the
/sitecore/Layout/Renderingsitem. -
Create a rendering folder named
Custom. -
Copy the
/sitecore/Layout/Renderings/Coveo/Coveo Facet Viewrendering to theCustomrendering folder (Right click > Copying > Copy To). -
Rename the copied rendering to
Custom Coveo Hierarchical Facet View.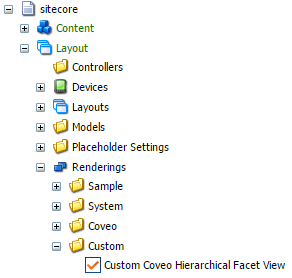
-
Select the
/sitecore/Layout/Renderings/Custom/Custom Coveo Hierarchical Facet Viewrendering. -
In the right side of the panel, select the Content tab.
-
Change the value of the view Path field to
/Views/Custom/CustomHierarchicalFacetView.cshtml.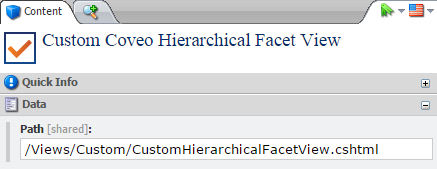
-
Save the rendering.
-
Step 6: Create the Facet Item
To be able to select the hierarchicalcategory field in the hierarchical facet sublayout and rendering properties editor, a facet item must be created.
-
In the left side of the panel (Content Tree), expand the
/sitecore/System/Settings/Buckets/Facetsitem. -
Duplicate the
/sitecore/System/Settings/Buckets/Facets/Authoritem (Right-click > Duplicate) and name itHierarchical Category.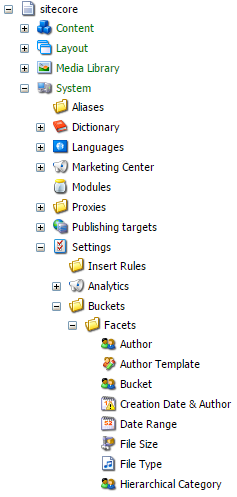
-
In the right side of the panel, select the Content tab.
-
Change the item name (Facet > Name) to
Hierarchical Category. -
Change the item field name (Facet > Field Name) to
hierarchicalcategory.
-
Save the item.
Step 7: Add the Hierarchical Facet to the Search Page
Facets can be added to a Coveo-powered search page from the Page Editor or the Layout Details dialog.
In the Page Editor, the coveo-facets placeholder is configured in such a way that it only suggests a predetermined set of facets to add (that is, those that come shipped with Coveo for Sitecore).
For this reason, hierarchical facets can only be added to a Coveo-powered search page from the Layout Details dialog.
However, once added, they can be configured and re-ordered from the Page Editor.
-
In the left side of the panel (Content Tree), select the Coveo-Powered Search Page item in which you want to add the hierarchical facet.
-
Open the Layout Details dialog of this item (Presentation > Details).
-
For the Default device, select Edit under the list of controls.
-
In the Device Editor dialog, under Controls, click Add.
-
In the Select a Rendering dialog, select the appropriate rendering and placeholder.
-
Web Forms
-
Rendering:
/Sublayouts/Custom/Custom Coveo Hierarchical Facet -
Placeholder name:
/coveo-search/coveo-facets
-
-
MVC
-
Rendering:
/Sublayouts/Custom/Custom Coveo Hierarchical Facet View -
Placeholder name:
/coveo-search-mvc/coveo-facets-mvc
-
-
-
Ensure that the Open the Properties dialog box immediately checkbox is checked.
-
Click Select.
-
In the properties dialog box:
-
Set the title (Basic Settings > Title) to
Category. -
Set the field (Basic Settings > Field) to
Hierarchical Category. -
Change the number of values ( Basic Settings > Number of Values ) to
10000to ensure that all the categories are listed by the facet.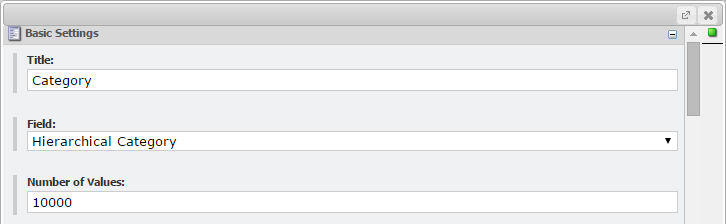
-
Click OK to close the properties dialog box.
-
-
Click OK to close the Device Editor dialog.
-
Click OK to close the Layout Details dialog.
-
Validate the result by opening the Coveo-Powered Search Page in Preview mode (Publish > Preview) or Edit mode (Publish > Page Editor).