Upgrading from July 2016 to September 2016
Upgrading from July 2016 to September 2016
|
|
For the best Coveo for Sitecore experience, always follow the Leading Practices When Upgrading Coveo for Sitecore. |
|
|
This release of Coveo for Sitecore includes the Open-Source version of the JavaScript Search Framework. Due to the many changes brought by this version, you’re strongly encouraged to revise your pages and components that rely on the Coveo JavaScript Framework. |
This section describes how to upgrade Coveo for Sitecore 4.0 from the July 2016 to the September 2016 release.
Step 1: Upgrade Coveo Services
-
Upgrade Coveo Enterprise Search (CES) to the September 2016 release. For more details, see Upgrading CES.
-
Upgrade Coveo Search API to the May 2016 release (8.0.1127). Follow the normal steps of the installation wizard.
Step 2: Upgrade Coveo for Sitecore
|
|
Ensure that the Microsoft MVC security update MS14-059 is installed on every Sitecore host in your environment. |
|
|
If you’re using the Coveo Admin Service in secure mode, read this notice before installing the package. In the |
-
Log into the Sitecore Desktop.
-
Access the Installation Wizard (Sitecore Start Menu > Development Tools > Installation Wizard).
-
Install the Coveo for Sitecore .zip package.
-
When prompted to overwrite files, click Yes to all.
-
When prompted to overwrite items, select Overwrite, then click Apply to all.
 Note
NoteYou might be prompted twice with this question. Select the Overwrite option and click Apply to all both times.
-
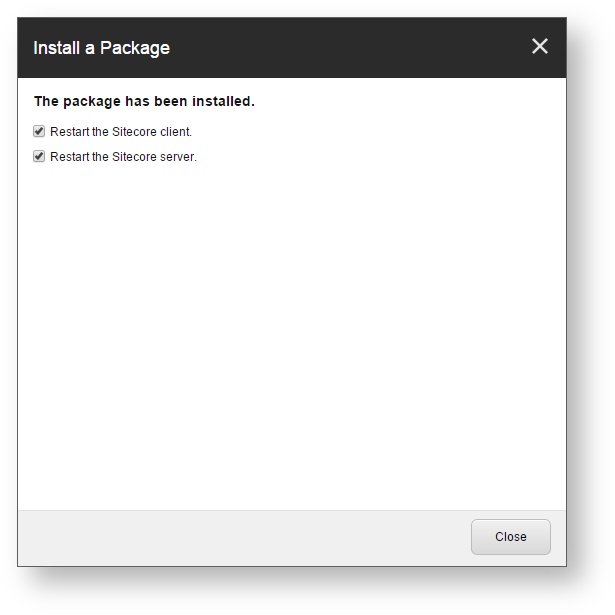
Once the installation is completed, make sure that you restart both the Sitecore client and server.
Step 3: Manually Update the Coveo Search Provider Configuration File
Merging Your Modifications into the Configuration Files
Since upgrading Coveo for Sitecore modifies the Coveo Search Provider configuration files (Coveo.SearchProvider.config.example and Coveo.SearchProvider.Custom.config.example) with the latest fixes and enhancements, you need to manually merge these modifications into your current configuration files (Coveo.SearchProvider.config and Coveo.SearchProvider.Custom.config).
This method allows you to keep your own customization intact, while still benefiting from the latest enhancements brought in the product.
You can use a merge tool such as WinMerge to do that.
Step 1: Upgrade Coveo for Sitecore
|
|
Ensure that the Microsoft MVC security update MS14-059 is installed on every Sitecore host in your environment. |
-
Log into the Sitecore Desktop.
-
Access the Installation Wizard (Sitecore Start Menu > Development Tools > Installation Wizard).
-
Install the Coveo for Sitecore .zip package.
-
When prompted to overwrite files, click Yes to all.
-
When prompted to overwrite items, select Overwrite, then click Apply to all.
NoteYou might be prompted twice with this question. Select the Overwrite option and click Apply to all both times.
-
Once the installation is completed, make sure that you restart both the Sitecore client and server.
Step 2: Manually Update the Coveo Search Provider Configuration File
Merging Your Modifications into the Configuration Files
Since upgrading Coveo for Sitecore modifies the Coveo Search Provider configuration files (Coveo.SearchProvider.config.example and Coveo.SearchProvider.Custom.config.example) with the latest fixes and enhancements, you need to manually merge these modifications into your current configuration files (Coveo.SearchProvider.config and Coveo.SearchProvider.Custom.config).
This method allows you to keep your own customization intact, while still benefiting from the latest enhancements brought in the product.
You can use a merge tool such as WinMerge to do that.
Modify Your Search Pages Without Tab Sections
There’s a known issue with the new Coveo Search UI, where Coveo-Powered Search Pages without a tab section but with facets fail to load.
To learn how to quickly fix this issue, see Coveo-powered search page fails to load after upgrade.
Manually Modify the Mobile Search Components
The Coveo for Sitecore JavaScript UI has been modified, leading the previous Mobile search component to become incomplete.
If you were relying on a copy of the CoveoSearchMobile.aspx or SearchViewMobile.cshtml for your mobile pages, you need to modify them.
The CoveoSearchMobile.aspx is by default located under <Sitecore instance>\Website\layouts\Coveo, and the SearchViewMobile.cshtml under <Sitecore instance>\Website\Views\Coveo.
Within the <div id="search"> element, add the following line.
data-enable-automatic-responsive-mode="false"Manually Modify the Configuration Files
The following modifications detail what has changed between the July 2016 and September 2016 releases in the .example files.
Coveo.SearchProvider.config
In the pipelines node, after the getContentEditorWarnings pipeline, add the following element:
<startAnalytics>
  <!-- The ExcludeCoveoUserAgentProcessor stops the pipeline if the request comes from the Coveo user agent -->
  <processor patch:before="*[1]" type="Coveo.Analytics.Processors.ExcludeCoveoUserAgentProcessor, Coveo.Analytics" />
</startAnalytics>
In the delay in the requirementsInvalidateDelay node to 60.
<requirementsInvalidateDelay>60</requirementsInvalidateDelay>At the end of the conversionTypes node, add the following conversion types:
<conversionType inputType="System.Single" type="Coveo.Framework.Conversion.FloatValueConverter, Coveo.Framework" />
<conversionType inputType="System.Decimal" type="Coveo.Framework.Conversion.DecimalValueConverter, Coveo.Framework" />
<conversionType inputType="System.Double" type="Coveo.Framework.Conversion.DoubleValueConverter, Coveo.Framework" />
Coveo.SearchProvider.Custom.config
Replace the log4net node with this one. Keep in mind that this section is commented by default.
<log4net>
  <appender name="CoveoLogger" type="log4net.Appender.RollingFileAppender, Sitecore.Logging">
    <file value="$(dataFolder)/logs/Coveo.Search" />
    <appendToFile value="true" />
    <rollingStyle value="Composite" />
    <datePattern value=".yyyyMMdd'.txt'" />
    <staticLogFileName value="false" />
    <maxSizeRollBackups value="20" />
    <maximumFileSize value="250MB" />
    <layout type="log4net.Layout.PatternLayout">
      <conversionPattern value="%4t %d{ABSOLUTE} %l %-5p %m%n" />
    </layout>
  </appender>
  <logger name="Coveo" additivity="false">
    <level value="INFO" />
    <appender-ref ref="CoveoLogger" />
  </logger>
</log4net>
Coveo.UI.Controls.config
In the CoveoAnalyticsPipeline node, before the TrackAnalyticsEventProcessor processor, add the following two processors:
<processor mode="on" type="Coveo.SearchProvider.Processors.HandleErrorEventsProcessor, Coveo.SearchProviderBase" />
<processor mode="on" type="Coveo.SearchProvider.Processors.HandleEventsToIgnoreProcessor, Coveo.SearchProviderBase" />
SwitchMasterToWeb.Coveo.config
Under the sitecore/scheduling node, remove the following element:
<agent name="CoveoCleanUpAfterRebuild">
  <patch:delete />
</agent>