Updating Coveo for Sitecore Settings
Updating Coveo for Sitecore Settings
|
|
Note
This feature is experimental and is subject to change. |
The Coveo Cloud Manager allows you to modify your Coveo organization settings. Typically, you will use this feature either to change the Coveo organization your Sitecore instance is linked to or to modify indexing settings.
Changing Your Coveo Organization
To change your Coveo organization
-
Access the Configuration section of the Coveo Cloud Manager through the following URL:
http://<INSTANCE_HOSTNAME>/coveo/command-center/index.html#configuration/.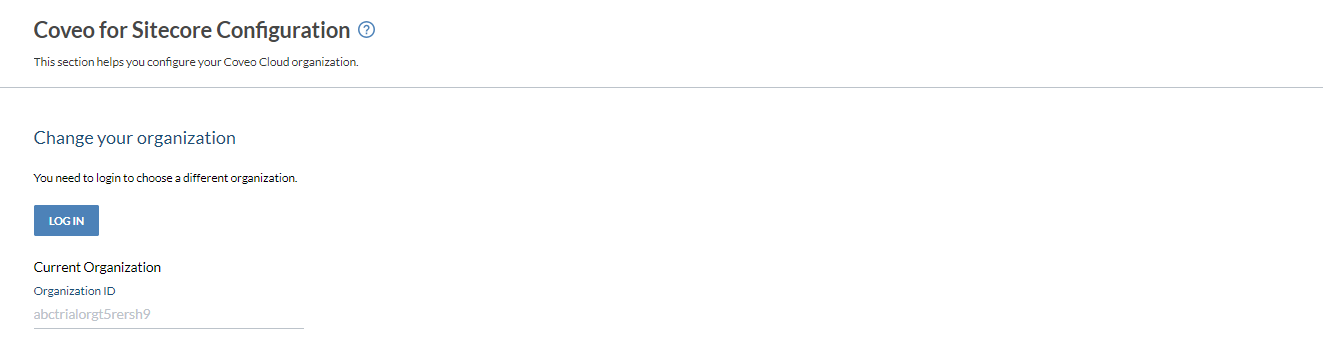
-
Click Log In.
-
Follow the instructions shown on screen to log into the Coveo Platform using your preferred identity provider.
-
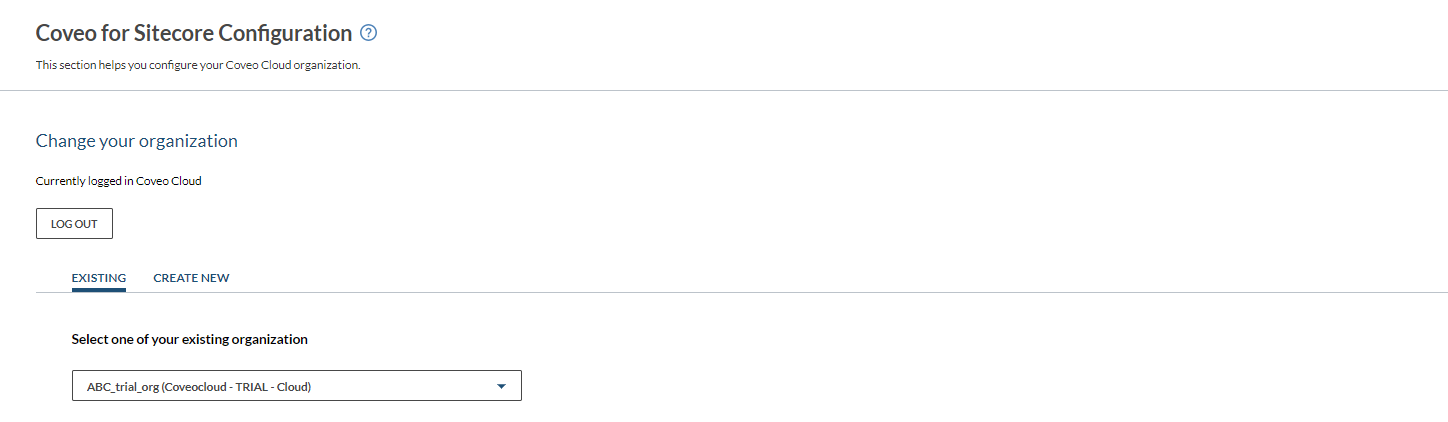
Select or create your Coveo organization.
-
To select an existing organization, in the Change your organization section, under the Existing tab, select the appropriate organization name from the dropdown menu.
-
To create a new organization
-
In the Change your organization section, select the Create New tab.
-
Type the name you want in the Organization name field.

While you can always change your organization display name later in the Coveo Administration Console under Settings > Organization > Profile, be aware that the original name value you specify when creating an organization will forever be part of the unique and permanent ID of that organization.
-
-
-
Select the Trial type that matches your needs (see Pro and Enterprise Edition Features).
-
By default, your Configure options section settings are carried over from your previous Coveo organization to the current one.
-
If you need to change these settings as well, proceed to Modifying Your Indexing Settings.
-
If you want to keep the settings in the Configure options section such as they are, click Apply and Restart.
 Notes
Notes-
Allow 15 to 30 minutes for a new Coveo organization to be provisioned.
-
When a Coveo Cloud Trial organization has been idle for some time, it’s paused automatically. If you have selected an existing organization that has been idle for a while, the following dialog box will be displayed when you reload the page:
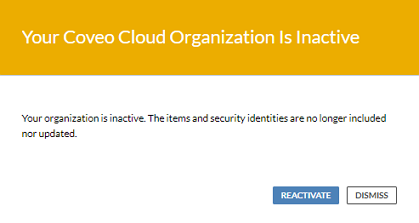
You can click Reactivate in the dialog box to resume using your organization.
You can also reactivate your organization by logging in to the Coveo Administration Console.
-
-
Modifying Your Indexing Settings
-
In the Configure options section, specify your new settings.
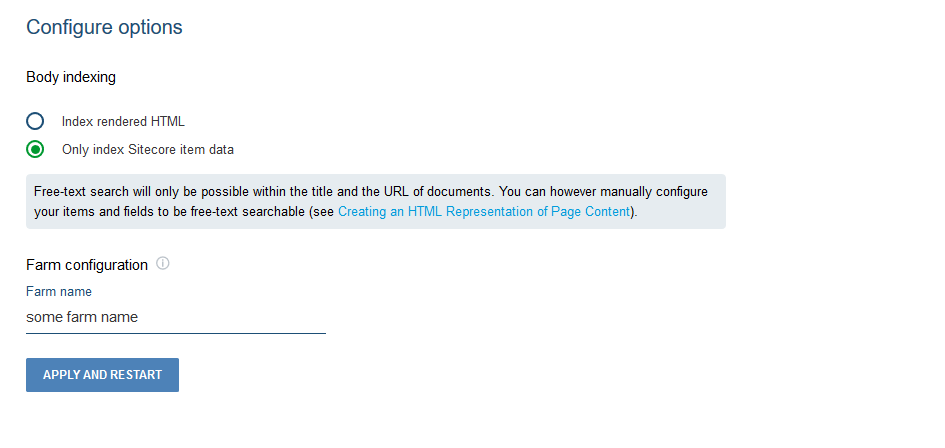
Further details for each option are provided below.
-
Body indexing: Allows you to select whether the rendered HTML should be indexed.
-
Farm configuration: Allows you to specify a farm name in order to refer to resources such as sources and security identity providers with coherent names.
-
-
Click Apply and Restart.
NoteSince Coveo for Sitecore configuration files are updated, the Sitecore instance must be restarted.
Modifying Your Security Settings
-
Access the Security section of the Coveo Cloud Manager through the following URL:
http://<INSTANCE_HOSTNAME>/coveo/command-center/index.html#security/. -
At the top of the security page, specify your new settings.
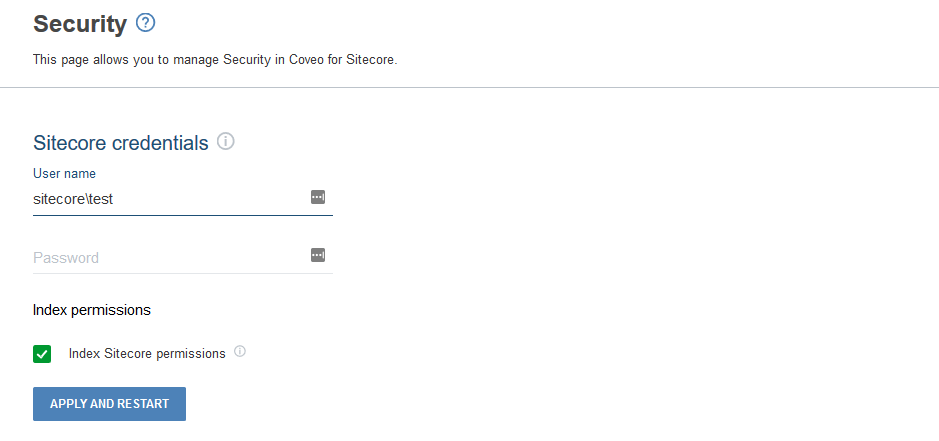
Further details for each option are provided below.
-
Index permissions: Allows you to select whether to index Sitecore permissions on the items. When permissions aren’t indexed, all indexed items are available to anonymous users. If your site contains secure content, we recommend that you index the permissions.
-
Sitecore credentials: Allows you to specify the Sitecore account responsible for crawling the items and expanding permissions (see Sitecore Credential Usage in Coveo for Sitecore).
-
-
Click Apply and Restart.