Add a Catalog source
Add a Catalog source
This is for:
System AdministratorTo start indexing your content, create a Catalog source that will hold your catalog data in the Coveo index.
A Catalog source contains items that are designed to be sold. It can also contain variants, availability channels, or entitlement information.
|
|
Notes
|
Source key characteristics
The following table describes the key characteristics of Catalog sources.
| Features | Supported | Additional information | |
|---|---|---|---|
Content update operations |
All content update operations are triggered by Stream API requests. |
||
Content security options |
|
||
|
|||
|
|||
Metadata indexing for search |
Automatic mapping of metadata to fields with the same name |
Enabled by default[1] |
|
Automatically indexed metadata |
Examples of auto-populated default fields:
|
||
You must explicitly define a source mapping if the metadata name in your API request payloads and the associated Coveo field name are different.
See Map commerce fields for instructions. After pushing or updating your catalog data, inspect your item field values in the Content Browser. |
|||
Prerequisites
Ensure that your license allows you to create this source and that your organization hasn’t reached its source quota. You can review your quotas on the License & Usage (platform-ca | platform-eu | platform-au) page, along with your usage.
Recommended setup
Create separate product sources for each locale you support[1], so Coveo ML models can learn independently from each experience.
This results in recommendations that are optimally personalized to users' preferences and search behavior on each website in your multi-catalog structure.
The company Barca sells products in Canada and the US. In Canada, they support French and English. In the US, they support English and Spanish.
They have the following storefronts:
-
Barca Canada (
www.sports.barca.group/ca/). This storefront supports French (www.sports.barca.group/ca/fr/) and English (www.sports.barca.group/ca/en/). -
Barca US (
www.sports.barca.group/us/). This storefront supports English (www.sports.barca.group/us/en/) and Spanish (www.sports.barca.group/us/es/).
This setup requires the creation of four product sources:
-
One for the English variation of the Canadian storefront.
-
One for the French variation of the Canadian storefront.
-
One for the English variation of the US storefront.
-
One for the Spanish variation of the US storefront.
|
|
Note
Some setups require an additional source to index items of the availability catalog object. See Source configuration approaches for availability channel for details. |
1. Maintaining a separate source for each supported locale may lead to content duplication, increasing resource usage and potentially causing you to reach your entitlements sooner. You can review your usage on the License & Usage (platform-ca | platform-eu | platform-au) page. See Review your license and usage for details on this page.
Add a Catalog source
|
|
Leading practice
It’s best to create or edit your source in your sandbox organization first. Once you’ve confirmed that it indexes the desired content, you can copy your source configuration to your production organization, either with a snapshot or manually. Source re-authentication with a separate crawling account may be required in the production organization. See About non-production organizations for more information and best practices regarding sandbox organizations. |
Follow these steps to add a Catalog source.
-
Make sure that your organization meets the prerequisites before adding this source.
-
On the Sources (platform-ca | platform-eu | platform-au) page, click Add source.
-
In the Add a source of content panel, click the Catalog source tile.
-
Configure your source.
"Configuration" tab
In the Add a Catalog source panel, the Configuration tab is selected by default. It contains your source’s general and authentication information, as well as other parameters.
General information
Source name
Enter a name for your source.
|
|
Leading practice
A source name can’t be modified once it’s saved, therefore be sure to use a short and descriptive name, using letters, numbers, hyphens ( |
When coding a crawler to push content in this source, a developer will need this name to get the corresponding sourceId from the Sources (platform-ca | platform-eu | platform-au) page.
Stream API URL
Available only when accessing an existing Catalog source, the input contains the URL you must use to push your catalog data in your source. The URL has the following form:
https://api.cloud.coveo.com/push/v1/organizations/<ORGANIZATION_ID>/sources/<SOURCE_ID>/stream/open
The URL that you can Copy to clipboard contains your <ORGANIZATION_ID> and <SOURCE_ID>, which are required parameters to stream your catalog data in your source.
See the Stream section in Push API to test API calls.
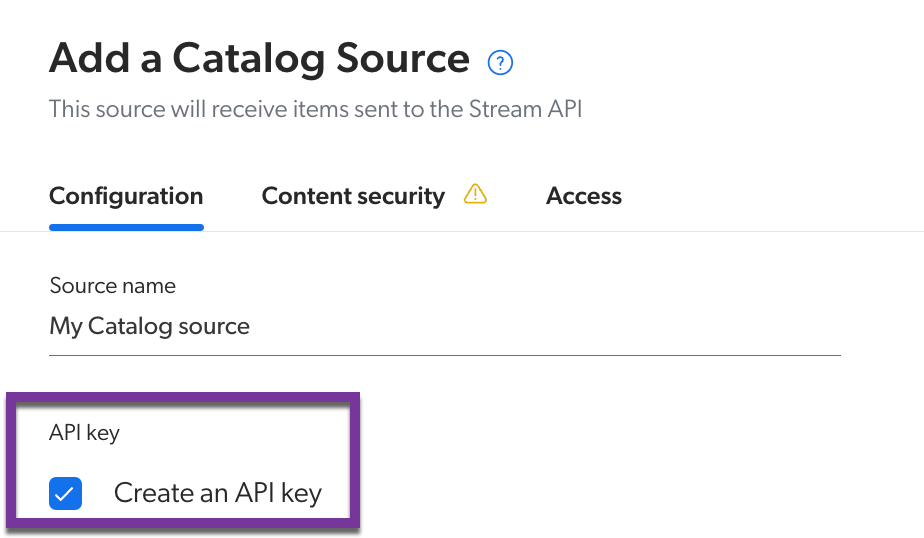
API key
An API key with adequate privileges is required to push and update your catalog data. A user with Edit access on the API keys domain can create a Catalog source API key in the following ways:
-
When creating the Catalog source by selecting the Create an API key checkbox.
-
Once the source is saved, the API key successfully created dialog appears and lets you view and copy the value of the API key. This key is meant to be kept private. Make sure to save it in a secure location, as you won’t be able to see it again after you close the dialog. If the key’s value isn’t retained, a new API key can be created in one of the other ways listed in this section.
 Note
NoteIf the source you’re creating has the Same users and groups as in your content system Content security option selected, an error occurs if the following conditions are met:
-
The Create an API key checkbox is selected.
-
You don’t have the necessary content security-related privileges.
-
-
By selecting a specific source on the Sources (platform-ca | platform-eu | platform-au) page, and then selecting Create API key from the Action bar. This method also ensures that the key has the proper privileges required to push content to the source.

-
From the API Keys (platform-ca | platform-eu | platform-au) page. You can create a new key for the source or assign an existing API key to it. When using this method, make sure that the proper privileges are given to the key. See the following table for the required privilege set depending on the Content security option selected for the source.
Granted API key privileges Everyone content security Same users and groups as in your content system content security Content > Push items to sources > Custom (Allow on target source)

Content > Sources > View all
Organization > Organization > View
Content > Push identities to security providers > Allow for all providers
Content > Security identity providers > View
|
|
Leading practice
Deactivate or delete all unused API keys assigned to your source. |
Project
Use the Project selector to associate your source with one or more Coveo projects.
"Content Security" tab
Select who will be able to access the source items through a Coveo-powered search interface. For details on the content security options, see Content security.
|
|
Note
If you make your source secure by selecting the Same users and groups as in your content system content security option, your crawler process must push item permissions along with the content. For more information, see Manage security identities in a security identity provider and Manage items and permissions in a Push source. |
"Access" tab
On the Access tab, specify whether each group (and API key, if applicable) in your Coveo organization can view or edit the current source.
For example, when creating a new source, you could decide that members of Group A can edit its configuration, while Group B can only view it.
For more information, see Custom access level.
Required privileges
You can assign privileges to allow access to specific tools in the Coveo Administration Console. The following table indicates the privileges required to view or edit elements of the Sources (platform-ca | platform-eu | platform-au) page and associated panels. See Manage privileges and Privilege reference for more information.
|
|
Note
The Edit all privilege isn’t required to create sources. When granting privileges for the Sources domain, you can grant a group or API key the View all or Custom access level, instead of Edit all, and then select the Can create checkbox to allow users to create sources. See Can create ability dependence for more information. |
| Actions | Service | Domain | Required access level |
|---|---|---|---|
View sources, view source update schedules, and subscribe to source notifications |
Content |
Fields |
View |
Sources |
|||
Organization |
Organization |
||
Edit sources, edit source update schedules, and edit source mappings |
Organization |
Organization |
View |
Content |
Fields |
Edit |
|
Sources |
|||
View and map metadata |
Content |
Source metadata |
View |
Fields |
|||
Organization |
Organization |
||
Content |
Sources |
Edit |
What’s next?
Now that you’ve created your Catalog source, make sure that your Coveo organization contains all the required fields.