Build an abandonment recovery experience
Build an abandonment recovery experience
In this article, we’ll show you how to build an Abandonment recovery experience through an integration.
Abandonment recovery and Integrations
One of the major advantages of our Integrations capability is the ability to build and execute server-side logic that can be executed alongside your personalizations.
Importantly, Integrations allows you to access APIs and services that are not publicly exposed and typically require some form of authentication, such as email service and push notification providers.
With specific reference to our Abandonment recovery solution, through integrations, you can push data into an email service provider, such as a visitor’s current basket contents to trigger an email.
In this article, we will look at creating an Abandonment recovery experience using an integration that calls the SendGrid API. We’ll start by building the integration before moving onto the experience.
Getting started
Step 1
Select Data tools and then Integrations from the side menu. Select New integration
Step 2
Select Authentication request and then Choose
Enter a name for your integration
|
|
Leading-practice
You can also enter a description to help others in your team understand what the integration is for. |
Finally, select HTTP from the Trigger combo box and then Create
Adding a sample payload
A payload is a JSON object and represents the information that you will be sending to the integration. Using a payload when building an integration enables us to test its execution with actual data that reflects the data we would expect the integration to receive in a productive environment.
It is really important that the payload matches precisely what your authenticated API expects. For example, the payload must match the template used by your email provider.
Let’s look at the example we will use in this tutorial:
{
  "email": "email@qubit.com",
  "heading": "Still looking for that perfect going out Dress?",
  "viewedItem": {
    "url": "https://qshop-demo.myshopify.com/collections/dresses/products/floral-red-mini-dress",
    "name": "Warm Spring mini dress",
    "image": "https://cdn.shopify.com/s/files/1/0026/1203/5642/products/18-warm-spring-2017-ready-wear_400x.jpg?v=1524488626",
    "price": "£25.00"
  },
  "recommendations": {
    "rec_1_url": "https://qshop-demo.myshopify.com/collections/dresses/products/floral-red-mini-dress",
    "rec_2_url": "https://qshop-demo.myshopify.com/collections/dresses/products/floral-red-mini-dress",
    "rec_1_name": "Warm Spring mini dress",
    "rec_2_name": "Warm Spring mini dress",
    "rec_1_image": "https://cdn.shopify.com/s/files/1/0026/1203/5642/products/18-warm-spring-2017-ready-wear_400x.jpg?v=1524488626",
    "rec_1_price": "£35.00",
    "rec_2_image": "https://cdn.shopify.com/s/files/1/0026/1203/5642/products/18-warm-spring-2017-ready-wear_400x.jpg?v=1524488626",
    "rec_2_price": "£45.00"
  }
}
Paste this into Sample payload
Change the value in email on line 2 to match the email you wish to use to test the abandonment recovery email:
"email": "email@qubit.com",Select Save
Setting up an API key
API keys are used to generate credentials, which are used to authenticate with an API. In this tutorial, we are using an integration to call the SendGrid API and so we need to pass an API key. We will do this by adding the API key as an integration secret.
|
|
Note
Refer to the documentation for your ESP for details of where to find the relevant API key. |
With your integration open, select Manage secrets and enter SENDGRID_API_KEY in the KEY field
Paste the API key in secret
Select Save
Incorporating a package into the integration
By using an NPM package, you can make use of the rich ecosystem of open source NPM packages and reduce substantially the amount of code needed to develop an integration.
With your integration open, select Add a package
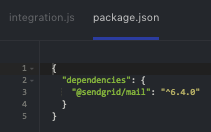
Enter sendgrid/mail into the search field and then select  to add it:

Building the integration
Switch back to integrations.js and replace the template code with the following lines:
const sgMail = require('@sendgrid/mail')

module.exports = async ({ payload, secrets }) => {
  const { email, heading, viewedItem, recommendations } = payload
  const { SENDGRID_API_KEY } = secrets

  sgMail.setApiKey(SENDGRID_API_KEY)

  const msg = {
    to: email,
    from: 'no-reply@qshop-demo.com',
    subject: 'Don\'t forget these!',
    templateId: '66074b80-c939-41cf-bfed-acbe96f0da1e',
    substitutions: {
      heading,
      ...viewedItem,
      ...recommendations
    },
    text: ' ',
    html: ' '
  }

  const [response] = await sgMail.send(msg)
  if (response.statusCode !== 202) {
    console.error('Something went wrong!')
  } else {
    console.log('Email sent!')
  }
}
Feel free to edit these lines:
from: 'no-reply@qshop-demo.com',
subject: 'Don\'t forget these!',
Testing the integration
At this point, it is a good idea to test to make sure the triggering of the email functions correctly.
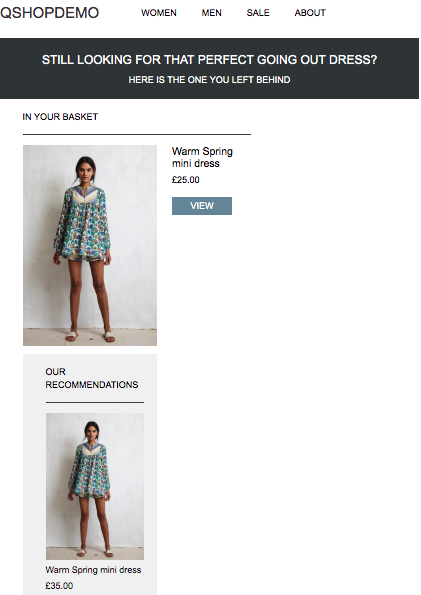
To do this, select Run. You should now see an email in your Inbox:

Note that the email includes not only the product in the user’s basket at the time of abandonment but also product recommendations. This highlights how you can leverage other Qubit solutions such as Product recommendations to create upsell or cross-sell opportunities during your recovery efforts.
|
|
Leading-practice
If the email was not received, check that you set your email address correctly in the sample payload. |
Releasing the integration
Close the integration then select Release
Enter a value in Changelog to describe the work you have done.
For the first iteration of an integration, you might use Initial release, for example
Select Release
Building the Abandonment recovery experience
In this penultimate section we will look at building the Abandonment recovery experience, including adding the integration.
Step 1: Creating the experience
Select Experiences from the side menu. Then select New experience, Abandonment recovery, and Choose.
Enter a name for your experience in the field provided and select Create
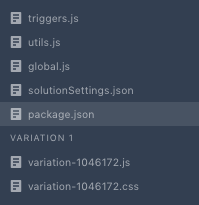
Select  and then select package.json from the side menu:

Select Add package and the following packages:
-
@qubit/http-api
-
@qubit/remember-preview
{
  "dependencies": {
    "@qubit/messages": "^3.0.0",
    "@qubit/http-api": "^1.6.1",
    "@qubit/remember-preview": "^1.2.0"
  }
}
Select Save
Step 2: Editing the triggers.js file
Select the triggers.js file from the side menu and replace any content in the editor with the following lines:
module.exports = function triggers (options, cb) {
  require('@qubit/remember-preview')(60)

  options.poll('.social-sharing').then(function (container) {
    options.state.set('data', { $container: $(container) })
    cb(true)
  })
}
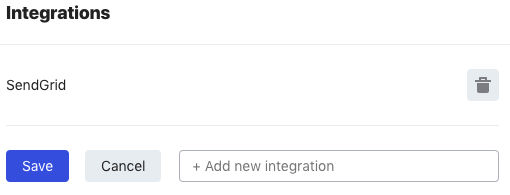
Now select  to open the experience’s settings and select Edit in the Integrations card.
You can now add the integration we created earlier by entering its name in the field provided:

Select Save
Step 3: Editing the variation.js file
Select the variation.js file from the side menu and replace any content in the editor with the following lines:
module.exports = function variation (options) {
  const { $container } = options.state.get('data')
  const $ = window.jQuery

  $container.append(`<div class="qp-trigger-ar">AR</div>`)

  $('.qp-trigger-ar').on('click', trigger)

  function getHeading (category) {
    const isJeans = /jeans/i.test(category)
    const demons = isJeans ? 'those' : 'this'
    const catName = isJeans ? 'jeans' : category.toLowerCase().replace(/e?s$/, '')

    return `Still looking for ${demons} perfect going out ${catName}?`
  }

  function trigger () {
    const email = prompt('email address')
    const { url, name, images, categories, price } = options.uv.events.filter(ev => ev.eventType === 'detail')[0].product

    try1({
      email,
      heading: getHeading(categories[0]),
      viewedItem: {
        url,
        name,
        image: images[0],
        price: price.currency + ' ' + price.value.toFixed(2)
      },
      recommendations: {
        rec_1_image: 'https://cdn.shopify.com/s/files/1/0026/1203/5642/products/AZALEA-DRESS-BURGUNDY-22858__16718_thumb_feb84cf0-919f-4a6b-860c-7fb36fd4bca0_1024x1024@2x.jpg',
        rec_1_name: 'Azalea dress',
        rec_1_price: 'GBP 20.00',
        rec_1_url: 'https://qshop-demo.myshopify.com/products/azalea-dress',

        rec_2_image: 'https://cdn.shopify.com/s/files/1/0026/1203/5642/products/M3221C0LF-Q11__default__12_1024x1024@2x.jpg',
        rec_2_name: 'Black and red floral spring dress',
        rec_2_price: 'GBP 20.00',
        rec_2_url: 'https://qshop-demo.myshopify.com/products/spring-dress'
      }
    })
  }

  function try1 (payload) {
    console.log('sending email with payload:', payload)

    options.integration('SendGrid').schedule(payload, {
      delay: '60s'
    }).then(console.log)
  }
}
Step 4: Editing the variation.css file
Select the variation.css file from the side menu and replace any content in the editor with the following lines:
.qp-trigger-ar {
  display: inline-block;
  border: 1px solid #e8e9eb;
  line-height: 32px;
  vertical-align: top;
  width: 50px;
  text-align: center;
  cursor: pointer;
  border-radius: 2px;
}
Previewing the experience
Select  and select Set preview URL.
Enter the following as the URL and select Save:
https://qshopdemo.myshopify.com/collections/frontpage/products/promSelect  again and select Preview "Variation 1" to view the experience