Qubit events 101
Qubit events 101
In this article, we’ll show you how to visualize the QProtocol events emitted on a page, how to send and listen for QProtocol data, troubleshoot problems, and then finally, use BigQuery to analyze and join event data.
Before getting started
-
Login to the Qubit platform. For this tutorial we will be using a demo property called QShop, but you can equally use your own site
-
You will require the login you use to access BigQuery
-
Install Qubit CLI
First up, we’ll take a look at using Qubit Explorer to visualize the events emitted on a page.
Visualizing events emitted on a page
Navigate to your site and append, ?qubit_explorer to the URL, as shown in the following example:
link:https://[your-site^]/?qubit_explorerSelect the on-page prompt:

Select the Events tab to the see the events emitted on the page
|
|
Note
If you are not already logged in to the Qubit platform, you will be required to do so now. |
A focus on meta and context events
Whilst you are in the Events tab, it is worthwhile taking a look at how Qubit enriches each event emitted on a page with the context and meta events.
Some fields in each of these 2 events will be consistent across the session, for example:
"deviceType": "tablet"whilst others are consistent throughout the user’s lifetime, for example:
"viewNumber": 11,
"sessionNumber": 2,
"id": "p6a40nvarxs-0jg2305pc-qipfisw",
"lifetimeValue": {
  "value": 540
    }
By persisting this data, we provide a method to join data and therefore construct a highly valuable window into the behavior of each of your users.
Building up a picture of what your visitors are doing on your site, and have done in the past, is the key to understanding likely future trends and uncovering patterns that you might build an experience hypothesis around.
Emitting events
QProtocol events are emitted using the method uv.emit(type, [data]).
Before emitting an event, let’s clear any events already present in the Events tab.
You can do this by selecting Reset.
Open a console window and paste the following snippet:
window.uv.emit('ecProduct', {
"eventType": "detail",
"product": {
"price": {
"currency": "GBP",
"value": 20
},
"names": "Ripped Jeans",
"url": "https://qshopdemo.myshopify.com/products/jeans"
}})
You should now see an ecProduct event in the Events window.
The status should be Received with errors:

This error means that Qubit’s Event Validation API has determined that the event is invalid.
Select the event in the Events tab to see what errors have been returned:

We can now fix these errors by adding one field that is required for this event according to our QProtocol schema, productId and another, description, which we recommend emitting, and correcting the field names, which according to our schema should be name:
window.uv.emit('ecProduct', {
"eventType": "detail",
"product": {
"price": {
"currency": "GBP",
"value": 20
},
"name": "Ripped Jeans",
"url": "https://qshopdemo.myshopify.com/products/jeans",
"productId": "jeans-001",
"description": "These jeans look really nice"
}})
Paste the above example into your console and return to the Events tab to see whether the event was emitted correctly:

We cover using the Qubit Explorer as a first validation of your QProtocol setup Using Qubit Explorer To View The Events Emitted On A Page.
If you are looking for more information about the consequences of incorrectly emitted events, refer to Validating Your Setup.
Listening for events
Qubit has numerous methods within the UV API to help you work with data.
We’ve already covered uv.emit, which is used to emit events.
We will now focus on uv.on, uv.once, and replay().
uv.on
uv.on(type, handler, [context])
This method allows you to subscribe to an event. Any time the event is emitted on the page, it will be logged to the console.
For example, to subscribe to the ecProduct event, copy and paste the following snippet into your console window:
var subscription = uv.on('ecProduct', function (data) {
console.log(data)
})
uv.once
uv.once(type, handler, [context])
This method is similar to uv.on but instead of logging all the instances of an event type to the console, it will only emit the last one:
var subscription = uv.once('ecProduct', function (data) {
console.log(data)
})
replay
You can extend the subscription variable with the replay() function.
This function will re-emit any events emitted before the event you subscribed to using uv.on or uv.once:
subscription.replay()Listening for interaction events
It is also possible to listen for interaction events such as mouseover. Let’s look at an example that allows us to listen for a user hovering over the ADD TO CART button:
(function () {
var atcButton = document.getElementById('AddToCart-product-template')
var productName = document.querySelector('[property="og:title"]').content

atcButton.addEventListener('mouseover', (event) => {
uv.emit(-----YOUR EVENT HERE-----)
}, {once: true})
}())
Sending an ecInteraction event
In this next example, we will listen for a user interaction with the product name and emit the product details in an ecInteration event.
Before pasting the following snippet in your console, ensure the event filter is set to All:

Paste the following snippet into the console:
(function () {
var atcButton = document.getElementById('AddToCart-product-template')
var productName = document.querySelector('[property="og:title"]').content

atcButton.addEventListener('mouseover', (event) => {
uv.emit('ecInteraction', {
type: 'hover-addToBag',
name: productName
})
}, {once: true})
}())
Here’s the result:
"context": {
   "sample": "53079",
   "viewNumber": 15,
   "sessionNumber": 3,
   "entranceNumber": 3,
   "sessionViewNumber": 4,
   "entranceViewNumber": 4,
   "conversionNumber": 0,
   "conversionCycleNumber": 1,
   "timezoneOffset": -60,
   "entranceTs": 1524034846545,
   "sessionTs": 1524034846545,
   "viewTs": 1524128151893,
   "id": "p6a40nvarxs-0jg2305pc-qipfisw",
   "lifetimeValue": {
     "value": 0
   }
}|
|
Take note of the |
Validating events
Return to the Qubit platform and select Data tools and Validation in the side menu.
Select the filter 1 hour and Show requirements for Best practice.
Notice that the ecProduct event has less than 100% validity:

This is due to the invalid ecProduct event we sent earlier :
window.uv.emit('ecProduct', {
"eventType": "detail",
"product": {
"price": {
"currency": "GBP",
"value": 20
},
"names": "Ripped Jeans",
"url": "https://qshopdemo.myshopify.com/products/jeans",
}})
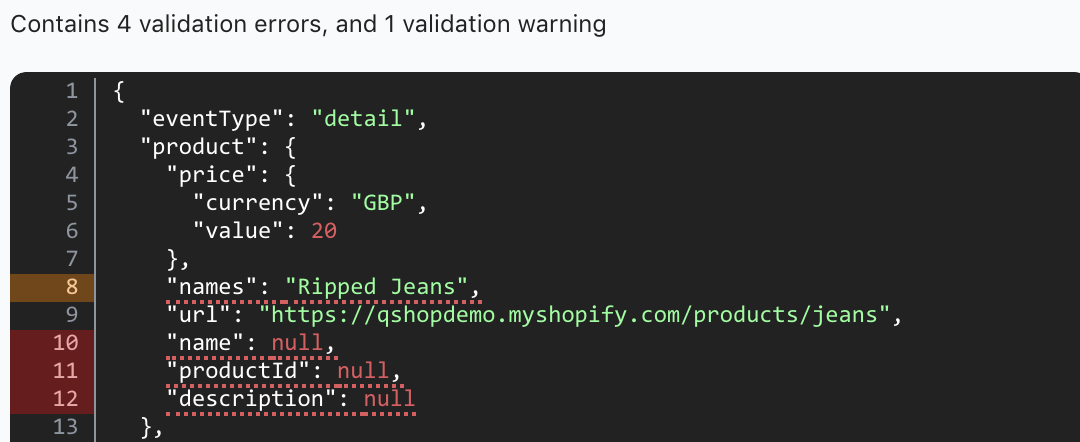
Select the event from the list of QProtocol events. This will open a new window, displaying the reason for the invalid event:

If you now select the issue and scroll down towards the bottom of the event, you’ll see the error highlighted in red:

With this information, you can make changes to your QProtocol implementation to correct the error.
Analyzing data in Google BigQuery
Navigate to Google BigQuery and navigate to your project
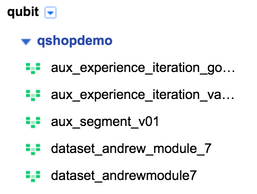
Now select the relevant dataset to see the views
Our example dataset is called qshopdemo:

Select the event_ecInteration view and then select Query View to open the query editor
Paste this SQL statement into the New Query window:
SELECT
meta_url,
type,
name,
meta_serverTs AS time
FROM
`qubit-client-37403.qshopdemo__v2.event_ecInteraction`
WHERE
context_id = ''
GROUP BY
1,
2,
3,
4
LIMIT
1000
Change the contextid_ to the context.id from the ecProduct event we emitted earlier
In our example, this is p6a40nvarxs-0jg2305pc-qipfisw.
You should now see the event in the table of results:

Refer to the following table for an explanation of the fields:
| Field | Description |
|---|---|
Meta_url |
The URL of the page the event was emitted from |
Type |
Corresponds to the value of the |
Name |
Corresponds to the value of the |
Time |
The date and time for the event emission, converted into a readable time format from UNIX time |
Joining data
In this final step we will join data from the eventecInteration_ view with data from eventqubitsession to get the geo and device information for the user that triggered the interaction event.
Start by closing the query view window. Then select the event_qubit_session and Query View
Next paste the following SQL snippet into the editor, remembering to modify the context_id as we did in the previous step:
SELECT
  A.deviceType,
  A.osName,
  A.ipLocation_country,
  B.meta_url,
  B.type,
  B.name,
  B.time
FROM (
  SELECT
    context_id,
    context_sessionNumber,
    deviceType,
    osName,
    ipLocation_country
  FROM
    `qubit-client-37403.qshopdemo__v2.event_qubit_session`
  GROUP BY
    1,
    2,
    3,
    4,
    5) A
JOIN (
  SELECT
    context_id,
    meta_url,
    type,
    name,
    context_sessionNumber,
    meta_serverTs AS time
  FROM
    `qubit-client-37403.qshopdemo__v2.event_ecInteraction`
  GROUP BY
    1,
    2,
    3,
    4,
    5,
    6) B
ON
  A.context_id=B.context_id
  AND A.context_sessionNumber = B.context_sessionNumber
WHERE
  A.context_id = ''
GROUP BY
  1,
  2,
  3,
  4,
  5,
  6,
  7
Select Run Query. You should see results similar to the following example:

|
|
It is always important to join on |