About the Configuration Manager
About the Configuration Manager
The options in the Command Center Configuration Manager let you:
-
Change the Coveo organization your Sitecore instance is linked to.
-
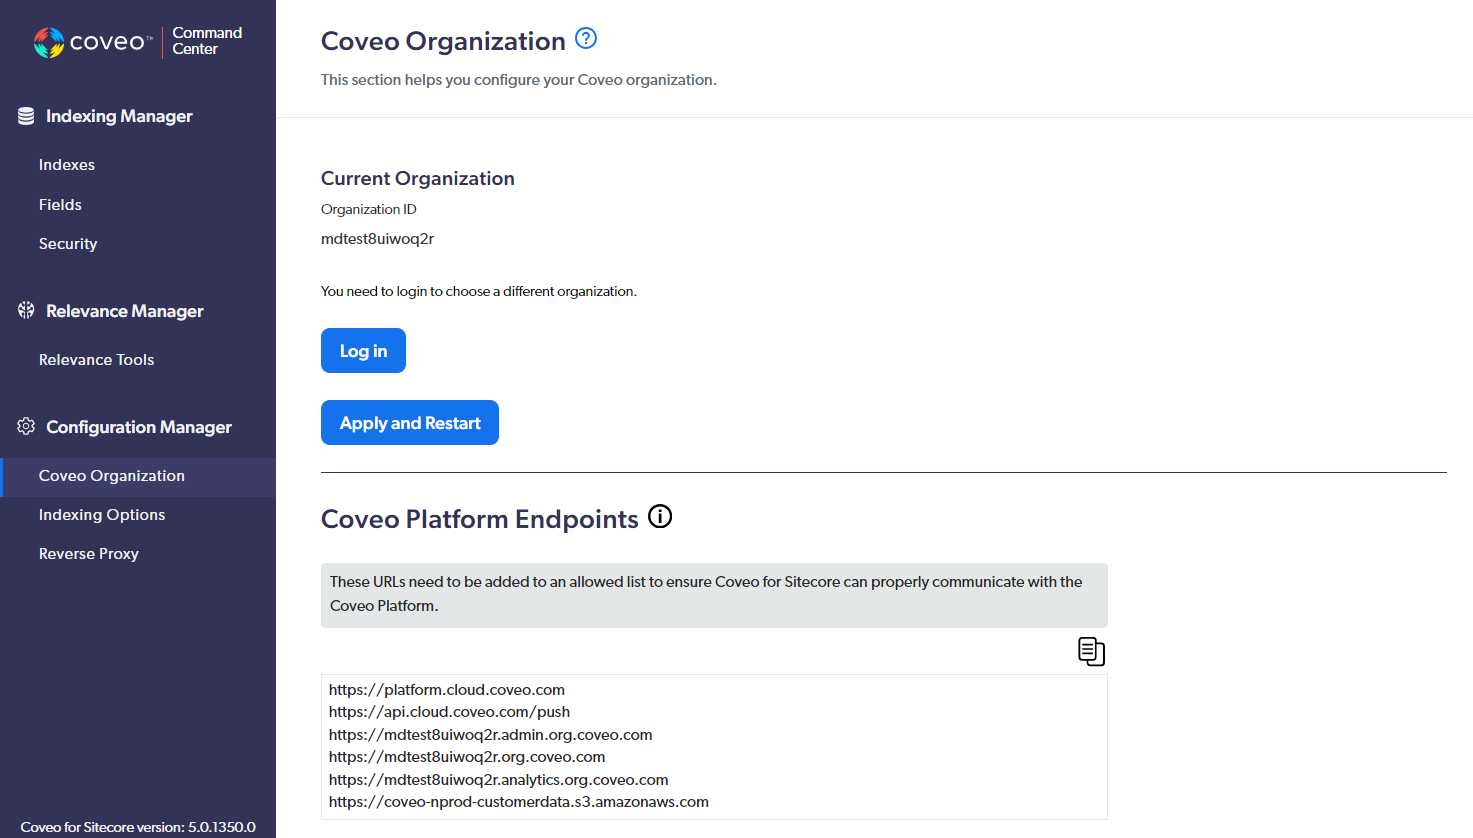
View and copy the list of URLs you should add to your firewall allowed list.
-
Edit your indexing options.
-
Enable or disable the Coveo for Sitecore reverse proxy.
Accessing the Configuration Manager
To access the Configuration Manager as a Sitecore administrator
-
Select Configuration Manager.

|
|
Note
You can also access the Command Center Configuration Manager using URL |
Modifying your Coveo organization
To modify the Coveo organization your instance is linked to
-
In the Coveo Organization section, click Log In.
-
Follow the instructions shown on screen to log in to the Coveo Platform using your preferred identity provider.
-
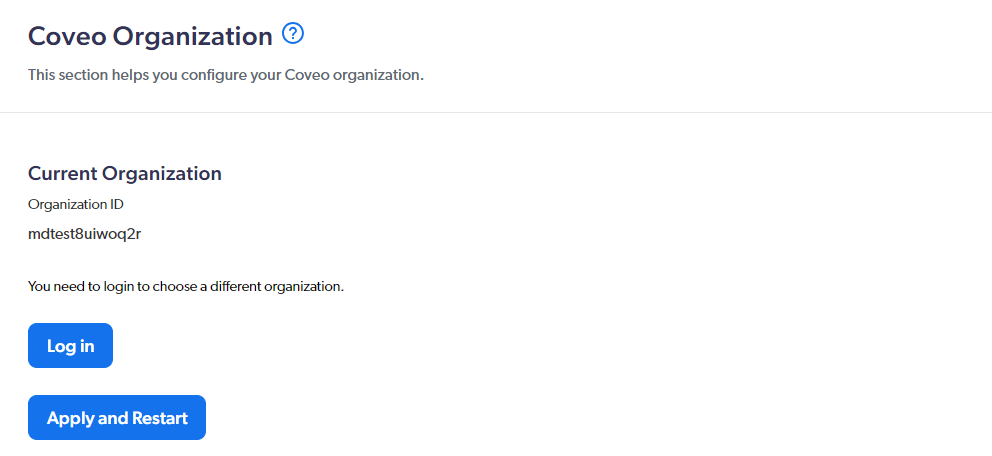
Select or create your Coveo organization.
-
To select an existing organization, under the Existing tab, select the desired organization from the dropdown menu.

 Notes
Notes-
Coveo for Sitecore now lets you connect to Coveo organizations in regions other than
us-east-1. For more information on your data residency options, see Multi-Region Deployments. -
The flag next to the organization name indicates the region the organization data is hosted in. The flag tooltip provides further details on the organization data residency location.
-
-
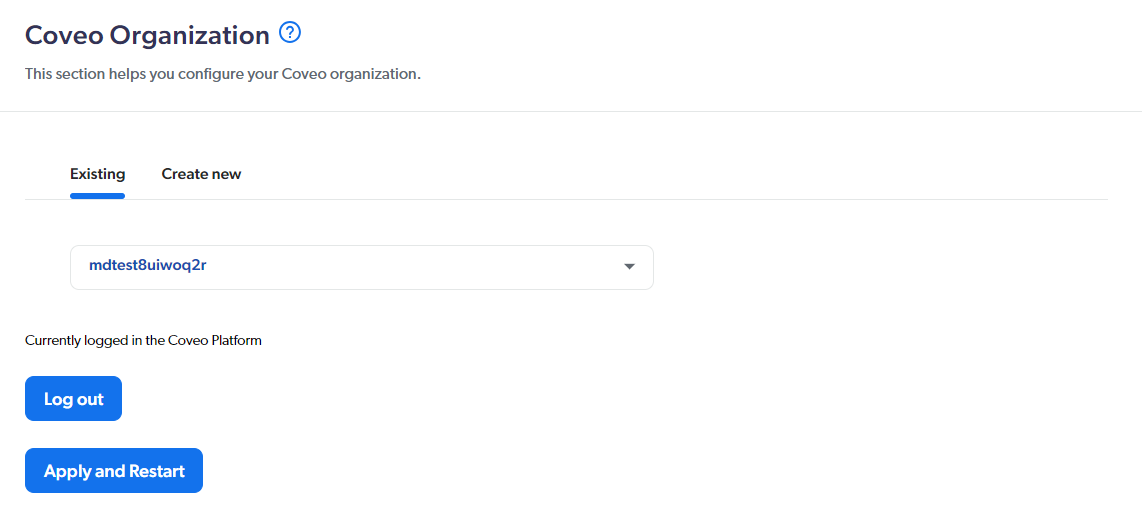
To create a new organization
-
Select the Create New tab.
-
Type the name you want in the Organization Name field.
NoteWhile you can always change your organization display name later in the Coveo Administration Console (platform-ca | platform-eu | platform-au) under Settings > Organization > Profile, be aware that the original name value you specify when creating an organization will forever be part of the unique and permanent ID of that organization.
-
Select the Organization Type that matches your needs (see Entitlement comparison (Coveo for Sitecore)).
 Leading practice
For a local development environment, select the Test organization organization type.
-
In the Organization Region dropdown menu, select the data residency region that best suits your needs.
-
-
-
Click Apply and Restart.
Your Security and Indexing Options section settings are carried over from your previous Coveo organization to the current one. To make changes to these settings, refer to the Modifying security settings and Modifying your indexing options sections below.
NoteAllow 15 to 30 minutes for a new Coveo organization to be provisioned.
When a Coveo trial organization has been idle for some time, it’s paused automatically. If you have selected an existing organization that has been idle for a while, one of the following dialogs is displayed when you reload the page:
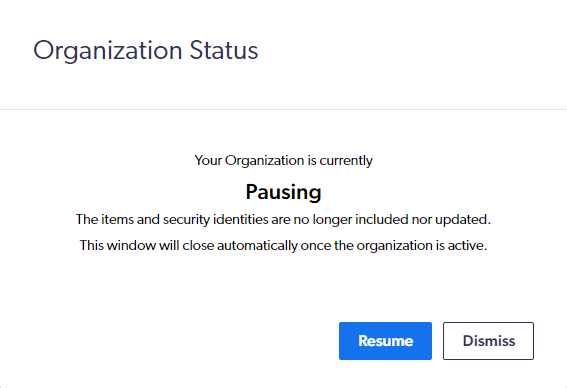

If you click Resume, the organization status then changes to
Resuming.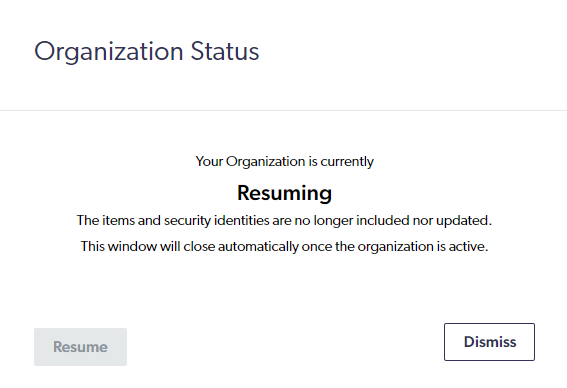
The dialog automatically closes once the organization has finished resuming and is, once again, fully functional.
You can also reactivate your organization through the Coveo Administration Console (platform-ca | platform-eu | platform-au), in the notification center.
Modifying your indexing options
To modify your indexing options settings
-
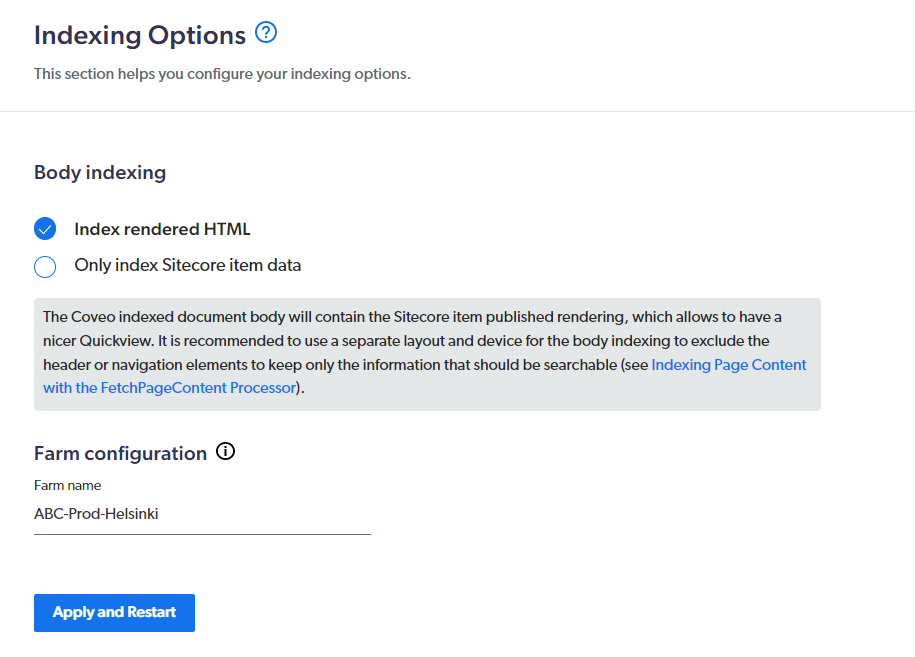
In the Indexing Options section, specify your new settings.
Further details for each option are provided below.
-
Body indexing: Lets you select whether the rendered HTML should be indexed.
-
Farm configuration: Lets you specify a Farm name to set coherent names for your resources (that is, sources and security identity providers).

By default, Coveo for Sitecore sources are named
Coveo_master_index - <FARM_NAME>andCoveo_web_index - <FARM_NAME>in your Coveo organization. As a result, if multiple Sitecore instances use the same farm name and are linked to the same Coveo organization, their items are indexed in the same sources.This is rarely useful in a development scenario, but a leading practice in a scaled production environment.
Multiple developers shouldn’t link their instances to the same Coveo organization and use the same farm name. With this setup, a rebuild in one Sitecore instance deletes all items in your Coveo for Sitecore sources that come from the other linked Sitecore instances. Instead, each developer should use their own trial or test Coveo organization.
In a scaled production environment, where multiple Content Management (CM) servers share the same databases, using the same farm name across all CMs and CDs is ideal. This ensures all CMs and CDs pull results from the same public website-related Coveo source (for example, a
Coveo_pub_index - <FARM_NAME>source).
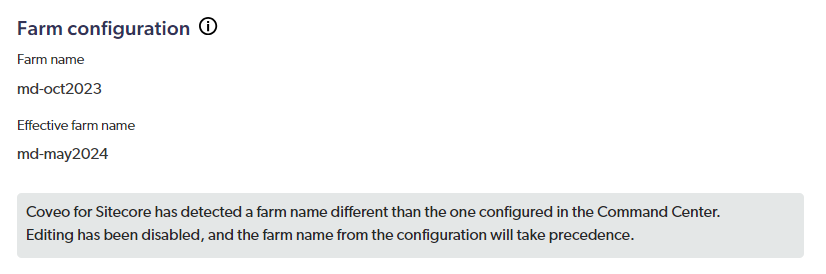
Changing the Farm name in the Command Center updates the
<farmName>element text content inCoveo.SearchProvider.Custom.config. Similarly, when you change the text content of the<farmName>element inCoveo.SearchProvider.Custom.config, the Command Center reflects this change as soon as you refresh the page.However, if you overwrite the Farm name value using a patch file of your own, the Command Center will detect a difference between the
Coveo.SearchProvider.Custom.configFarm nameand the one in the Sitecore compiled configuration. When both values are different:-
The Command Center displays the Farm name field which contains the
Coveo.SearchProvider.Custom.configFarm namevalue. -
The Command Center displays the Effective farm name field which contains the
Farm namevalue you set in your custom patch file. -
The Effective farm name is used for indexing.
-
Coveo for Sitecore disables farm name editing in the Command Center.
-
-
-
Click Apply and Restart.
|
|
Note
Since Coveo for Sitecore configuration files are updated, a restart of the Sitecore instance is triggered. |
Enabling or disabling the reverse proxy
To enable or disable the reverse proxy
-
In the Reverse Proxy Options section, select or clear Enable Coveo for Sitecore proxy.
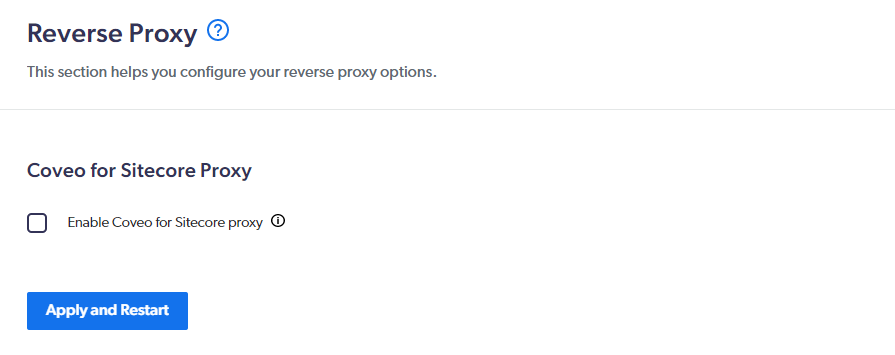
-
Click Apply and Restart.
|
|
Note
Since Coveo for Sitecore configuration files are updated, a restart of the Sitecore instance is triggered. |