Get started with Salesforce B2B Commerce for Visualforce
Get started with Salesforce B2B Commerce for Visualforce
Coveo for Salesforce B2B Commerce for Visualforce lets you grow your revenue by making B2B and D2C buying experiences relevant and personal, with Enterprise-grade AI-powered search and product recommendations technology.
This section explains how to index the necessary objects and how to create a Coveo-powered search page within Salesforce B2B Commerce for Visualforce.
|
|
The earliest version of Salesforce B2B Commerce for Visualforce (formerly CloudCraze) that’s supported by Coveo is 4.12. |
|
|
Note
Contact Coveo Support to get started with Salesforce B2B Commerce for Visualforce. |
Prerequisites
To take advantage of Coveo for Salesforce B2B Commerce for Visualforce in your Salesforce organization, you must:
-
Install Salesforce B2B Commerce for Visualforce in your Salesforce organization.
-
Set up a Salesforce storefront in your Salesforce organization.
 Note
NoteWhen you reach the Load Storefront Data from a Static Resource step, if you have your own set of data or you plan to use your own set, choose the Minimum data required to start building a storefront option.
Indexing Salesforce B2B Commerce for Visualforce
Step 1: Configure your B2B and D2C Commerce sources
To configure your B2B and D2C Commerce sources, you must create two separate sources (that is, one for the custom Product objects and another for the custom Order objects).
In order for your source to benefit from the group of functionalities that promote the personalization feature, it needs to be Stream API enabled.
Add a source for the Product objects
-
On the Sources (platform-ca | platform-eu | platform-au) page, click Add source.
-
Add a Salesforce source linked to your Salesforce organization with the B2B and D2C Commerce content and specify the following configuration information:

While you can use a Salesforce source to index your catalog data and create a catalog entity, you won’t be able to fully leverage Coveo’s commerce AI capabilities, such as Coveo Personalization-as-you-go.
To fully leverage these capabilities, you must use the Catalog source to index your catalog data instead of a Salesforce source. Note that there are other alternatives to the Catalog source, but require special configurations.
-
Source name: Enter a significant name. This source will index your
Productobjects. -
Schema version: Select the Current version in the dropdown menu.
-
Objects:
-
Unselect Service Cloud.
-
Select B2B Commerce for Visualforce (Products) to index the custom
ProductandPriceListItemobjects (that is,ccrzE_ProductcandccrzE_PriceListc, respectively).
NoteThe
Productobject retrieves information related to theCategories,Inventory_Items,ProductMedias, andSpecschild objects.
-
-
-
Click Add source.
|
|
Note
Product spec fields are automatically selected when you add a source for the |
Add a source for the Order objects
-
On the Sources (platform-ca | platform-eu | platform-au) page, click Add source.
-
Add a Salesforce source linked to your Salesforce organization with the B2B and D2C Commerce content and specify the following configuration information:
-
Source name: Enter a significant name. This source will index your
Orderobjects. -
Schema version: Select the Current version in the dropdown menu.
-
Objects:
-
-
Click Add source.
Step 2: Create a catalog entity to support Commerce entitlements
-
On the Catalogs (platform-ca | platform-eu | platform-au) page, click Add catalog.
-
Add a catalog entity for your product source.
-
Once your catalog entity is created, push your catalog data into the source. This ensures that the catalog entity is properly registered.
Integrating Coveo in your B2B and D2C for Visualforce Storefront
Step 1: Create a Visualforce page for your Salesforce B2B and D2C Commerce Storefront search page
You must first Create a Visualforce page for your Salesforce B2B and D2C Commerce Storefront search page:
-
In Salesforce, under Setup, search for and select Visualforce Pages (Build > Develop > Visualforce Pages).
-
On the Visualforce Pages page, select New.
-
Give your new component a Label; the Name should be filled automatically.
-
In the Visualforce Markup tab, enter the following code:
 <apex:page sidebar="false" showHeader="false" standardStylesheets="false" applyHtmlTag="false">
     <CoveoV2:SearchInterface name="<YOUR_COMMERCE_INTERFACE_PAGE_NAME>" catalog="<YOUR_CATALOG_ID>"></CoveoV2:SearchInterface>
 </apex:page>
Where you replace:
-
<YOUR_COMMERCE_INTERFACE_PAGE_NAME>with the name of your Commerce interface. -
<YOUR_CATALOG_ID>with the ID of your catalog entity.
-
-
Click Save.
|
|
Notes
|
Step 2: Configure a Coveo for Salesforce B2B and D2C Commerce Storefront search page
-
Access the Visualforce page you created in the previous step (see View and Edit Visualforce Pages).
-
On your Visualforce page Page Detail subpage, click Preview.
-
In the webpage that opens, click Set up a search page to build your Coveo-powered search interface.
-
Click Create page.
Step 3: Create a "Subscriber Pages" object
Use this procedure to create your CC Subscriber Page.
|
|
Note the value you assigned for the Page Key field as you’ll need it later on. |
Step 4: Add the Coveo Searchbox in your Salesforce B2B and D2C Commerce Storefront search page
You must create a Visualforce page for your Commerce Search box:
-
In Salesforce, under Setup, search for and select Visualforce Pages (Build > Develop > Visualforce Pages).
-
On the Visualforce Pages page, select New.
-
In the Label box, type
SearchBox; the Name should be filled automatically. -
In the Visualforce Markup tab, enter the following code:
 <apex:page docType="html-5.0" sidebar="false" showHeader="false" standardStylesheets="false" cache="false" applyHtmlTag="false">
     <CoveoV2:JsSearch
             catalog="YourCatalogId"
             stylesheet="CoveoFullSearchNewDesign.css"/>

     <!-- Declare a template containing the CoveoSearchbox -->
     <script id="coveoSearchbox" type="text/template">
     <div id="searchbox" style="z-index:20;min-height:100%;background:white;
 ">
         <div class="CoveoSearchbox" data-enable-query-syntax="true"></div>
     </div>
     </script>
     <script>
     jQuery(function ($) {
         // Inject the template declared before in place of the `.search_form` element that's contained in the productSearchView section.
         CCRZ.uiProperties.productSearchView.desktop.tmpl = 'coveoSearchbox';
         CCRZ.uiProperties.productSearchView.phone.tmpl = 'coveoSearchbox';

         // When the productSearchView section is refreshed, initialize the Searchbox.
         CCRZ.pubSub.once('view:productSearchView:refresh', function (event, args) {
             var root = document.getElementById('searchbox');
             if (root) {
                 Coveo.initSearchbox(root,'/DefaultStore/ccrz__CCPage?pageKey=coveo&CoveoStorefront=DefaultStore');
             }
         });
     });
     </script>
 </apex:page>
Where you replace:
-
YourCatalogIdwith the ID of your catalog entity. -
coveo(next topageKey=) with the page key created in step 3. -
DefaultStore(next toCoveoStorefront=) with the name of the Storefront in which you want the Coveo Searchbox.
-
-
Click Save.
-
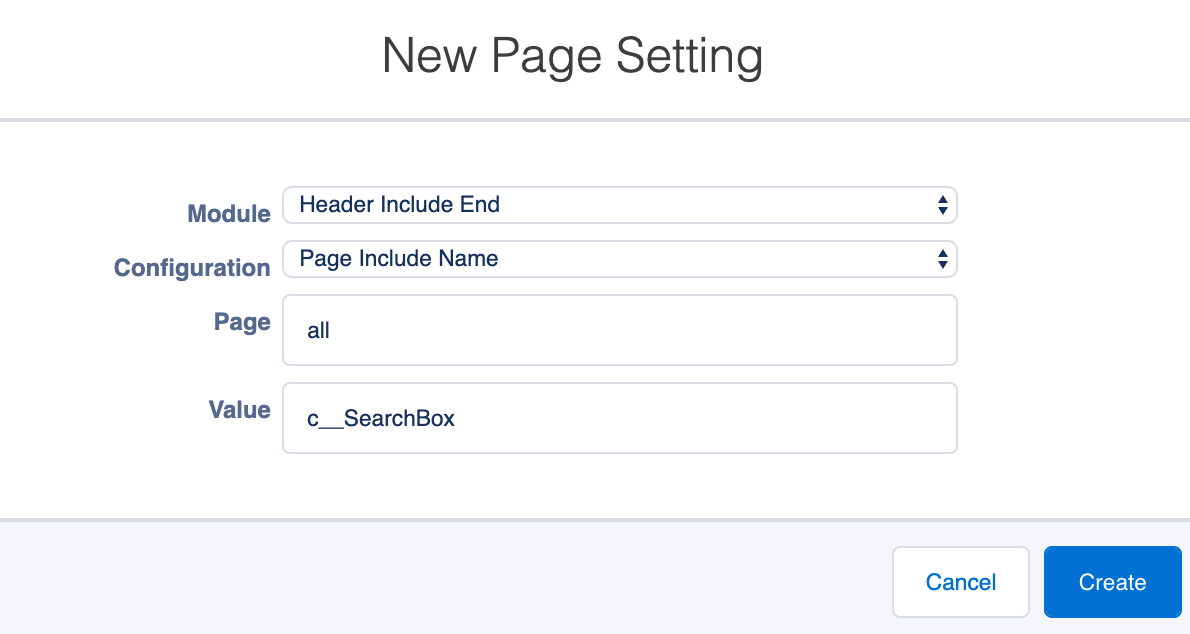
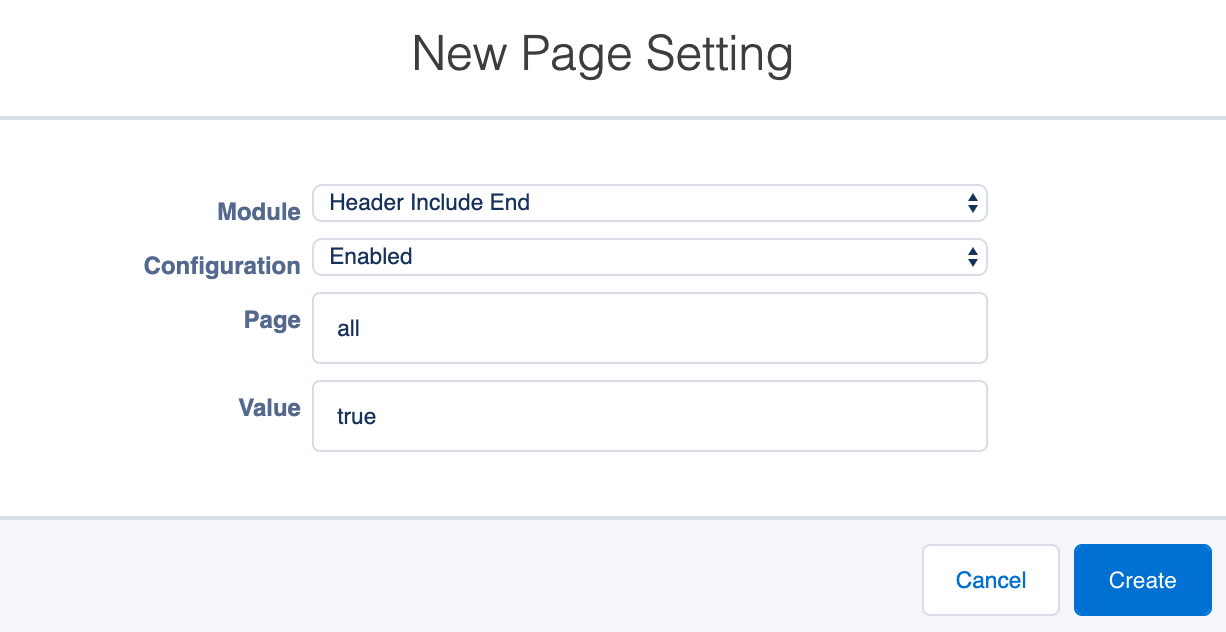
From the CC Admin tab, access your Storefront Configuration Settings, and add your new page as a PageInclude, on Header Include End (see Page Includes and Sample Gross Layout Override).
Your configurations should look as follows:
Step 5: Refresh your configuration cache
Once you’re done with the previous steps, you must refresh your configuration cache to take advantage of Coveo for B2B and D2C Commerce in your organization.
What’s next?
Learn how to display product pricing in a B2B and D2C search page.
Learn about common Coveo for Salesforce customizations.