Build a server experience
Build a server experience
|
|
The Server experiences API reference is located in the APIs section. |
In this article, we’ll step through the process of building a Server Experience.
Intro
The process of building a Server Experience is much the same as building any other type of experience in the Qubit platform.
The four steps
Step 1
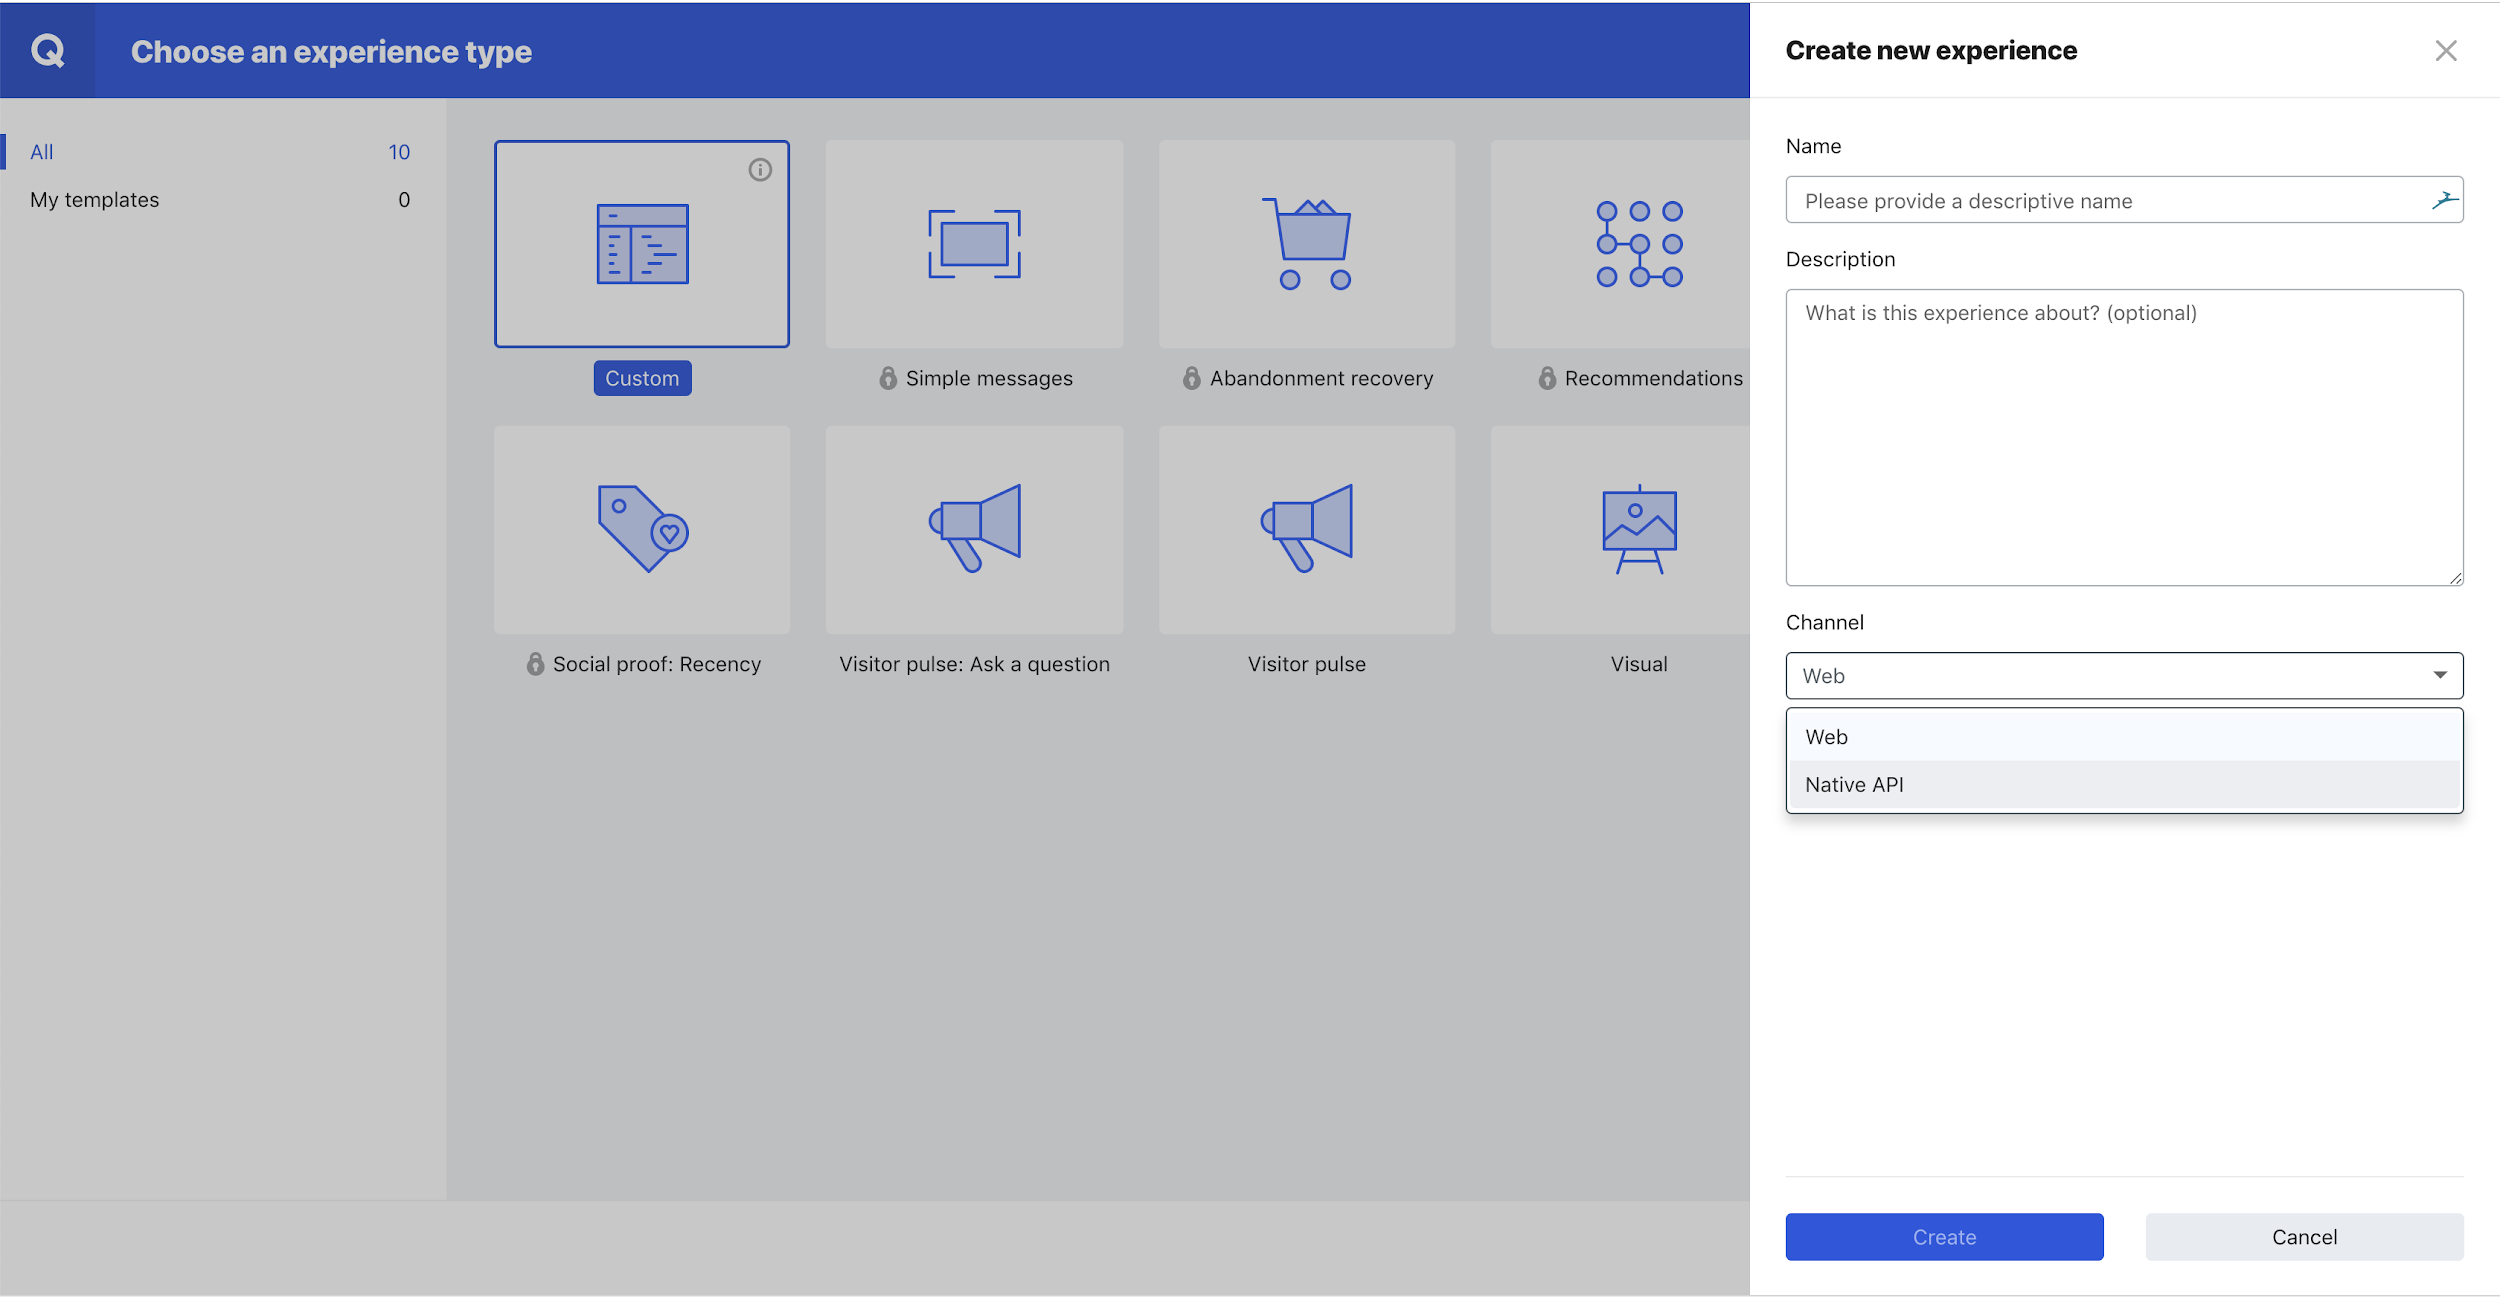
Select Experiences from the side menu and select New experience, Custom, and Choose
Step 2
Enter a name and a description for the experience, select Native API from the Channel combo box, and select Create:

Step 3
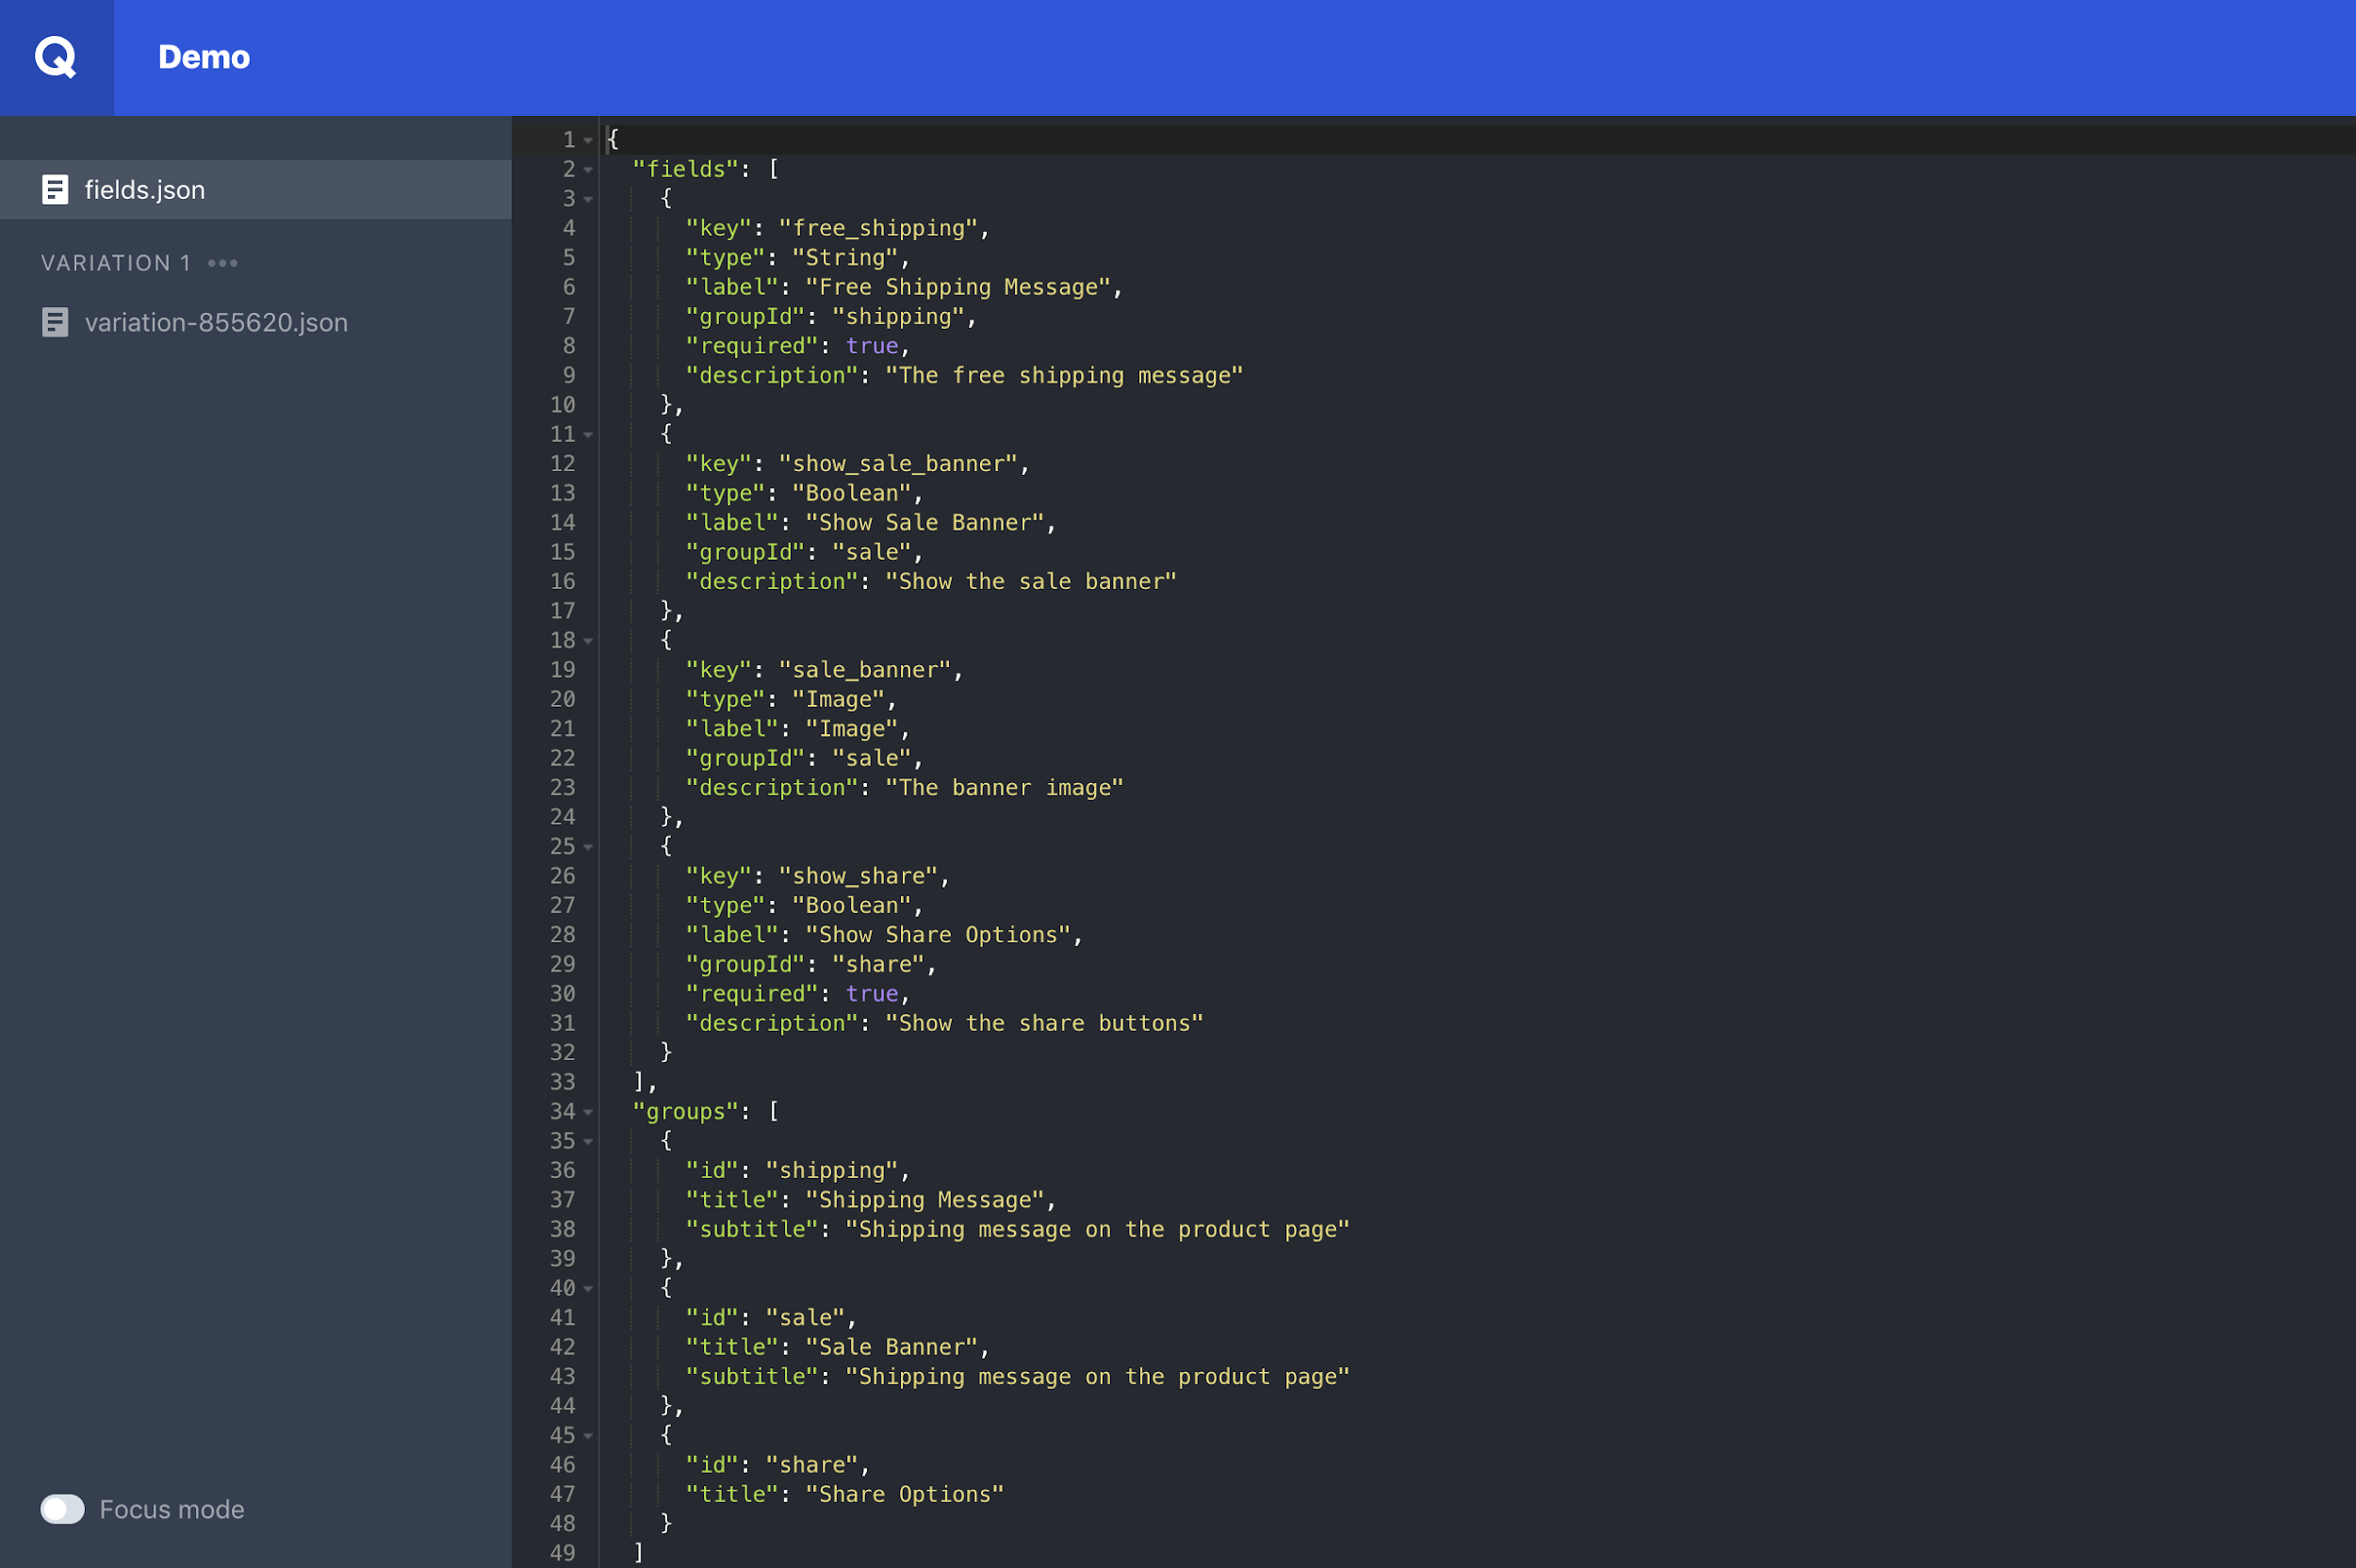
Use the editor provided to make changes to the fields.json file as required:

|
|
Note
The |
Step 4
Once done, select *Save*
You can now use the Settings tab to configure your experience as you would with any other experience. If you are unsure how to do this or want more information, see Configuring the experience.
|
|
Since Server Experiences are delivered server-side, it’s not possible to utilize our GA integration, which is executed in the browser by our JavaScript experience engine in Smartserve. |
All of the other functions that you can currently use when managing your experiences, such as duplicating an experience, duplicating a variation, renaming, deleting, can also be used with Server Experiences.