Create segments
Create segments
In this article, we’ll show you how to build a segment using our Simple builder and cover using segment conditions to target specific groups of people based on their interactions with your website or offline assets.
Creating a segment
Adding the basics
Step 1
Select Segments from the side menu and then Create new segment
Step 2
Enter a name for your segment and select Let’s start
You can now define the conditions that will be used to determine whether a person should enter or leave the segment
Let’s take a look at an example:

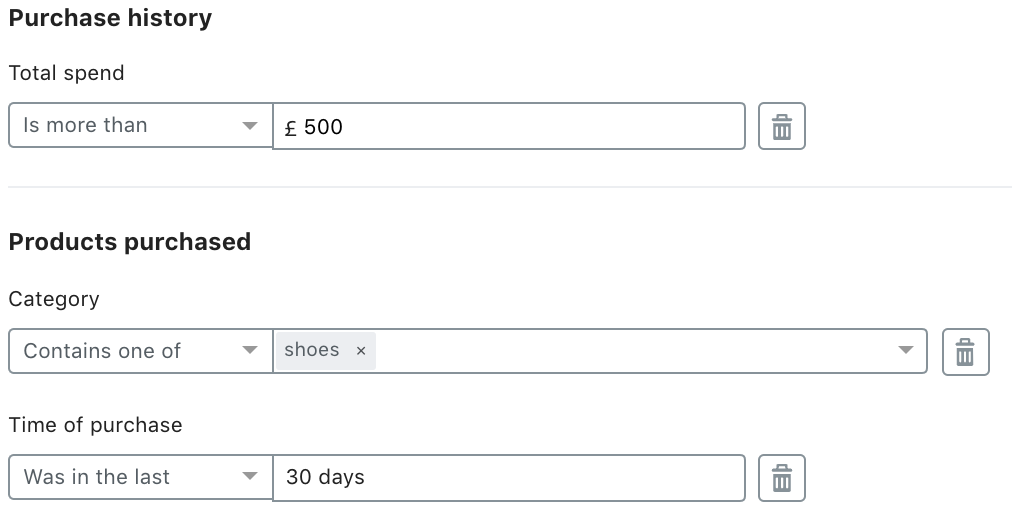
In our segment, we have three conditions, these are joined with an AND, so only users that meet all of these conditions will be added to the segment:
-
Spent more than £500 over their lifetime, as specified in the Purchase history condition and as further refined using the Total spend input type
-
AND, previously bought shoes, as specified in the Products purchased condition and as further refined in the Category input type
-
AND, made the purchase in the last 30 days, as specified in the Time of purchase condition and as further refined in the Time of purchase input type
Adding conditions
Conditions are the building blocks of segments and define the rules for segment membership. To help you find the right condition for your segment, they are ordered into groups such as Pages Viewed, Purchase history, and Browsing Behavior. There are no restrictions on how many conditions you can add to a segment.
Step 1
Select Add condition
Step 2
Select a condition from the combo box or enter a search term in the field provided
|
|
Note
Depending on the selected condition, you will also need to select an operator such as is, is not,is more than from the combo box and enter a value in the field provided. |
|
|
Note
The value you enter for the segment condition is case insensitive.
Product category is |
Conditions in a segment are bound together with an AND clause.
So add this visitor only if they meet this condition AND this condition AND this condition, etc.
The more conditions you add, the more restrictive the segment becomes.
For a list of all available conditions and operators, as well as associated QProtocol fields, see Segment conditions.
Including historical data
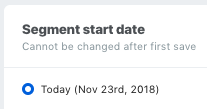
By default, when you create a new segment, only site traffic that is generated after the creation date will be used to determine segment membership:

This means that in the default setting, only visitors that meet the segment conditions from the creation date will be moved into or out of the segment.
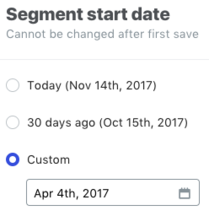
You can change this default behavior by selecting a different in Segment start date. In the following example, the user has selected Custom and selected the date April 4th, 2017 from the date picker:

|
|
Your selection can’t be changed once the segment has been saved. |
When you save the segment, the platform will start analyzing QP event data, starting from the date you selected and will report when done. When this process is complete, you can view the processed data by selecting Show details.
Let’s have a look at how historical data is broken down:

-
Total QP events processed: This represents the number of QP events processed to determine changes in segment membership.
-
Total historical visitors processed: This refers to the number of unique visitors included in the processed QP events.
-
Total changes in segment membership: This indicates the number of joins and leaves recorded after processing the QP events.
-
Total historical visitors ever in the segment: This is the count of unique visitors that have joined the segment at any point in time.
-
Total historic visitors in segment: This is the number of visitors remaining in the segment after all QP events have been processed.
Editing a segment
Open your segment from your list, select , and then select Edit.
Make the required changes and select Save.
Deleting a segment
Open your segment from your list then select .
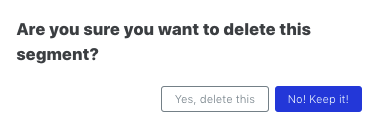
Select Delete and Yes, delete this

|
|
Leading-practice
We recommend deleting segments you are no longer using to reduce the weight of your Smartserve script, thereby optimizing performance. See Improving performance for details. |
Testing your simple segment
Before saving your segment to make it live, we recommended that you test it against browsing activity to ensure users will be segmented correctly according to the segment’s design and logic.
To do this, edit your segment:

and then select Preview segment in a new tab
This opens a split-screen view of your website, your segment conditions, the events generated by site activity, and relevant user data.
In the Conditions view, you can see immediately if the user has fulfilled the conditions necessary to be added to the segment. In the following example, we see that the user has not yet fulfilled the condition:

Importantly, as you navigate through the site, viewing products, making purchases, interacting with banners, etc, we will automatically analyze the generated data and report any changes in those conditions. Now that the user has completed more than 5 sessions, we see that the condition has been fulfilled:

To fulfill the conditions in a segment, and as an alternative to navigating around a site and interacting with it, you can also the user data in the Settings tab to force a user in and out of a segment.
Using the example above, rather than completing an additional 5 sessions for the user, you can simply edit Session number and then refresh the page to achieve the same result:

|
|
Leading-practice
You can take this testing a step further by using the Qubit Explorer to understand what segments a "virtual" visitor on your site is a member of as they navigate through your site and interact with experiences. |
Saving a segment
Once you have added the required conditions, and tested it, you are ready to save it. Once saved, the segment is live. Any changes you made will immediately impact the flow of visitors into and out of the segment.
To save your segment, select Save.