Add opinions as a custom experience
Add opinions as a custom experience
You can collect qualitative visitor feedback on your site by emitting a special type of QP event called qubit.feedback in a custom experience.
Understanding the feedback event
The following simplified example shows how to emit qubit.feedback and direct the feedback flow to the Opinions dashboard:
function execution (options) { // eslint-disable-line no-unused-vars
  const feedback = prompt('What do you think about our site?')

  if (feedback && feedback.length) { // check that feedback was actually entered
    options.uv.emit('qubit.feedback', {
      feedback: {
        id: Date.now(),
        body: feedback.substr(0, 2048),
        type: 'exit',
        language: 'en',
        vertical: options.meta.vertical
      }
    })
  }
}
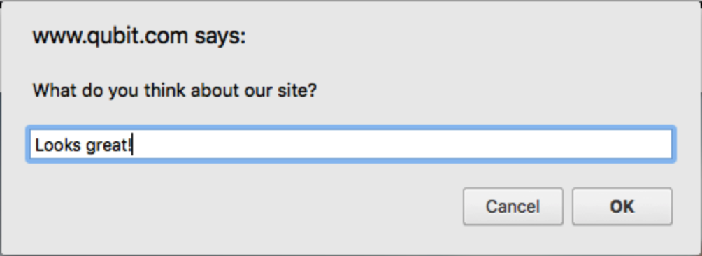
This will create a basic prompt that allows a visitor to enter text:

After emitting qubit.feedback, the feedback is displayed in the Opinions dashboard:

|
|
Note
The example above only uses a subset of available event fields.
The full specification of |
qubit.feedback specification
| Field (JS Data Type) | Description |
|---|---|
feedback.id (String) |
A unique identifier for the feedback |
feedback.body (String) |
The feedback given by the visitors |
feedback.type (String) |
The type of feedback: exit, inline, proactive |
feedback.vertical (String) |
The Qubit vertical code for the property sending the feedback (for example, ec for retail, tr for travel) |
feedback.language (String) |
The ISO 639-1 code for the original feedback text (for example, |
feedback.translatedBody (String) |
If translated, the translated feedback |
feedback.hidden (Boolean) |
True to hide the feedback in the Qubit platform and in reporting |
Creating an exit feedback experience
If you’re interested in a collection format that is more robust than a generic prompt box, the following steps will help you create a simple modal that displays when a visitor expresses an intent to exit the site.
Step 1
Select Experiences from the side menu, select New experience, select Custom, and then Choose
Step 2
Enter a name for the experience and a description, if required, and then select Create
Step 3
Create a lightbox by placing the following code in the variation.js and variation.css files:
Variation JS
const { body } = document
const container = document.createElement('div')
body.appendChild(container)
// Create lightbox
container.outerHTML = `
<div class='qb-opinions-lightbox'>
<span class='qb-opinions-close'>×</span>
<span class='qb-opinions-msg'>What do you think about our site?</span>
<textarea class='qb-opinions-input' placeholder='Type your feedback here...'></textarea>
<button class='qb-opinions-submit'>Submit</button>
</div>
`Variation CSS
.qb-opinions-lightbox {
  position: absolute;
  top: 40vh;
  left: calc(~'50vw - 200px');
  height: 250px;
  width: 400px;
  z-index: 100;
  text-align: center;
  background-color: #fff;
  padding: 20px;
  box-sizing: border-box;
  outline: 1px solid #000;
}

.qb-opinions-close {
  position: absolute;
  top: 0px;
  right: 10px;
  font-size: 30px;
  cursor: pointer;
}

.qb-opinions-msg {
  font-weight: bold;
  display: inline-block;
  padding-bottom: 25px;
}

.qb-opinions-input {
  margin-bottom: 15px;
  min-height: 85px;
}
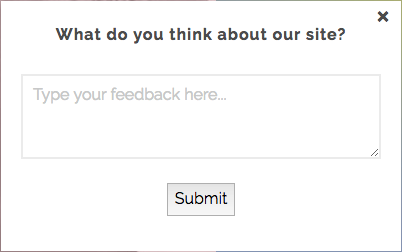
This code will yield a modal that looks similar to the example below:

Step 4
Wire up click handlers for lightbox CTAs by adding the following code to the variation.js and variation.css files:
Variation JS
// Lightbox initialization
const $lightbox = document.querySelector('.qb-opinions-lightbox')
const $submitButton = $lightbox.querySelector('.qb-opinions-submit')
const $closeButton = $lightbox.querySelector('.qb-opinions-close')
const $textArea = $lightbox.querySelector('.qb-opinions-input')
const errorClass = 'qb-opinions-error'

// Close CTA click handler
$closeButton.addEventListener('click', removeLightbox)

// Textarea focus handler
$textArea.addEventListener('focus', evt => {
  // Remove error validation when user engages with input box
  removeClass(evt.target, errorClass)
})

// Submit CTA click handler
$submitButton.addEventListener('click', () => {
  const feedback = $textArea.value

  if (feedback && feedback.length) { // check that feedback was actually entered
    options.uv.emit('qubit.feedback', {
      feedback: {
        id: Date.now(),
        body: feedback.substr(0, 2048),
        type: 'exit',
        language: 'en',
        vertical: options.meta.vertical
      }
    })

    // Show thank you messaging
    $lightbox.innerHTML = `
      <div class='qb-opinions-thanks'>
        Thanks for your feedback!
      </div>
    `

    // Auto remove lightbox after 2 seconds
    window.setTimeout(removeLightbox, 2000)
  } else {
    // Add error validation
    removeClass($textArea, errorClass) // remove first to prevent duplication
    addClass($textArea, errorClass)
  }
})

function removeLightbox () {
  $lightbox.className += ' qb-opinions-hide'
}

function addClass (el, addedClass) {
  el.className += ` ${addedClass}`
}

function removeClass (el, removedClass) {
  el.className = el.className.replace(removedClass, '')
}
Variation CSS
.qb-opinions-error {
  outline: 1px solid red;
}

.qb-opinions-hide {
  display: none !important;
}
Step 5
Add a trigger condition to fire the experience if the user’s mouse movement indicated an exit intent by first selecting 
Step 6
Select Edit in the Triggers panel and select Leaving page (arming delay) from Add new condition combo box*
Step 7
Enter the number of seconds that the visitor must be on the page before the mouse movement tracking begins and select Save:
