Use the compressedBinaryDataFileId property
Use the compressedBinaryDataFileId property
Use the compressedBinaryDataFileId property when you want to push 256 MB or less of compressed or uncompressed, binary or non-binary item data.
Using this property to push item data, whether you’re pushing a single item or batches of items, involves several steps which are detailed in this article.
When pushing a single item
When pushing a single item, you must first create a file container.
You then upload the item binary data into the file container.
Finally, you perform an Add or update a single item request using the compressedBinaryDataFileId property to reference the file container in which the item data is stored.
Step 1: Create a file container
Send a Create a file container HTTP request.
Note the uploadUri and fileId from the request response.
Step 2: Upload the item binary data into the file container
Perform the following PUT uploadUri request to upload your item data into the file container you created in step 1.
Request template
PUT <MyUploadURI> HTTP/1.1
<HTTPHeaders>Request parameters
-
Replace
<MyUploadURI>with theuploadUriyou got from step 1. -
Replace
<HTTPHeaders>with therequiredHeadersyou got from step 1.
Request body:
Your uncompressed or Deflate, GZip, LZMA, or ZLib compressed item data. Your request body must be in binary format and not Base64 encoded.
Successful response: 200 OK
{}A successful response has no content, but indicates that the content was successfully uploaded to the Amazon S3 file container.
Sample request
The following example shows how to upload Deflate compressed item data.
PUT link:https://coveo-nprod-customerdata.s3.amazonaws.com/proda/blobstore/mycoveocloudv2organizationg8tp8wu3/05ee7647-15a6-464a-8ffd-cd2fb6c1a03b[...] HTTP/1.1
x-amz-server-side-encryption: AES256
Content-Type: application/octet-streamRequest body:
eJyzySjJzbHjUgACm4zUxBQoUx+JnZSfUglhQlQZ2rlWJOYW5KQCVRkiSRTYhWRkFisAUWKeQipEiZ6NfoEdF6eNPsQQoA6QdQDMhB8EStep 3: Use the fileId as the CompressedBinaryDataFileId value
After the request in step 2 succeeds, use the fileId obtained from step 1 as the value for the compressedBinaryDataFileId property.
The following example shows how to use the compressedBinaryDataFileId property to specify item data in an Add or update an item request.
|
|
When using the
The default value is |
Sample request
PUT https://api.cloud.coveo.com/push/v1/organizations/mycoveocloudv2organizationg8tp8wu3/sources/mycoveocloudv2organization-rp5rxzbdz753uhndklv2ztkfgy/documents?documentId=file://example.html&compressionType=DEFLATE HTTP/1.1
Content-Type: application/json
Accept: application/json
Authorization: Bearer **********-****-****-****-************Request body:
{
  // ...Item metadata...
  "compressedBinaryDataFileId": "b5e8767e-8f0d-4a89-9095-1127915c89c7",
  "fileExtension": ".html",
  // ...Item permission model (if applicable)...
}
When pushing batches of items
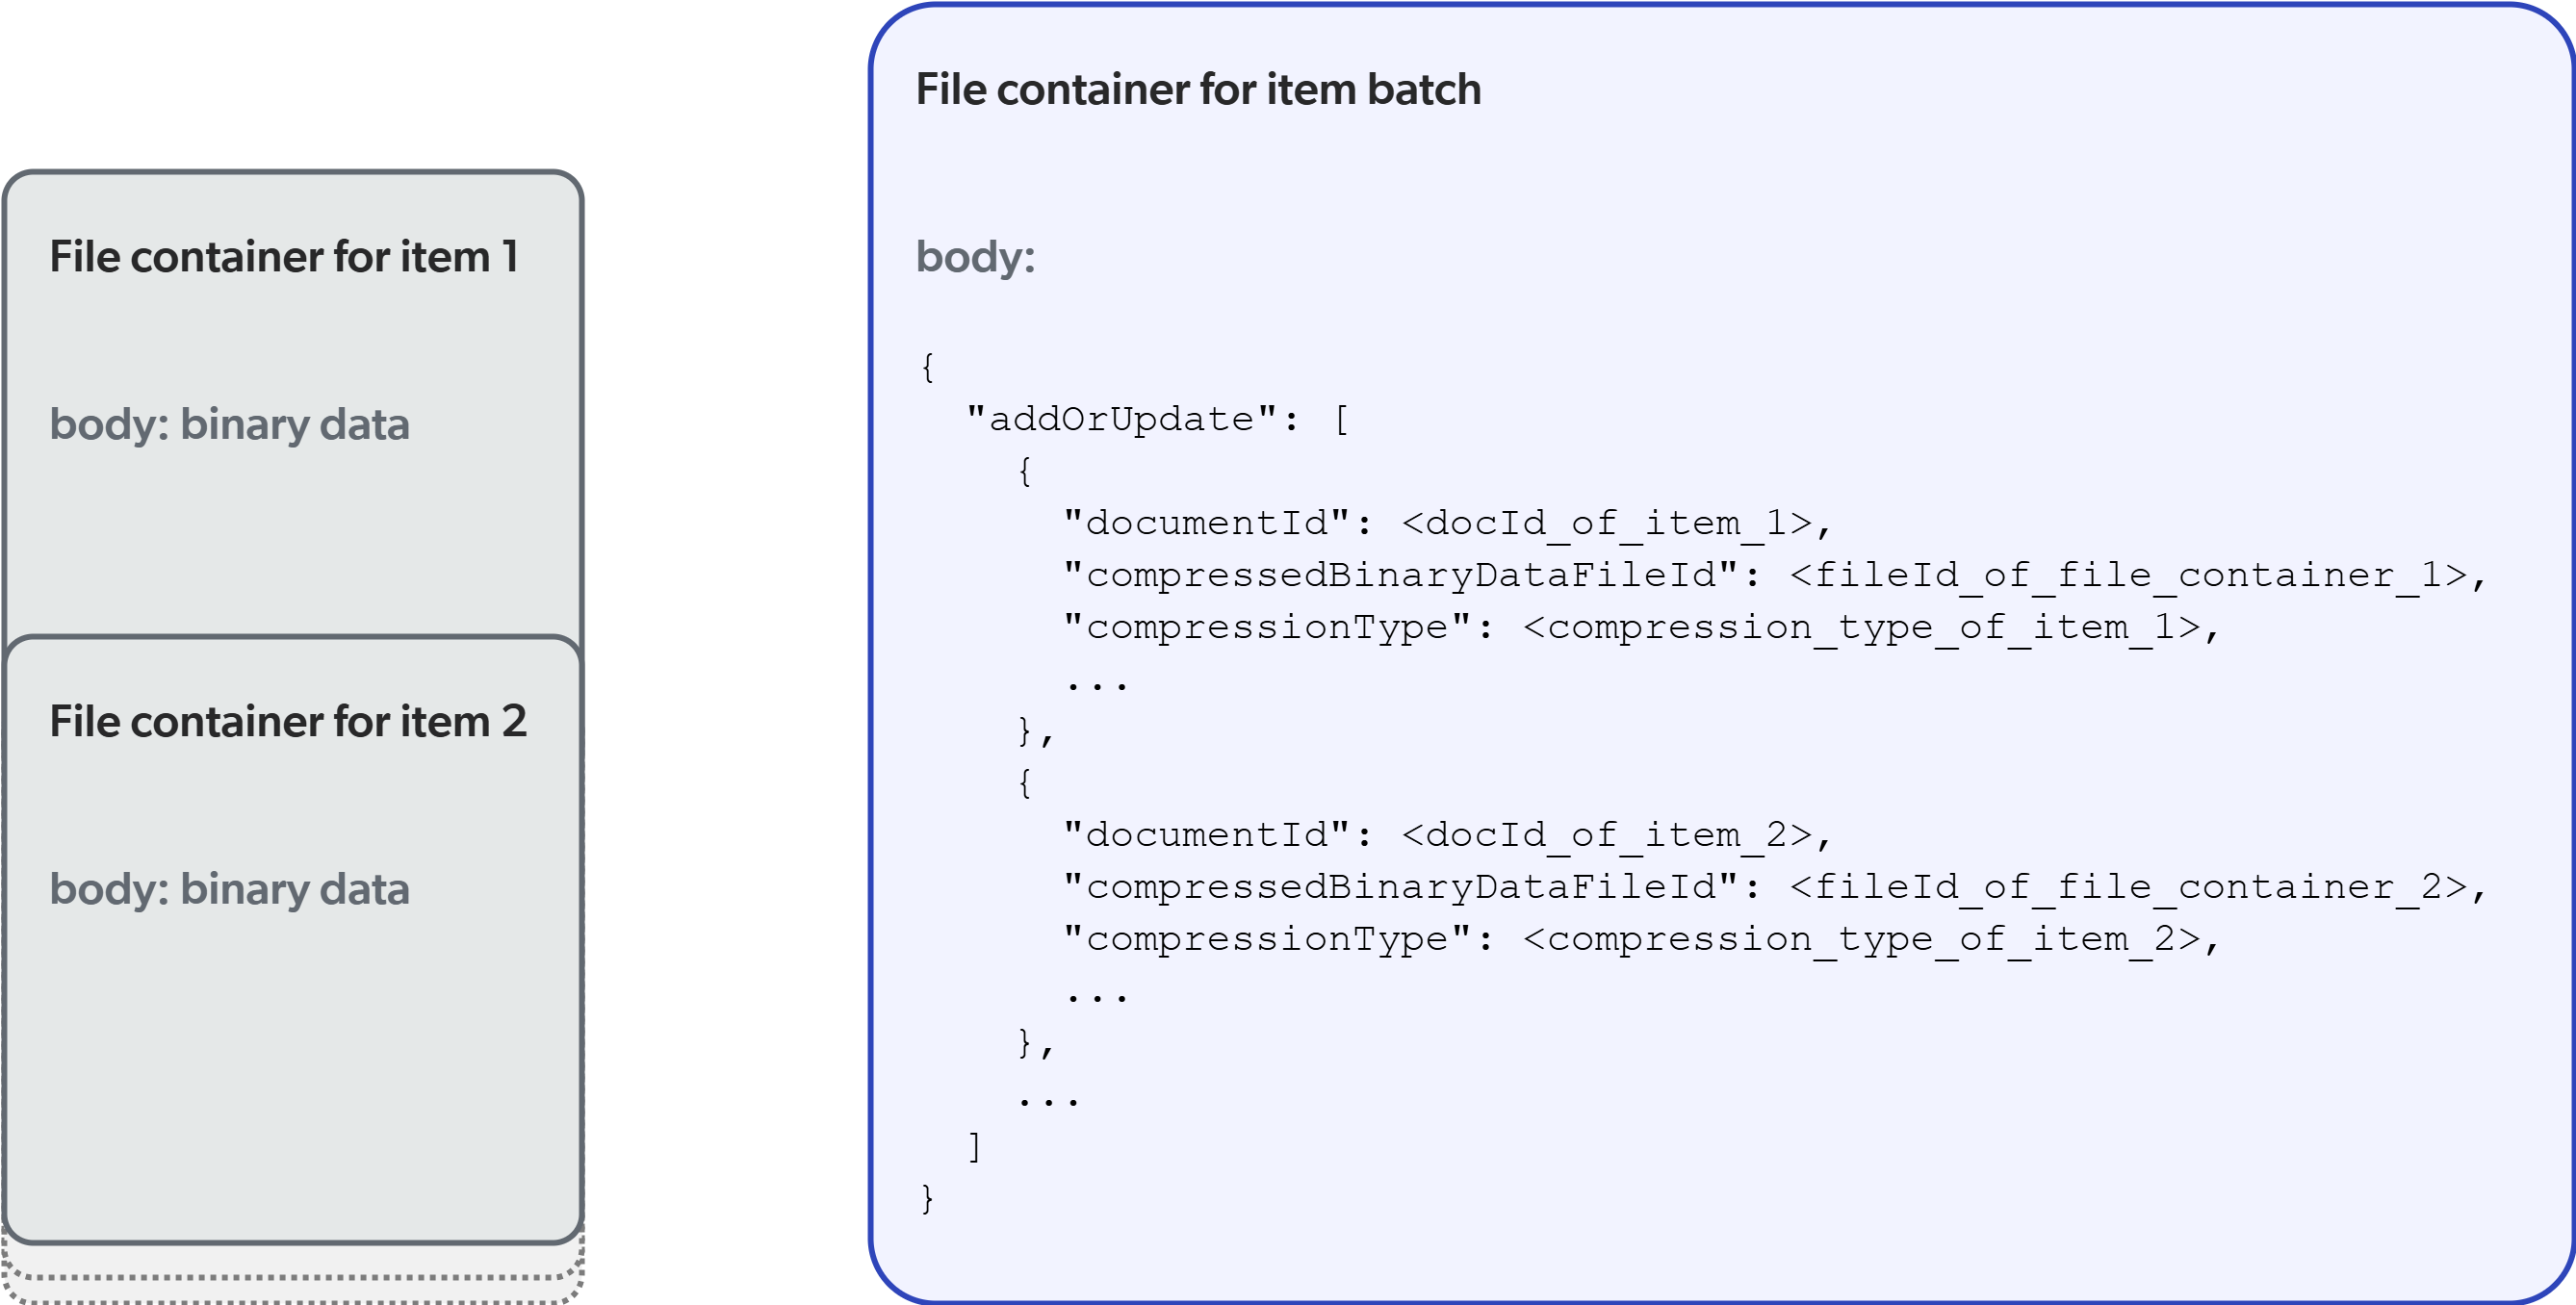
Using the compressedBinaryDataFileId property to upload a batch of items involves creating file containers for each item, and another for the batch of items.
You then upload the binary data of each item into its file container.
The next step is to upload the batch of items into the batch file container, using the compressedBinaryDataFileId property to reference each item’s file container.
Finally, you can push the batch file container to your source.
Step 1: Create the file containers
-
For each item to be added or updated, use the
Create a file containerHTTP request to create a new Amazon S3 file container. -
Note the
uploadUriandfileIdof each file container you create. -
Similarly, create a file container for the batch of items you want to add or update.
-
Note its
uploadUriandfileIdas well.
Step 2: Upload the binary data of each item into its file container
For each item to be added or updated, use the PUT uploadUri HTTP request to upload the item data into its file container.
Request template
PUT <MyUploadURI> HTTP/1.1
<HTTPHeaders>Request parameters
-
Replace
<MyUploadURI>with theuploadUriyou got from step 1. -
Replace
<HTTPHeaders>with therequiredHeadersyou got from step 1.
Request body:
Your uncompressed or Deflate, GZip, LZMA, or ZLib compressed item data. Your request body must be in binary format and not Base64 encoded.
Successful response: 200 OK
{}A successful response has no content, but indicates that the content was successfully uploaded to the Amazon S3 file container.
Sample request
The following example shows how to upload Deflate compressed item data.
PUT link:https://coveo-nprod-customerdata.s3.amazonaws.com/proda/blobstore/mycoveocloudv2organizationg8tp8wu3/05ee7647-15a6-464a-8ffd-cd2fb6c1a03b[...] HTTP/1.1
x-amz-server-side-encryption: AES256
Content-Type: application/octet-streamRequest body:
eJyzySjJzbHjUgACm4zUxBQoUx+JnZSfUglhQlQZ2rlWJOYW5KQCVRkiSRTYhWRkFisAUWKeQipEiZ6NfoEdF6eNPsQQoA6QdQDMhB8EStep 3: Upload the batch of items using the compressedBinaryDataFileId property
Upload your items into your batch file container using the PUT uploadUri HTTP request.
In the addOrUpdate child items, use the compressedBinaryDataFileId property to reference the fileId of the file container into which you uploaded the item’s binary data.
|
|
When using the
The default value is |
Sample request
The following example shows how to upload a batch of items to a file container, referring to an uploaded compressedBinaryDataFileId in an item.
PUT link:https://coveo-nprod-customerdata.s3.amazonaws.com/proda/blobstore/mycoveocloudv2organizationg8tp8wu3/8d3jf7sh-8d3h-sd89-d1s2-d9fj2ls9dnv7[...] HTTP/1.1
x-amz-server-side-encryption: AES256
Content-Type: application/octet-streamRequest body:
{
  "addOrUpdate": [
    {
      "documentId": "file://example1.html",
      "compressedBinaryDataFileId": "b5e8767e-8f0d-4a89-9095-1127915c89c7",
      "compressionType": "DEFLATE",
      "fileExtension": ".html",
      // ...Item metadata...
      // ...Item permission model (if applicable)...
    },
    {
      "documentId": "file://example2.html",
      "compressedBinaryDataFileId": "694de324-a895-497c-9624-c14a9424a6ac",
      "compressionType": "DEFLATE",
      "fileExtension": ".html",
      // ...Item metadata...
      // ...Item permission model (if applicable)...
    },
    // ...More items to add or update...
  ],
  "delete": [
    // ...Items to delete...
  ]
}
Step 4: Push the file container into your push source
Push the file container that contains your batch of uploaded items into your source.
Use the Add, update, and/or delete a batch of items HTTP request to complete this step.