Add a Database source
Add a Database source
A Database source indexes the content of a database. You can then make this content searchable through a Coveo-powered search interface.
For example, your company developer may have created a custom database to manage the parts used in your facilities, their location in your warehouse, and purchase orders. You could decide to index data regarding purchase orders only so that your buyers can find this content via your Coveo-powered employee portal.
Source key characteristics
The following table presents the main characteristics of a Database source.
| Features | Supported | Additional information | |
|---|---|---|---|
|
|||
|
|||
|
|||
Content security options |
|
This option is available in Crawling Module sources, not in Cloud sources. |
|
|
|||
|
|||
Automatic mapping of metadata to fields that have the same name |
|||
Automatically indexed metadata |
Examples of auto-populated fields:
Sample of auto-populated fields (when the source configuration XML includes the corresponding element):
After a content update, inspect your item field values in the Content Browser. |
||
Extracted but not indexed metadata |
Source configuration |
||
|
|
Leading practice
The number of items that a source processes per hour (crawling speed) depends on various factors, such as network bandwidth and source configuration. See About crawling speed for information on what can impact crawling speed, as well as possible solutions. |
Supported database types
The cloud version (![]() ) of the source supports the following database types:
) of the source supports the following database types:
-
Databricks
-
Microsoft SQL Server
-
MySQL
-
Postgres
-
Oracle
-
Redshift
The Crawling Module version (![]() ) supports the following database types:
) supports the following database types:
-
Microsoft SQL Server
-
MySQL
-
Postgres
-
Oracle
-
Any database using an ODBC driver. This driver must be installed on your Crawling Module server.
Prerequisites
Before you create a Database source:
-
Ensure that your license allows you to create this source and that your organization hasn’t reached its source quota. You can review your quotas on the License & Usage (platform-ca | platform-eu | platform-au) page, along with your usage.
-
If you’re using the Database source in a Coveo for Commerce implementation, ensure you meet the commerce requirements.
Commerce requirements
When using a Database source to index commerce-specific content, such as products, variants, and availabilities, you have to undergo a catalog configuration process to benefit from all commerce-related capabilities.
More specifically, you must:
-
Enable Coveo Personalization-as-you-go (PAYG) capabilities in your source.
-
Associate your source with a catalog configuration.
Enable Coveo Personalization-as-you-go
Coveo Machine Learning tools include Coveo Personalization-as-you-go (PAYG) capabilities for commerce use cases. This suite of advanced features learns from a user’s intent and reacts within a few clicks. PAYG models require the building of a product vector space to represent the products contained in your source. For Database sources, you must enable the Stream API before pushing any content to your source to build this product vector space and benefit from PAYG capabilities.
To enable the Stream API in your source
-
In the
parametersobject, add the following:"UseStreamApi": { "value": "true" } -
Click Save.
|
|
You must enable the Stream API in your source before performing the first Stream API load operation. After the first Stream API load operation, you can’t change this setting. |
Catalog configuration
Behind the scenes, the Database source uses the Stream API to push content to the Coveo index. Therefore, Database sources must be associated with a catalog entity to ensure a complete configuration. This allows the source to accurately build a product vector space.
For instructions on how to create a catalog entity, see Commerce catalog entity.
Add a Database source
|
|
Leading practice
It’s best to create or edit your source in your sandbox organization first. Once you’ve confirmed that it indexes the desired content, you can copy your source configuration to your production organization, either with a snapshot or manually. Source re-authentication with a separate crawling account may be required in the production organization. See About non-production organizations for more information and best practices regarding sandbox organizations. |
Follow these steps to add a Database source using the desired content retrieval method:
-
Make sure that your organization meets the prerequisites before adding this source.
-
On the Sources (platform-ca | platform-eu | platform-au) page, click Add source.
-
In the Add a source of content panel, select the Cloud (
 ) or Crawling Module (
 ) tab, depending on your content retrieval context.
With the latter, you must install the Crawling Module to make your source operational.
) tab, depending on your content retrieval context.
With the latter, you must install the Crawling Module to make your source operational. -
Click the Database tile.
-
Configure your source.
"Configuration" tab
On the Add a Database Source page, the Configuration tab is selected by default. It contains your source’s general and authentication information, as well as other parameters.
"Identification" subtab
The Identification subtab contains general information about the source.
Name
Enter a name for your source.
|
|
Leading practice
A source name can’t be modified once it’s saved, therefore be sure to use a short and descriptive name, using letters, numbers, hyphens ( |
Project
Use the Project selector to associate your source with one or more Coveo projects.
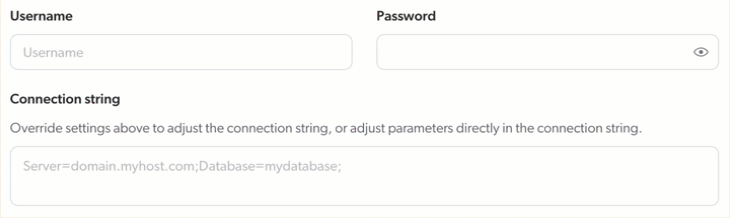
"Connection parameters" subtab
Enter your database connection parameters or a connection string. Coveo will use this information to access your database.
Since the connection string syntax differs from one database type to another, you might want to see The connection strings reference for details.
When providing credentials to access your database, enter the credentials of a dedicated user account that has access to the content you want to index. See Source credentials leading practices.
|
|
Notes
When you paste a connection string into the Connection string box:
These behaviors are normal and don’t indicate that your connection string is invalid. |
About ODBC drivers
If you’re using a Crawling Module source to index content from a database using an ODBC driver, ensure that you have the appropriate ODBC driver installed on your Crawling Module server.
A driver acts as an intermediary between Coveo’s connector and your database server. For example, to connect Coveo to an Oracle source, you must install an Oracle driver. ODBC drivers are typically provided by the database vendor. You can also use ODBC Data Source Administrator to review the drivers installed on your server.
"Content to index" subtab
The Content to index subtab lets you define the content that you want to make available as search results.
Item types
Enter the name of the tables or view objects you want to index.
XML configuration
For each item you entered above, add the corresponding XML read query to define what to index and how. Specify the data to copy from database fields to Coveo fields. See the reference page to help you in the process.
|
|
Your XML queries should be read queries only, or else you could make unwanted changes to your database. |
If needed, you can run subqueries on every item to complete the information with more complex queries. See also Further configuration for other options you can implement.
"Advanced settings" subtab
The advanced settings are optional. They let you fine-tune the behavior of your source in some specific situations.
Command timeout
Try increasing the timeout value when:
-
Your database is slow to respond to queries.
-
Your queries take long to execute.
-
You encounter database timeout errors.
First increase the value to 120 seconds. If the issue persists, you can either increase the timeout value again or use paged SQL queries instead.
Maximum response page size
This is the maximum number of items a database can return at once. If you know your query will return a large number of items and this may affect your database’s stability, try decreasing this value.
"Crawling Module" subtab
If your source is a Crawling Module source, and if you haven’t already installed the Coveo Crawling Module on a server that has access to the database of which you want to retrieve the content, click Download in the information box to do so.
If you have more than one Crawling Module linked to this organization, select the one with which you want to pair your source. If you change the Crawling Module instance paired with your source, a successful rebuild is required for your change to apply.
"Items" tab
On the Items tab, you can specify how the source handles items based on their file type or content type.
File types
File types let you define how the source handles items based on their file extension or content type. For each file type, you can specify whether to index the item content and metadata, only the item metadata, or neither.
You should fine-tune the file type configurations with the objective of indexing only the content that’s relevant to your users.
Your repository contains .pdf files, but you don’t want them to appear in search results.
You click Extensions and then, for the .pdf extension, you change the Action by default and Action on error values to Ignore item.
For more details about this feature, see File type handling.
Content and images
If you want Coveo to extract text from image files or PDF files containing images, enable the appropriate option. The extracted text is processed as item data, meaning that it’s fully searchable and will appear in the item Quick view.
|
|
Note
When OCR is enabled, ensure the source’s relevant file type configurations index the item content. Indexing the item’s metadata only or ignoring the item will prevent OCR from being applied. |
See Enable optical character recognition for details on this feature.
"Content security" tab
Select who will be able to access the source items through a Coveo-powered search interface. For details on the content security options, see Content security.
If you select Everyone or Specific users or groups, skip to the "Access" tab.
With a Crawling Module source, you can select the Same users and groups as in your content system option to index a permission system.
When using this option, define AllowedUsers nodes in your XML queries.
Moreover, check the Permission system is Active Directory box if applicable. If so, you’ll need to enter your Active Directory details.
Active Directory details
Username and password
Enter credentials to grant Coveo access to your Active Directory. See Source credentials leading practices.
Email attributes
By default, Coveo retrieves the email address associated to each security identity from the mail attribute.
Optionally, you can specify additional or different attributes to check.
Should an attribute contain more than one value, Coveo uses the first one.
Enable Transport Layer Security (TLS)
Select this option to use a TLS protocol to retrieve your security identities. If you do, we strongly recommend selecting StartTLS if you can. Since LDAPS is a much older protocol, you should only select this value if StartTLS is incompatible with your environment.
Expand well-knowns
Select this option if you want the users that are included in your Active Directory well-known security identifiers to be granted access to the indexed content.
Supported well-known SIDs are: Everyone, Authenticated Users, Domain Admins, Domain Users, and Anonymous Users.
When enabling this option, you can expect an increase in the duration of the security identity provider refresh operation.
|
|
Leading practice
If your entire content is secured with |
Expand trusted domains
Select this option to have Coveo connect to your root domain to get the security identities of your other domains through the root domain.
If your environment contains more than one domain, you can establish a bidirectional or outbound cross-link relationship between the root domain of your Crawling Module server and your additional domains. When you do so, these domains trust your root domain, and Coveo can get their security identities through this root domain.
When enabling this option, you can expect an increase in the duration of the security identity provider refresh operation. Moreover, if a linked domain is unreachable, Coveo stops the security identity provider refresh operation.
"Access" tab
On the Access tab, specify whether each group (and API key, if applicable) in your Coveo organization can view or edit the current source.
For example, when creating a new source, you could decide that members of Group A can edit its configuration, while Group B can only view it.
For more information, see Custom access level.
Build the source
-
Finish adding or editing your source:
-
When you’re done editing the source and want to make your changes effective, click Add and build source/Save and rebuild source.
-
When you want to save your source configuration changes without starting a build/rebuild, such as when you know you want to make other changes soon, click Add source/Save. On the Sources (platform-ca | platform-eu | platform-au) page, click Launch build or Launch rebuild when you’re ready to make your changes effective and index your content.
-
-
On the Sources (platform-ca | platform-eu | platform-au) page, follow the progress of your source addition or modification.
-
Once the source is built or rebuilt, review its content in the Content Browser.
Index metadata
To use metadata values in search interface facets or result templates, the metadata must be mapped to fields. With recently created Database sources, Coveo automatically maps metadata to fields with the same name.
|
|
Note
To enable this auto-mapping behavior on older Database sources, set the |
Coveo has some default fields for commonly extracted metadata (for example, author, date).
For any custom metadata defined in your source XML configuration, you must create a field with the same name to store the metadata values.
For example, if you’ve defined a department metadata, you must have a department field to store the metadata values.
-
Review the <CustomFields> element in your source XML configuration for the list of metadata you’re currently extracting from your content.
-
On the Fields (platform-ca | platform-eu | platform-au) page, for each metadata you want to use in facets or result templates, add a field with the same name, unless one already exists.
 Note
NoteFields are shared across sources in your Coveo organization. If a field with the same name as the metadata you want to index already exists and its configuration suits you, use it for the metadata you want to index. Otherwise, you can create a mapping to index the metadata in a new field with a different name.
ExampleYou decided to retrieve picture URIs from your content using the following metadata definition in your source XML configuration:
<CustomField name="pictureuri">%[pictureuri]</CustomField>Since there’s no Coveo
pictureuridefault field, you need to create thepictureurifield, unless it already exists. -
Return to the Sources (platform-ca | platform-eu | platform-au) page.
-
To reindex your source with your new mappings, click your source, and then click More > Rebuild in the Action bar.
-
Once the source is rebuilt, review your item field values. They should now include the values of the metadata you selected to index.
-
On the Sources (platform-ca | platform-eu | platform-au) page, click your source, and then click More > Open in Content Browser in the Action bar.
-
Select the card of the item for which you want to inspect properties, and then click Properties in the Action bar.
-
In the panel that appears, select the Fields tab.
-
Crawling Module time zone adjustment
If you’re using the Crawling Module to index your content and if this Crawling Module is running in a different time zone than your database, edit the source JSON configuration and add the TzdbTimeZoneId hidden parameter as follows.
The expected time zone format is IANA TZDB.
The time zone of your database is America/New_York, therefore you add the following to the source JSON configuration:
"TzdbTimeZoneId": {
"sensitive": false,
"value": "America/New_York"
}
Required privileges
You can assign privileges to allow access to specific tools in the Coveo Administration Console. The following table indicates the privileges required to view or edit elements of the Sources (platform-ca | platform-eu | platform-au) page and associated panels. See Manage privileges and Privilege reference for more information.
|
|
Note
The Edit all privilege isn’t required to create sources. When granting privileges for the Sources domain, you can grant a group or API key the View all or Custom access level, instead of Edit all, and then select the Can create checkbox to allow users to create sources. See Can create ability dependence for more information. |
| Actions | Service | Domain | Required access level |
|---|---|---|---|
View sources, view source update schedules, and subscribe to source notifications |
Content |
Fields |
View |
Sources |
|||
Organization |
Organization |
||
Edit sources, edit source update schedules, and edit source mappings |
Organization |
Organization |
View |
Content |
Fields |
Edit |
|
Sources |
|||
View and map metadata |
Content |
Source metadata |
View |
Fields |
|||
Organization |
Organization |
||
Content |
Sources |
Edit |
What’s next?
-
See Further configuration for options you can implement to make your source more efficient.
-
If you encounter database timeout errors, try adjusting the Command timeout.
-
Consider subscribing to deactivation notifications to receive an alert when a Crawling Module component becomes obsolete and stops the content crawling process.