Populate a field with meta tag content
Populate a field with meta tag content
Recording metadata with your indexed items in the Coveo Platform is a three-step process:
A Web source automatically collects some metadata for you (that is, step 1). Knowing which metadata is automatically extracted can spare you from doing the first step needlessly.
Alternatively, you can set up a web scraping configuration to extract metadata yourself.
Automatically extracted metadata
The HTML content attribute of <meta> tags is extracted when the tag is keyed with one of the following attributes: name, property, itemprop, or http-equiv.
The HTML of a web page contains <meta name="viewport" content="width=device-width, initial-scale=1.0" /> in its <head> section.
When the Web source indexes this page, it automatically extracts a viewport metadata whose value is width=device-width, initial-scale=1.0.
|
|
The View and map metadata feature lets you see all the metadata currently extracted from your content, whether indexed (that is, mapped to a field) or not. 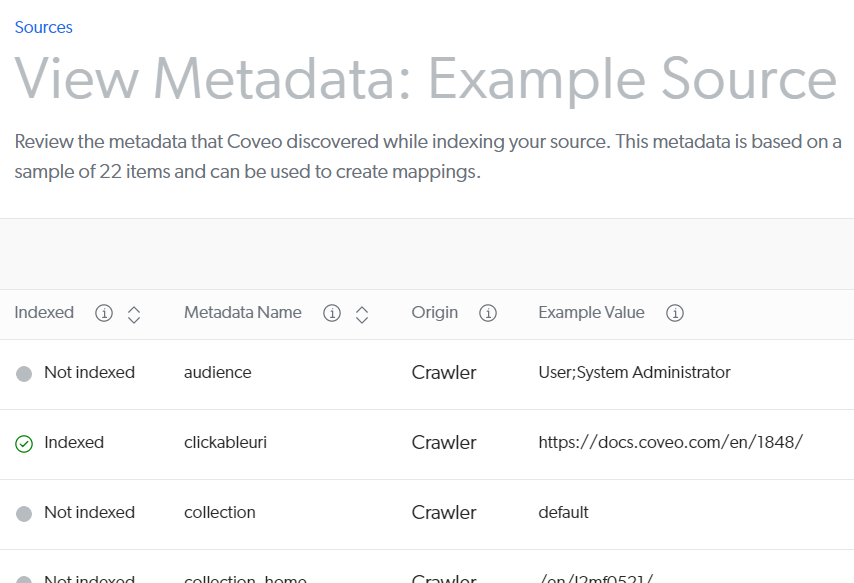
|
Store <meta> tag metadata in a field
If you have the necessary privileges, you can store an automatically extracted <meta> tag metadata with your indexed items as follows:
-
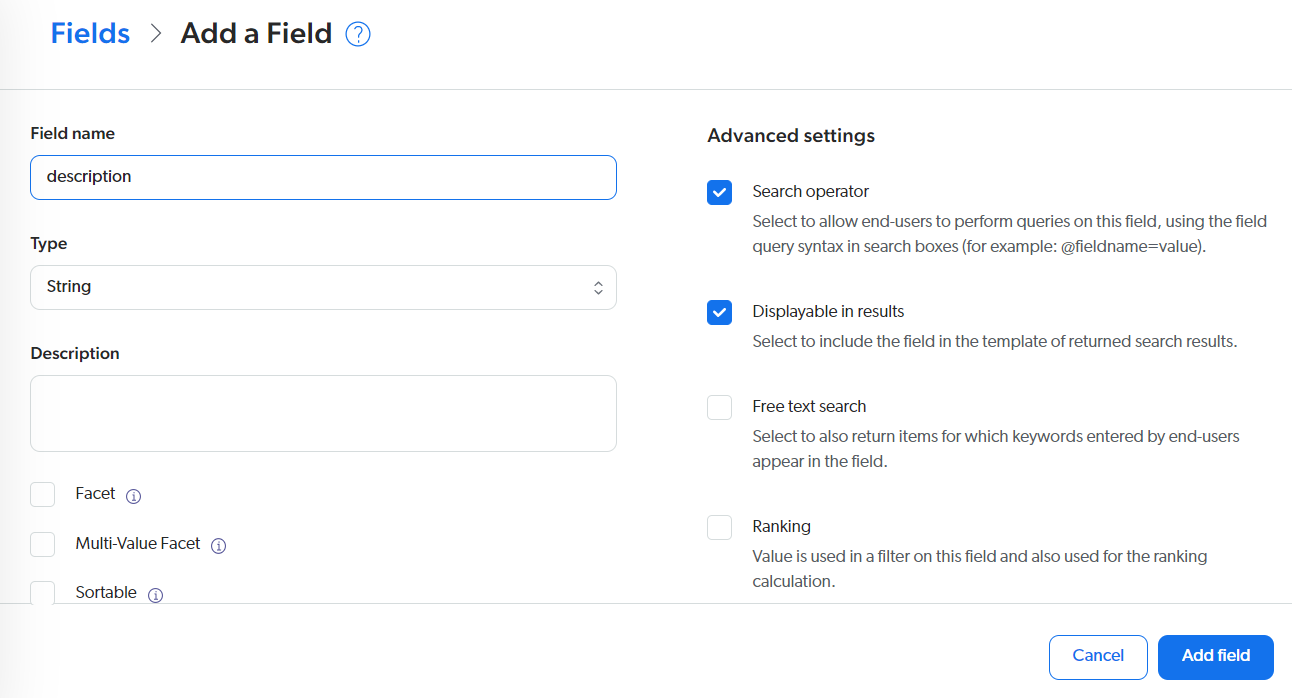
On the Fields (platform-ca | platform-eu | platform-au) page, click Add field.
-
In the Add a field panel, provide a field name. Specify other field settings as necessary.
-
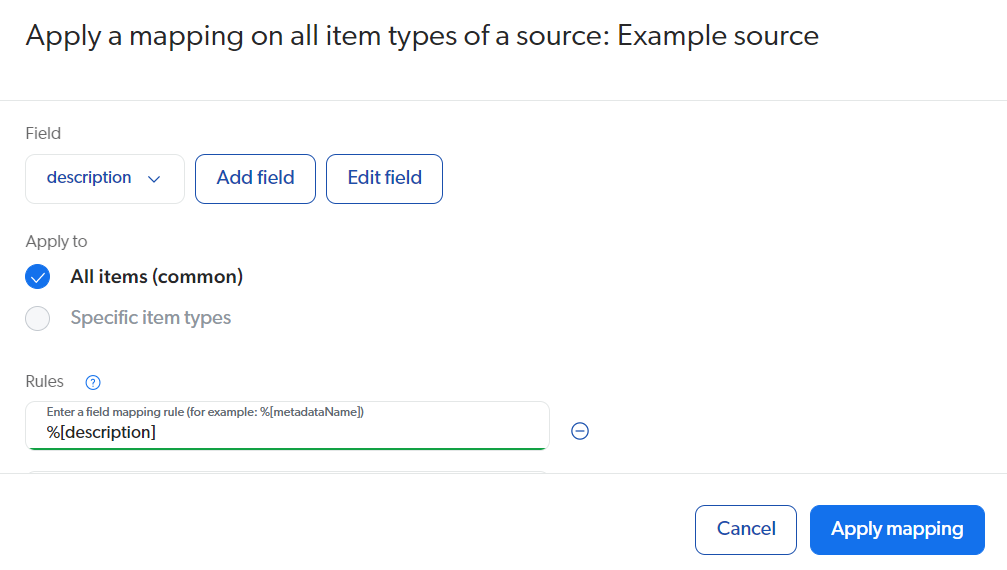
In the Sources (platform-ca | platform-eu | platform-au) page, click your source, and then click Mappings in the Action bar.
-
In the Edit mappings panel, click Add > Mapping.
-
In the Apply a mapping on all item types of a source panel, create a mapping rule which specifies the name of the metadata to be used to populate the field. Click Apply mapping when you’re done.
 Notes
Notes-
For help with mapping rules, see Mapping rule syntax reference.
-
For metadata names with colons (:), specify the origin explicitly in the mapping rule. The colon is the delimiter for the origin of the metadata (for example,
%[og:title:crawler]).
-
-
Rebuild your Web source.
-
Inspect a few items in the Content Browser to make sure that the field is properly populated.
What’s next?
Use your field in an Atomic search interface as follows:
-
Add your field to the
fieldsToIncludeproperty of theatomic-search-interfacecomponent. -
Use your field in a
atomic-field-conditioncomponent. For example, you can create a condition to display the field value in search results only when the item has a value for that field. -
Use the type-specific Atomic result component to display your field values in search results (for example,
atomic-result-text,atomic-result-number).
|
|
See the code sample of the |