Manage data exports
Manage data exports
The Data Exports (platform-ca | platform-eu | platform-au) feature in the Coveo Administration Console is a helpful tool that lets you extract your Coveo Analytics data to CSV files. This enables you to perform custom analysis, merge your data with other datasets, or archive it for future reference. With the required privileges, you can create data exports as needed or create a schedule for when you want exports to be automatically generated.
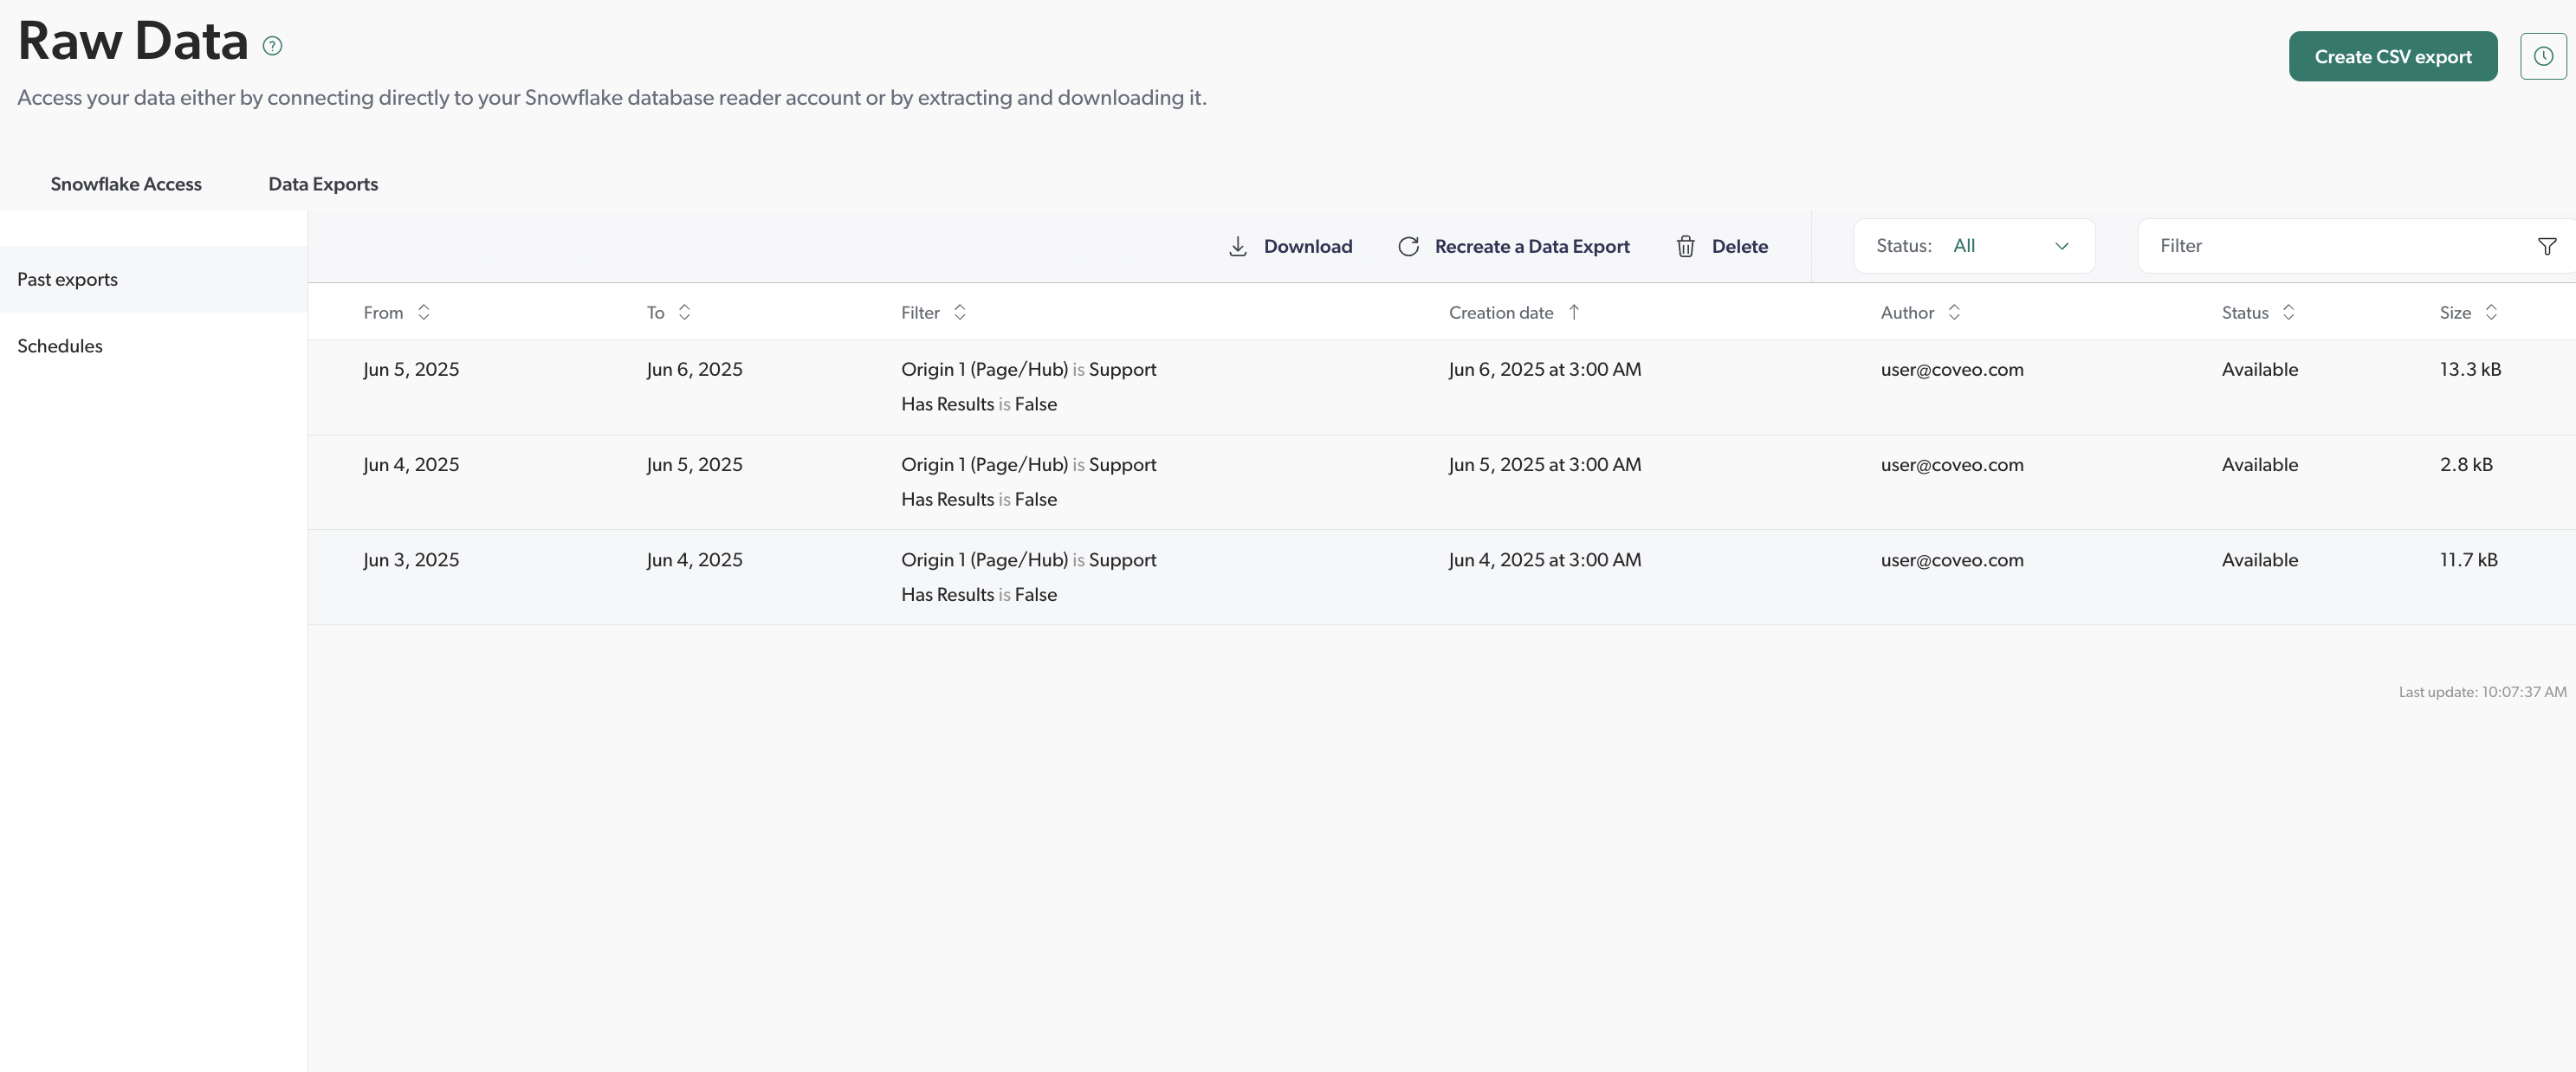
The Past exports subtab presents the data export management activities in reverse chronological order (newest activities at the top), where each row represents an export. You can download your exports to CSV files, provided that the Status of the export is set to Available.
|
|
An export expires 30 days after it’s created, and the status is set to Expired. Although you can’t download an expired export, you can use it to recreate a new one. After 60 days, the export is automatically deleted and removed from the Past exports subtab. |
Add or recreate an export
-
Access the Data Exports (platform-ca | platform-eu | platform-au) tab.
-
In the Past exports subtab, do one of the following:
-
To add a new export, click Create CSV export.
-
To recreate an export, click the applicable export, and then click Recreate a data export in the Action bar.
 Notes
Notes-
The Recreate a data export option is clickable when you’re within your Coveo organization export limit.
-
If you plan to create the same export several times, add an export schedule instead.
-
-
-
In the Add/Recreate a data export panel that opens, click the date picker to access the report period dialog, and then select the date range you want to review.
-
Click
 to access the dialog to add global dimension filters, and then create one or more filters to scope the exported data.
 -
Under Content to export, choose the type of data to export by selecting one or more of the corresponding checkboxes.
-
You can further scope the content to export by selecting or deselecting the relevant dimensions located next to the Content to export section.
Notes-
You can use the Origin dropdown menu to find the dimensions you’re looking for.
-
Not all dimensions can be exported.
-
In each CSV file contained in the export, each selected dimension appears in a single column.
-
-
In the Option section, select the Use dimension display name checkbox if you want the export to show the same dimension names as they appear in Coveo Analytics reports, for example, Origin 1 (Page/Hub).
NoteBy default, exports show the dimension API names (for example,
originLevel1).
-
-
Click Add data export.
The export appears at the top of the Data Exports tab table.
|
|
Notes
|
Download an export
-
Access the Data Exports (platform-ca | platform-eu | platform-au) tab.
-
In the Past exports subtab, click the export that you want to review, and then click Download in the Action bar to download the ZIP file on your device.
-
By default, the exported analytics database contains five tables.
-
Export data shows timestamps in GMT.
-
You can’t download an expired or a failed export.
See Reference for more details about the data export content in the CSV file.
Delete an export
-
Access the Data Exports (platform-ca | platform-eu | platform-au) tab.
-
In the Past exports subtab, click the export that you want to delete, and then click Delete in the Action bar.
-
In the confirmation prompt that appears, click Delete.
Add or edit an export schedule
-
Access the Data Exports (platform-ca | platform-eu | platform-au) tab.
-
In the Schedules subtab, do one of the following:
-
To add a new schedule, click Create schedule.
NoteYour Coveo organization is limited on the number of exports allowed. When you see the following Status:
The export limit is exceeded for your account., delete existing exports or contact Coveo Support to upgrade your limit. -
To edit an existing schedule, click the applicable schedule and then click More > Edit in the Action bar.
-
-
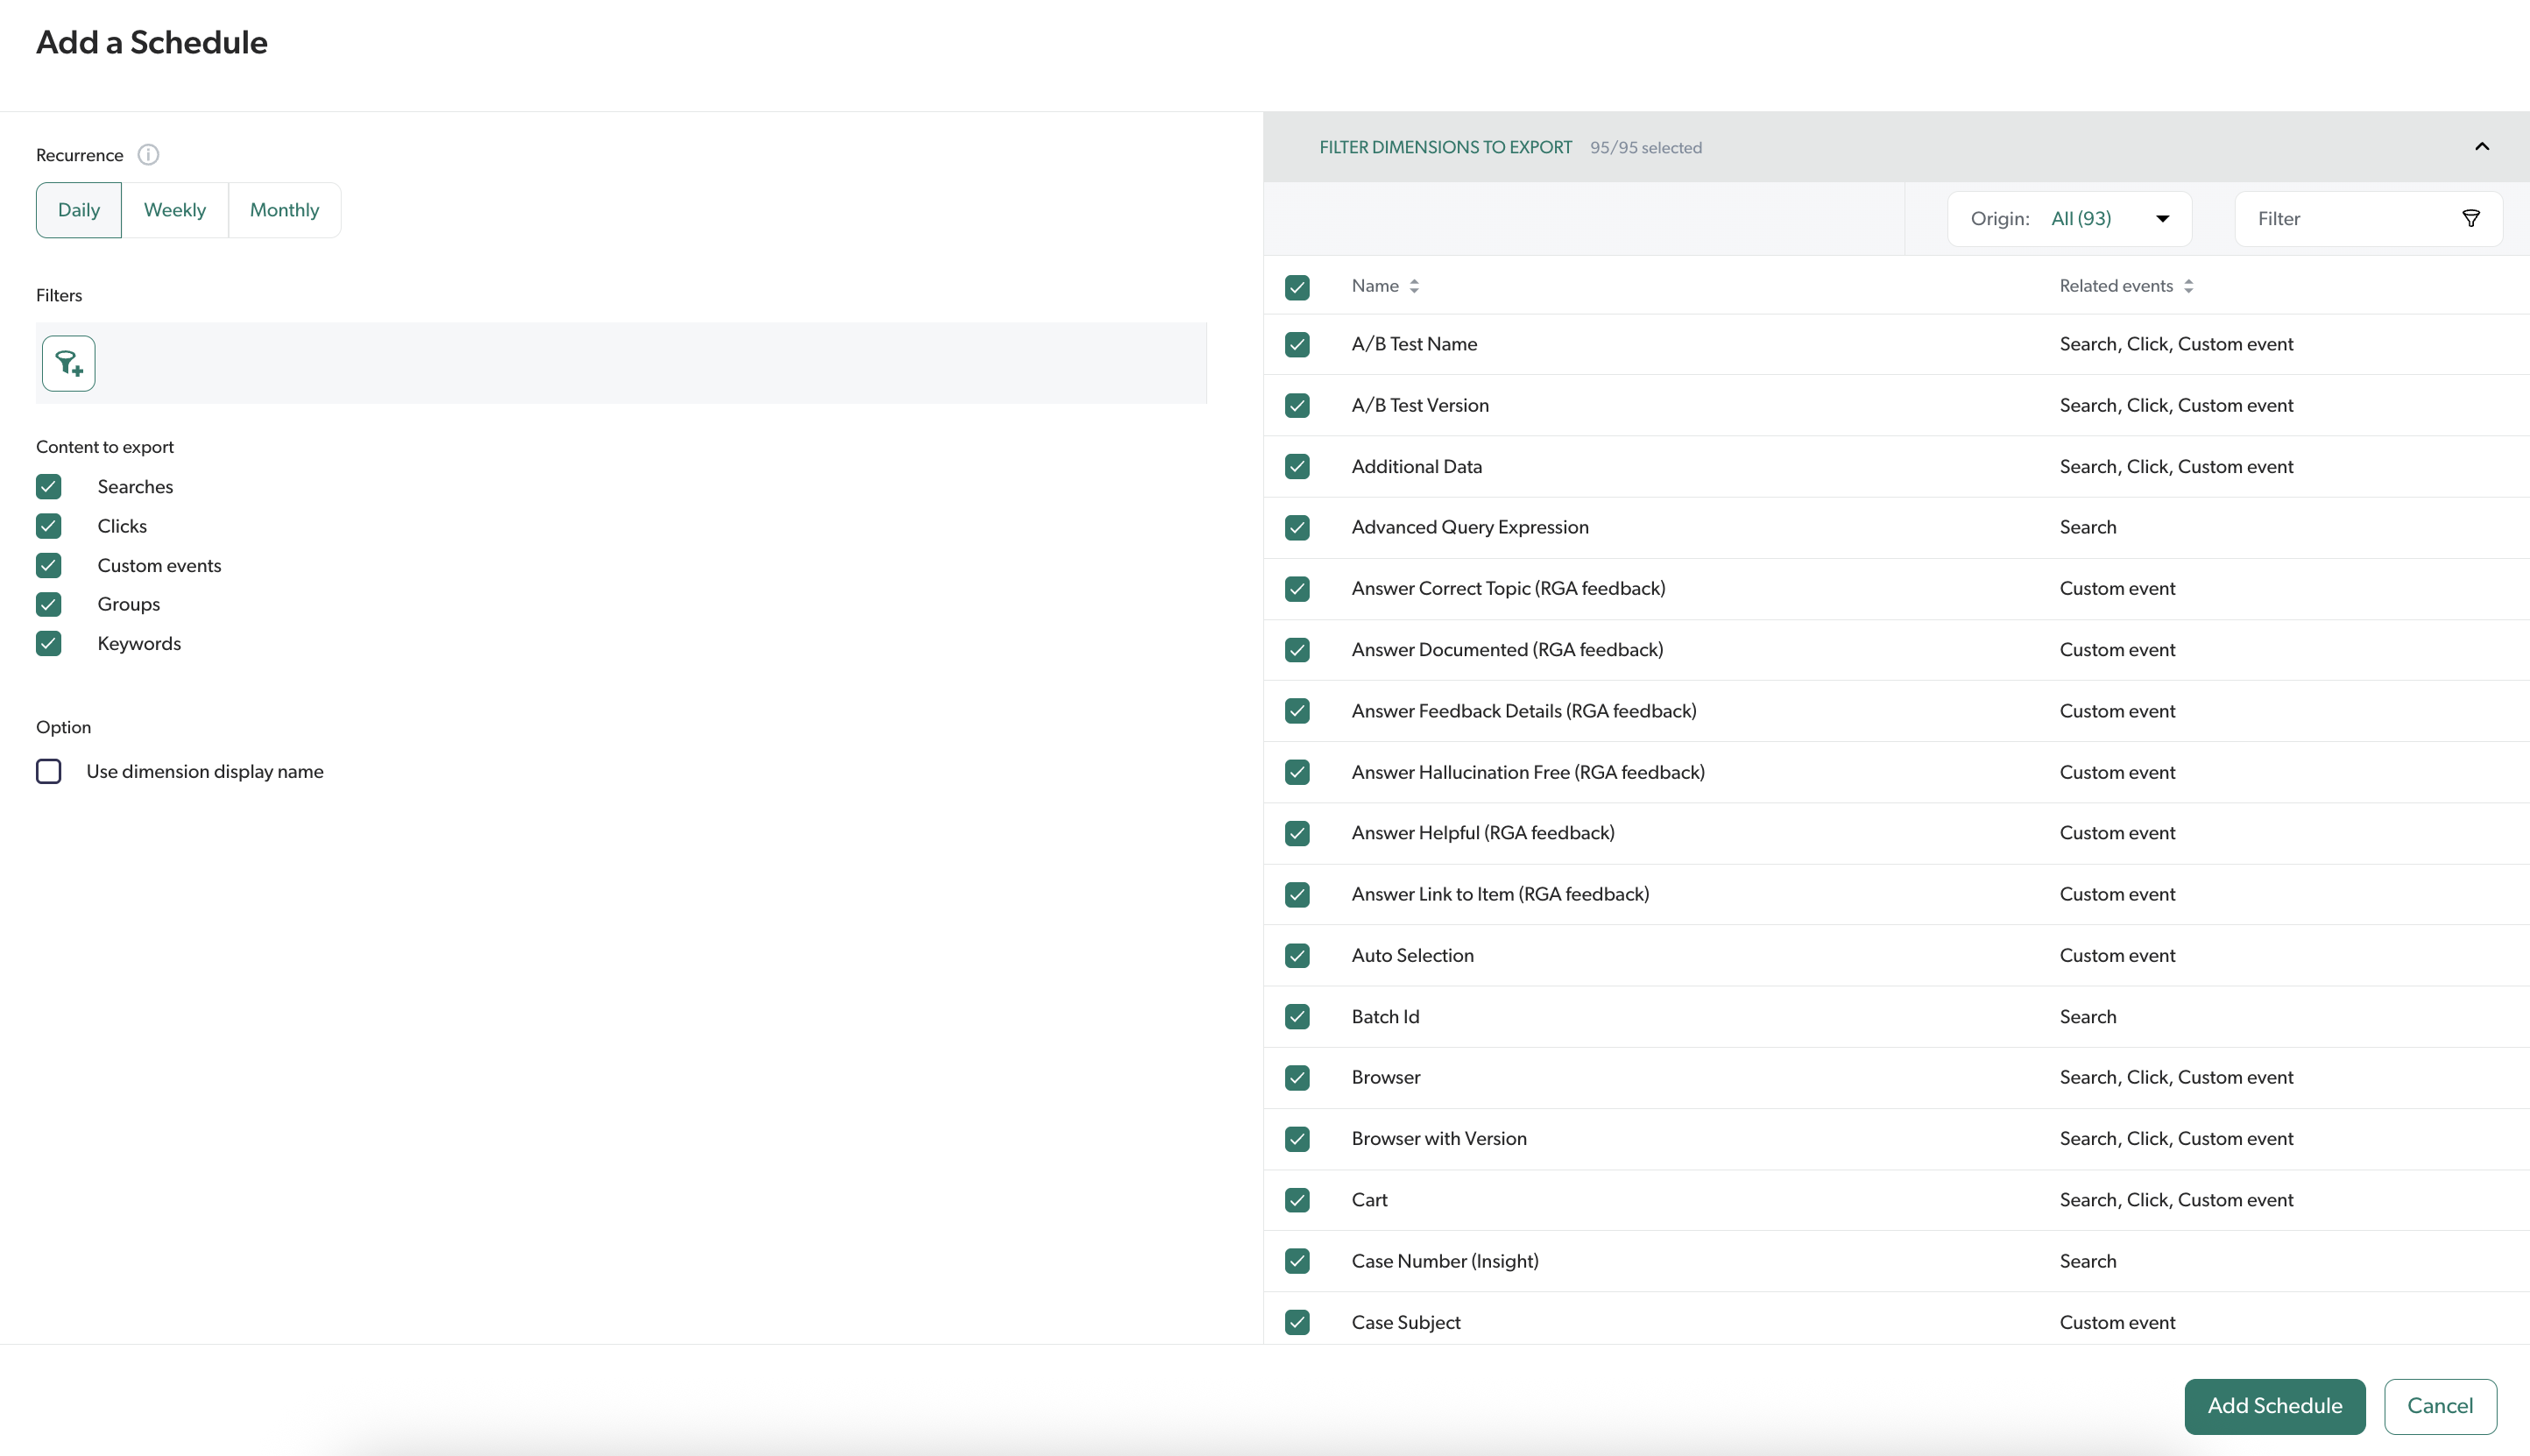
In the Add/Edit a Schedule panel that opens, under the Recurrence section, select the rate at which exports are created between the following values: Daily, Weekly, or Monthly.
Notes-
Exports are added at the end of the period referred by the selected recurrence. For example, when you select Daily, exports are added after midnight of each day.
-
An export scheduled with a recurrence counts as a new export every time it runs. For example, when you select Daily, the export added after midnight is considered a new export.
-
A maximum of three exports are kept per schedule. The oldest export is automatically deleted when the maximum is reached.
-
-
Click
to access the dialog to add global dimension filters, and then create one or more dimension filters to scope the exported data. -
Under the Content to export section, choose the type of data to export by selecting one or more of the corresponding checkboxes.
-
You can further scope the content to export by selecting or deselecting the relevant dimensions under the Filter Dimensions to Export section.
Notes-
You can use the Filter box or the Origin dropdown menu to find the dimensions you’re looking for.
-
By default, all dimensions are selected.
-
Not all dimensions can be exported.
-
In each CSV file contained in the export, each selected dimension appears in a single column.
-
-
-
Under Option, select the Use dimension display name checkbox, when you want the export to show the same dimension names as they appear in Coveo Analytics reports, for example, Origin 1 (Page/Hub).
NoteBy default, exports show the dimension API names.
For example,
originLevel1. -
Click Add Schedule or Save.
Review exports created by a schedule
-
Access the Data Exports (platform-ca | platform-eu | platform-au) tab.
-
In the Schedules subtab, click the desired schedule, and then click View Exports in the Action bar.
-
In the View Exports From Schedule panel, you can perform the same actions as in the Past exports section, such as downloading, recreating, and deleting exports.
Download the last export created by a schedule
-
Access the Data Exports (platform-ca | platform-eu | platform-au) tab.
-
In the Schedules subtab, click a schedule, and then click Download Last Export in the Action bar.
Delete a schedule
-
Access the Data Exports (platform-ca | platform-eu | platform-au) tab.
-
In the Schedules subtab, click the schedule you want to remove, and then click More > Delete in the Action bar.
-
In the confirmation prompt that appears, click Delete.
Reference
The five tables in the CSV files contain columns titled with the API names of the dimensions you use in reports. Therefore, knowing which API name refers to which dimension can be difficult. The following tables list the API names and the actual dimensions they refer to in alphabetical order.
In addition to these default columns, any created dimension will have its own column (see Manage dimensions on custom metadata).
click table
| API name | Dimension |
|---|---|
|
Is Anonymous |
|
Click Cause |
|
Facet Title |
|
Facet Value |
|
City |
|
N/A This column contains the unique ID for each click event. |
|
Click Rank |
|
Collection Name |
|
Country |
|
N/A This column contains all custom dimensions and their value, displayed in the following format and separated by comma: |
|
Click Date Time |
|
Device |
|
Device Category |
|
Document Title |
|
Document URL |
|
Language |
|
Is Mobile (deprecated) |
|
Origin Context |
|
Query Pipeline |
|
Region |
|
N/A The |
|
Source Name |
|
Search Result (see Search result (formerly Document)) |
|
User ID |
|
User Name |
|
Visit ID |
|
Visitor ID |
searches table
| API name | Dimension |
|---|---|
|
Advanced Query Expression |
|
Is Anonymous |
|
N/A Values in this column are destined for future use. |
|
Search Cause |
|
City |
|
Country |
|
Search Date Time |
|
Device (deprecated) |
|
Device Category |
|
Facet Title |
|
Facet Value |
|
N/A The |
|
Language |
|
Is Mobile |
|
Number of Results |
|
Origin Context |
|
Page Number |
|
N/A Values in this column are destined for future use. |
|
Query |
|
Query Pipeline |
|
Region |
|
N/A This column contains the time taken by each query to return. |
|
Origin 1 (Page/Hub) |
|
Origin 2 (Tab) |
|
Origin 3 (Referrer) |
|
User Agent |
|
User ID |
|
User Name |
|
Visit ID |
|
Visitor ID |
|
Has Clicks |
|
Has Results |
custom_events table
The custom_events table is a special one that contains the non-search and non-click events in the system.
Two different IDs can be used to create a relation between the custom events and the other tables:
-
The
visitIdcan be used to relate a custom event with all queries and clicks in the same visit (for example, all the queries that preceded a Case Deflection event in a user visit on your community site). -
The
lastSearchIdcontains the query (if any) that immediately preceded the custom event. Therefore, it’s possible to do a relation between a custom event and the last query done by the user who triggered the custom event.
| API name | Dimension |
|---|---|
|
Is Anonymous |
|
City |
|
Country |
|
N/A This column contains the unique ID for each custom event. |
|
Custom Event Date Time |
|
Device |
|
Device Category |
|
Event Type |
|
Event Value |
|
Facet Title |
|
Facet Value |
|
Language |
|
N/A The |
|
Is Mobile |
|
Origin Context |
|
Region |
|
User ID |
|
User Name |
|
Visit ID |
|
Visitor ID |
keywords table
| API name | Dimension |
|---|---|
|
Keyword |
|
N/A The |
groups table
| API name | Dimension |
|---|---|
|
Group |
|
N/A The |
Required privileges
The following table indicates the required privileges to view and edit the elements of the Raw Data (platform-ca | platform-eu | platform-au) page and associated panels (see Manage privileges and Privilege reference).
| Action | Service - Domain | Required access level |
|---|---|---|
View data exports |
Analytics - Analytics data |
View |
Manage data exports |
Analytics - Dimensions |
View |
Analytics - Analytics data |
Push |
|
Analytics - Data exports |
Edit |