Manage permission filters
Manage permission filters

If sensitive information can be derived from your Coveo Analytics data, you can restrict access by creating permission filters so that certain report data is only accessible to specific Coveo organization members. This article explains how to create, edit, and delete permission filters from the Permission Filters (platform-ca | platform-eu | platform-au) page.
Permission filters can be assigned to any organization member or group and can also be modified or deleted at any time.
You want your technical support team to see only the organization data that:
-
Is relevant to their department, that is, the small appliances department
-
Pertains to Canadian users, for which the team is responsible
Coveo Analytics data relative to other departments or countries aren’t relevant for this team and could cause confusion. You therefore create the following permission filter so that irrelevant data is excluded from the reports and the agents only see the information they need:
-
Origin 1 (Page/Hub) contains Small Appliances -
Country is Canada
How permission filters apply
In reports and data exports, permission filters apply at the event level, meaning that users only see data that matches the filter conditions.
In the Visit Browser, permission filters work at the visit level. A visit is a full user session that can include multiple events. If at least one event within a session matches the filter, the entire visit is shown, including the other events.
A filter set to Country is Canada will hide visits where no events came from Canada.
However, if a user’s session includes one event from Canada and one from France, the whole visit is shown, including the French event.
Prerequisites
-
You have the required privileges to edit permission filters.
-
The dimensions you want to filter by already exist in your organization.
Add a permission filter
-
Access the Permission Filters (platform-ca | platform-eu | platform-au) page, then click Add permission filter.
-
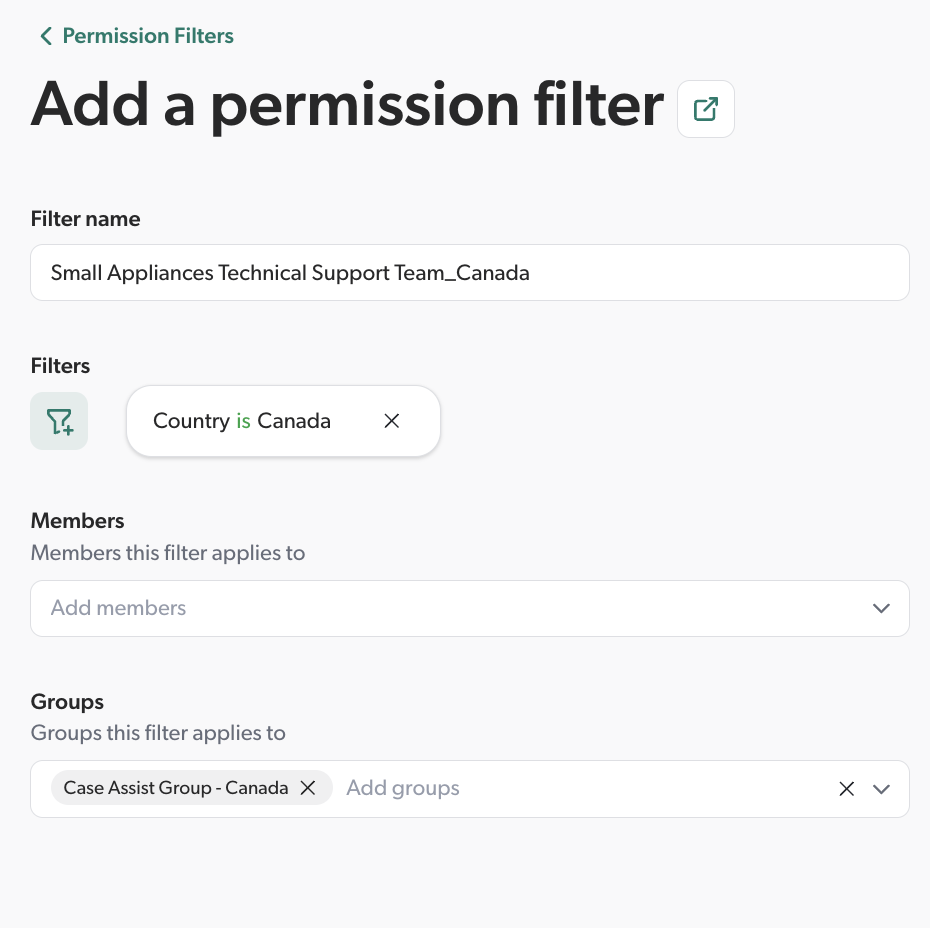
In the Add a permission filter panel that appears, under Filter name, enter a suitable name for the filter.
ExampleSmall Appliances Technical Support Team_Canada -
Under Filters, click
 .
.-
In the list of available dimensions, select the dimension by which you want to filter the data.
 Note
NoteYou can choose from multilevel dimensions only, that is, dimensions that can apply to click, search, and custom events, such as City and User Name.
-
Click the dropdown menu, and then select an operator to apply between the selected dimension and the value. The list of available operators depends on the selected dimension.
-
Click Add value and enter a value to use as a filter. To add more than one value, click Add value again or select Enter.

The maximum number of values per filter is 75.
NoteWhen you select a suggested value, this value is case-sensitive. However, when you enter a value, this value is case-insensitive.
-
Check the Include blank values in filter and Include n/a values in filter boxes if you want your filter to include blank and N/A values.
-
Click Add filter.
-
-
To add another filter, click
again. -
Under Members to whom the permission filter applies, use the dropdown menu to select the members you want to apply the filter to. Click
 to deselect any unwanted member.
 -
Under Groups to which the permission filter applies, use the dropdown menu to select the member groups you want to apply the filter to. Click
to deselect any unwanted group.ExampleYour filter applies to a Canadian technical support team responsible of the small appliances department, so you select the
Small Appliances Canadian Support Teamgroup. -
Click Add filter.
|
|
Notes
|
Edit a permission filter
-
Access the Permission Filters (platform-ca | platform-eu | platform-au) page, select the filter you want to edit, and then click Edit in the Action bar.
-
In the Edit a permission filter panel that appears, make your changes to the filter name, filter conditions, members, or groups.
-
Click Save.
Delete a permission filter
When you no longer want a permission filter to apply, you can delete it in the Coveo Administration Console.
-
Access the Permission Filters (platform-ca | platform-eu | platform-au) page, select the filter you want to edit, and then click Delete in the Action bar.
-
In the confirmation prompt that appears, select Delete.
Deleted permission filters stop applying immediately.
Review permission filter management activities
As part of your duties, you may need to review activities related to permission filters for investigation or troubleshooting purposes.
To do so, in the upper-right corner of the Permission Filters (platform-ca | platform-eu | platform-au) page, click  .
.
See Review resource activity for details on activities and alternative ways to access this information.
Required privileges
The following table indicates the required privileges to view and edit elements of the Permission Filters (platform-ca | platform-eu | platform-au) page and associated panels (see Manage privileges and Privilege reference).
| Action | Service | Domain | Required access level |
|---|---|---|---|
View permission filters |
Analytics |
Analytics data |
View |
Dimensions |
View |
||
Named filters |
View |
||
Permission filters |
View |
||
Organization |
Groups |
View |
|
Organization |
View |
||
Edit permission filters |
Analytics |
Analytics data |
View |
Dimensions |
View |
||
Named filters |
View |
||
Permission filters |
Edit |
||
Organization |
Groups |
View |
|
Organization |
View |
||
Access the Activity Browser and view all organization activities |
Organization |
Activities |
View |
Organization |
View |
|
|
A member with the View access level on the Activities domain can access the Activity Browser. This member can therefore see all activities taking place in the organization, including those from Coveo Administration Console pages that they can’t access. |
What’s next
If you assigned a group to a permission filter, verify that the correct members belong to that group.