Set destination links on card title and values
Set destination links on card title and values
In Coveo Analytics reports, when adding or editing specific report cards (table, trend, and pie/bar chart), you can set destination links on values and headers.
Destinations links can be useful; for example, they can help you learn exactly what search results the organization customers obtained before creating a support case. You could then fix relevance issues or fill the content gap to prevent similar case creation in the future.
Set destination links
|
|
Notes
|
-
Access Edit mode by clicking Edit in the upper-right corner.

If you’re not in Edit mode, your changes will be lost when you leave the explorer.
-
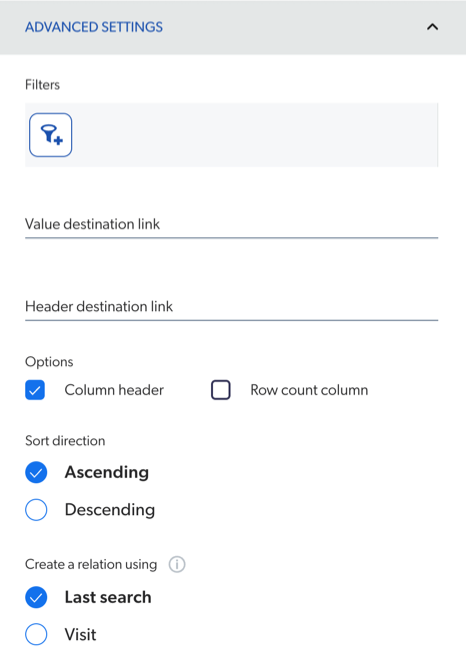
In the Value destination link box of the Create a card or Edit a card dialog (see Review and manage explorers and Review and manage dashboards), you can:
-
Enter the URL that you want to land on when clicking a table, trend, or pie/bar chart value.
 Note
NoteYou can also add a parameter in the URL to set a custom destination link based on the clicked value.
Each of the following examples uses the clicked value as a query:
-
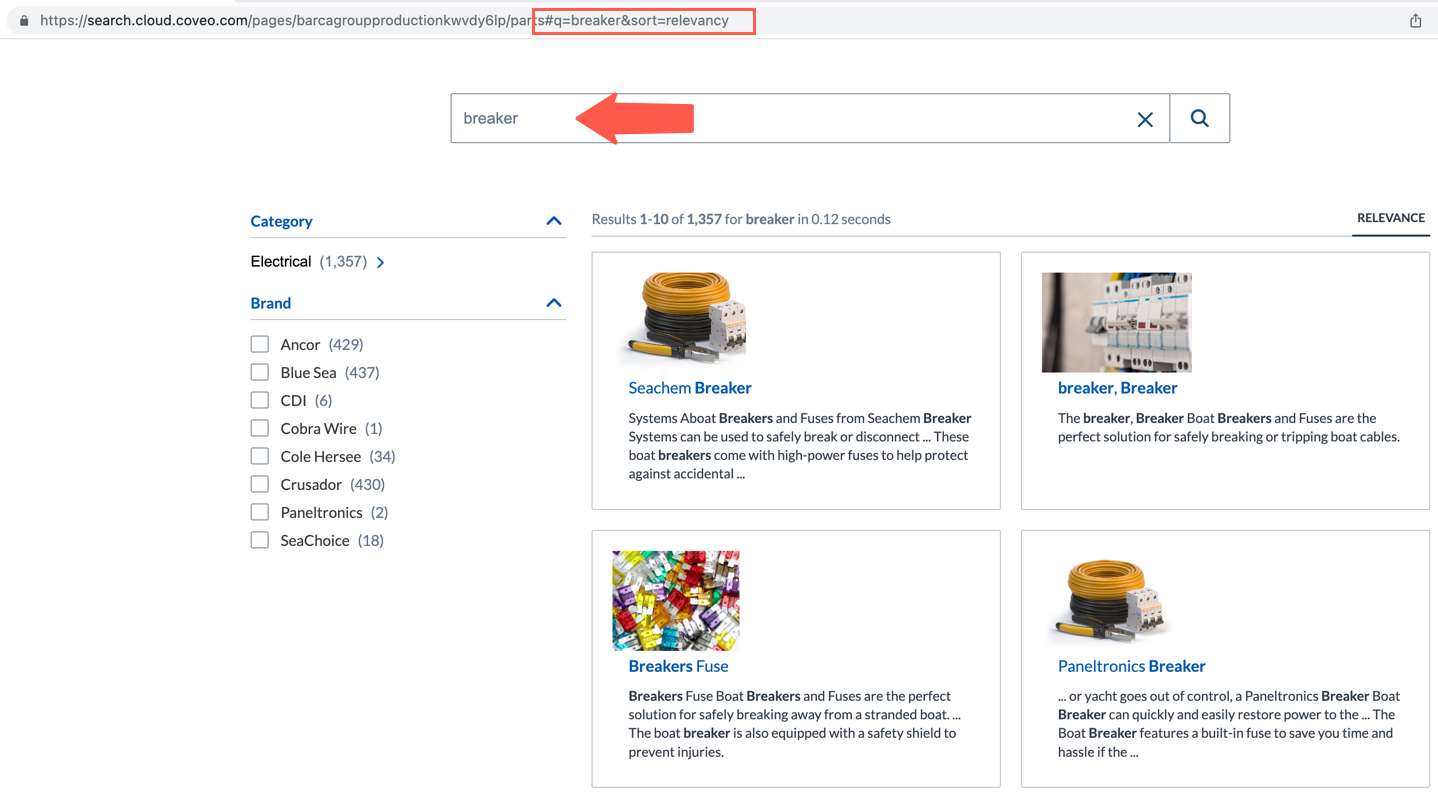
www.google.com/#q={value}: clicking a table or chart value launches a search in Google. -
http://mycoveosearchinterface.com/js/#q={value}: clicking a table or chart value launches a search in your Coveo Atomic Search Interface.
In each of these links,
valuewould be replaced with the clicked value in the table or chart.
Enter your customer support website URL with the parameter that launches a search on your site and
valuein brace brackets (for example,#q={value}) in the Landing Page box to know exactly what search results your customers got before creating a support case. You could then fix relevance issues or fill the content gap to prevent similar case creation in the future.For example, in a table, you click the User Query dimension value breaker and you’re redirected on your customer support website where the same query is launched.
-
-
Enter an existing report (pre-configured explorer, custom explorer, Summary dashboard, or custom dashboard) title in your Coveo organization by typing a report name, and then selecting one of the provided suggestions as you type.
NoteClicking a dimension value adds a filter with the clicked value to the landing page. This new filter is applied on top of the existing filters (if any). When a related filter already exists, the filters are combined together.
Examples:
-
You specify the Search Relevance pre-configured explorer as the destination for a table or chart containing queries. When you click a table or chart value (query), you’re redirected to the Search Relevance explorer with the following added filter:
(
User Query is [Clicked_Table/Chart_Value]) -
When you click a table or chart value (query) and the filter
User Query is Netflixis set in the destination (Search Relevance), the filter resulting is the following:User Query is Netflix OR [Clicked_Table/Chart_Value]
-
-
-
In the Header destination link box, you can:
Notes-
When no landing page and no header landing page are set, the pie/bar chart header doesn’t become a link and clicking the table and trend header redirects you to the current report.
-
When no header landing page is set, but a landing page is, clicking the card (table, trend, pie/bar chart) header redirects you to same page as clicking a the card value.
-
Enter the URL that you want to land on when clicking a card title.
-
Enter an existing report (pre-configured explorer, custom explorer, Summary dashboard, or custom dashboard) title in your Coveo organization by entering a report name, and then selecting one of the provided suggestions as you type.
-
-
Click Add card or Save.
-
If you’re in Edit mode, don’t forget to save your changes by clicking Save in the upper-right corner.
Required privileges
The following table indicates the required privileges to view and edit reports from the Reports (platform-ca | platform-eu | platform-au) page and associated panels (see Manage privileges and Privilege reference).
|
|
Note
Access to reports or part of their content may be further restricted as a function of the member (see Manage access to reports and Manage permission filters). |
| Action | Service | Domain | Required access level |
|---|---|---|---|
View reports |
Analytics |
Analytics data |
View |
Dimensions |
View |
||
Reports |
View |
||
Organization |
Organization |
View |
|
Edit reports |
Analytics |
Administrate |
Allowed |
Analytics data |
View |
||
Dimensions |
View |
||
Reports |
Edit |
||
Organization |
Organization |
View |