Snowflake Data Share
Snowflake Data Share
The Data Share (platform-ca | platform-eu | platform-au) feature of the Coveo Administration Console provides a convenient way to retrieve your data if you already have a Snowflake account. You can use this feature to extract and integrate your data into your account and leverage it using your business intelligence (BI) tool of choice.
Barca Sports stores the entirety of their data in their own Snowflake data lake. Meanwhile, they have a Coveo-powered search page, and they would like to retrieve the corresponding data and add it to the data lake. As a result, they use the Data Share feature, which accesses their data from Coveo’s database and shares it to their Snowflake account.
You can have multiple data shares active simultaneously. For example, if your company has multiple organizations in different regions and you separate your data based on regional compliance, you can create a data share for each region. To learn more about data sharing with Snowflake, see Working with shares.
Prerequisites
Before creating a data share, follow these prerequisites:
-
Confirm with your Coveo representative that your Snowflake account is eligible for data sharing based on the supported regions.
-
Make sure your Snowflake account uses AWS as its cloud provider.
-
Verify that you have the required permissions to create and manage data shares in your Snowflake account.
Regions and sites
Data sharing is currently supported for the following regions.
| Region | Sites |
|---|---|
US |
|
Canada |
Main: Canada (Central) - ca-central-1 |
Europe |
|
Asia |
Main: Asia Pacific (Sydney) - ap-southeast-2 |
Create a data share
To create a data share, do the following:
Step 1: Initiate a data share
To set up data sharing, access the Coveo Administration Console and the Snowflake console.
-
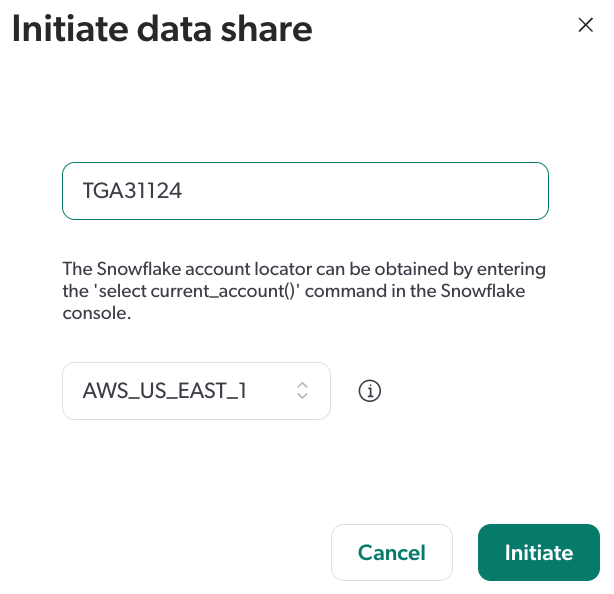
On the Data Share (platform-ca | platform-eu | platform-au) subtab, click Initiate data share.
-
In the Initiate data share panel that opens, enter the Snowflake account locator. If you’re unsure about which account locator to enter, you can find the correct one by entering
SELECT CURRENT_ACCOUNT()in the Snowflake console. Note
NoteThe account locator is case-sensitive, therefore when entering it in the Initiate data share panel, be sure to use the same casing as displayed in the Snowflake console.
-
Click the dropdown list and select the region where your Snowflake account is hosted. If you’re unsure about which region to select, you can find the correct one by entering
SELECT CURRENT_REGION()in the Snowflake console. -
Click Initiate.
Your Snowflake account appears in the Data Share subtab.
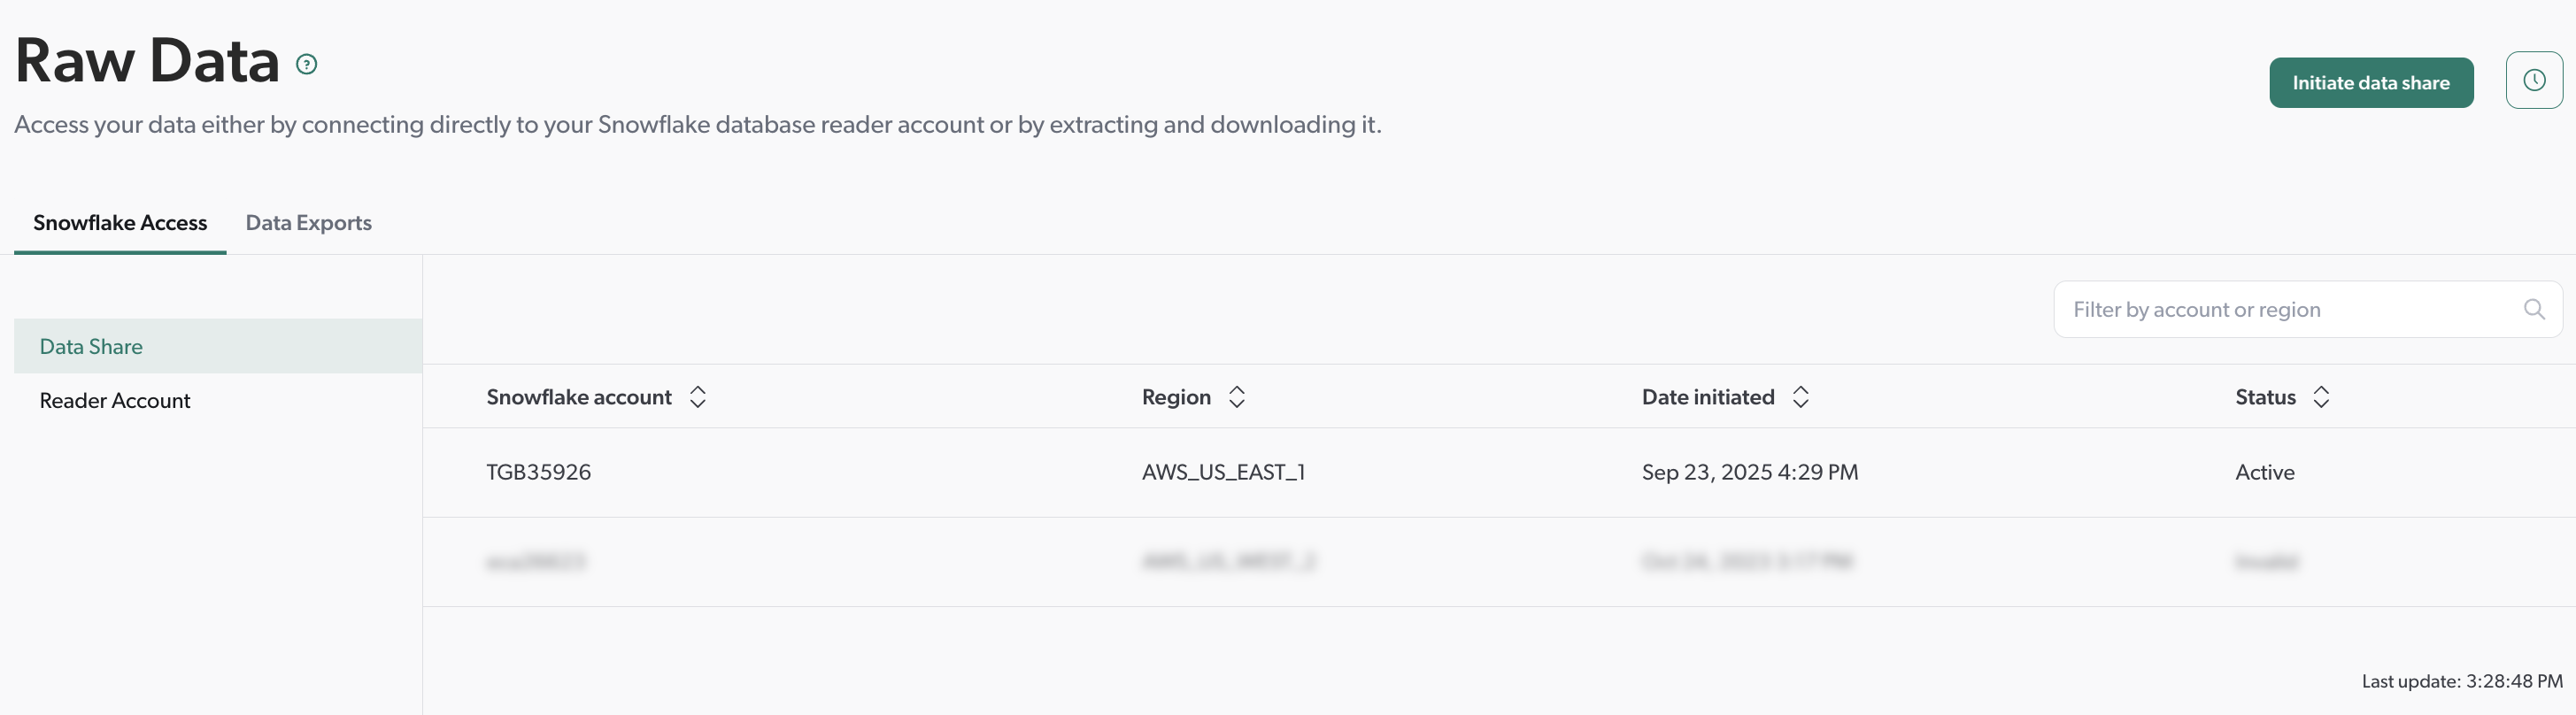
The Status column indicates the status of the share:
-
If the status is Invalid, the Snowflake account locator you entered or the region you selected may be incorrect.
-
If the status is Pending, the data share is still in the process of syncing.
|
|
Note
A data share with a Snowflake account in the same region as one of the Snowflake Disaster Recovery (DR) sites takes more time to sync, and therefore the share may be unavailable for up to one hour. |
Step 2: Retrieve the share in Snowflake
Once the data share is initiated and its status is shown as Active in the Coveo Administration Console, you must retrieve the shares in Snowflake and create a database for each one. This is possible through the Snowsight UI or by running SQL queries in a Snowflake worksheet.
|
|
Note
Multiple data models may be available to you, such as the CORE model and the UA model. Each data model results in an individual share and the retrieval process must be completed for each model. Therefore, you may need to repeat the share retrieval process more than once for each share in Snowflake. |
With the Snowsight UI:
-
Ensure that you’re using the
ACCOUNTADMINrole. You can do this by clicking your username in the lower-left corner of the console and selecting Switch Role. Then, selectACCOUNTADMINfrom the list of roles. -
Find the Coveo data share by navigating to Data Products > Private Sharing.
-
On the Private Sharing page, under Direct Shares, you should see one or multiple shares.
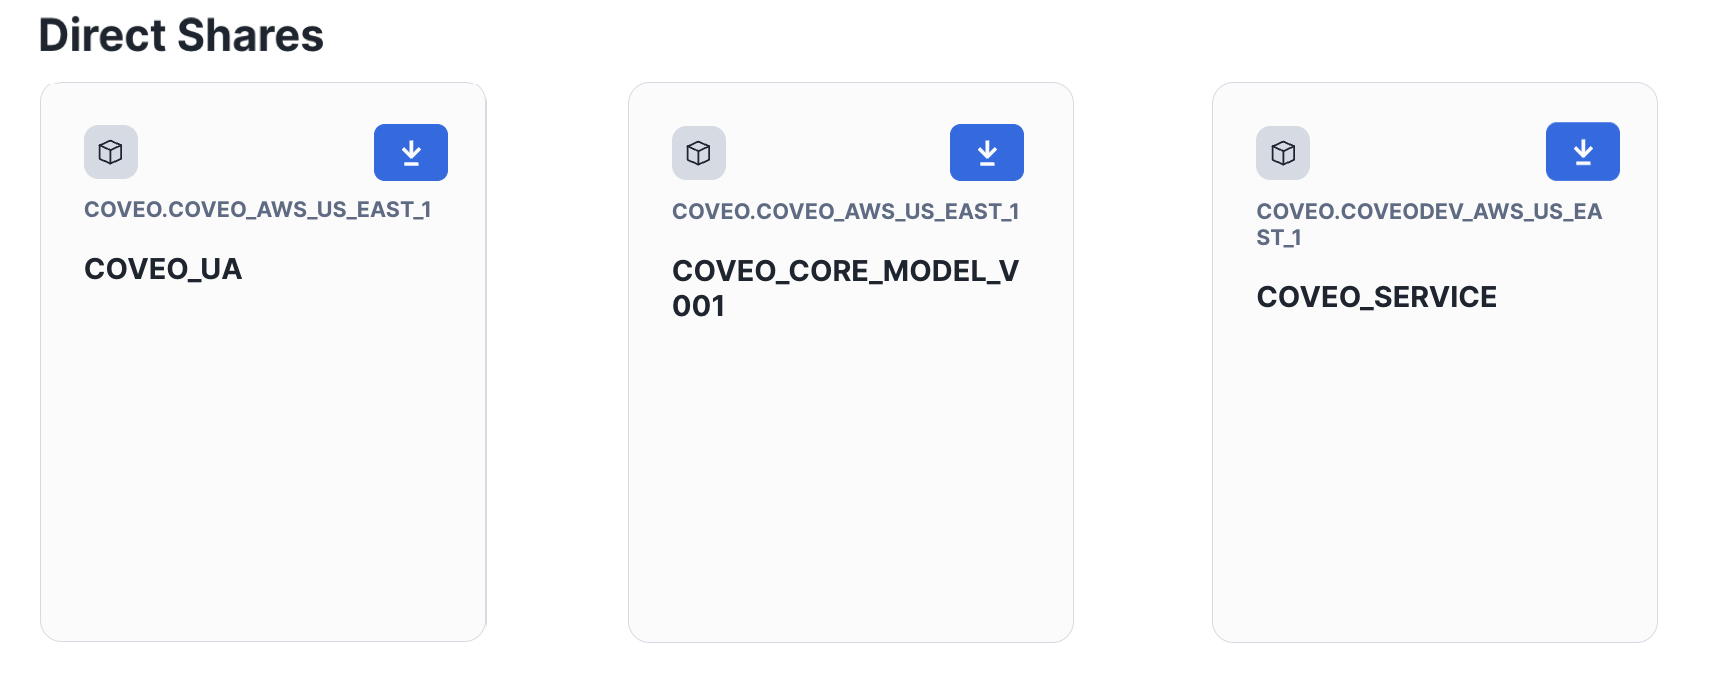
-
Click the down arrow next to the share you want to retrieve.
-
In the Get Data panel that opens, enter the database name of your choice.
-
Select a role from the dropdown list (for example,
USERADMIN). -
Click Get Data. The database is now created.
-
(Optional) Repeat the previous steps until you’ve retrieved all shares.
With SQL queries:
-
Ensure that you’re using the
ACCOUNTADMINrole. You can do this by clicking your username in the lower-left corner of the console and selecting Switch Role. Then, selectACCOUNTADMINfrom the list of roles. -
Find the Coveo data shares by running the following query:
SHOW shares;-
In the SQL results table, you should see one or multiple shares.
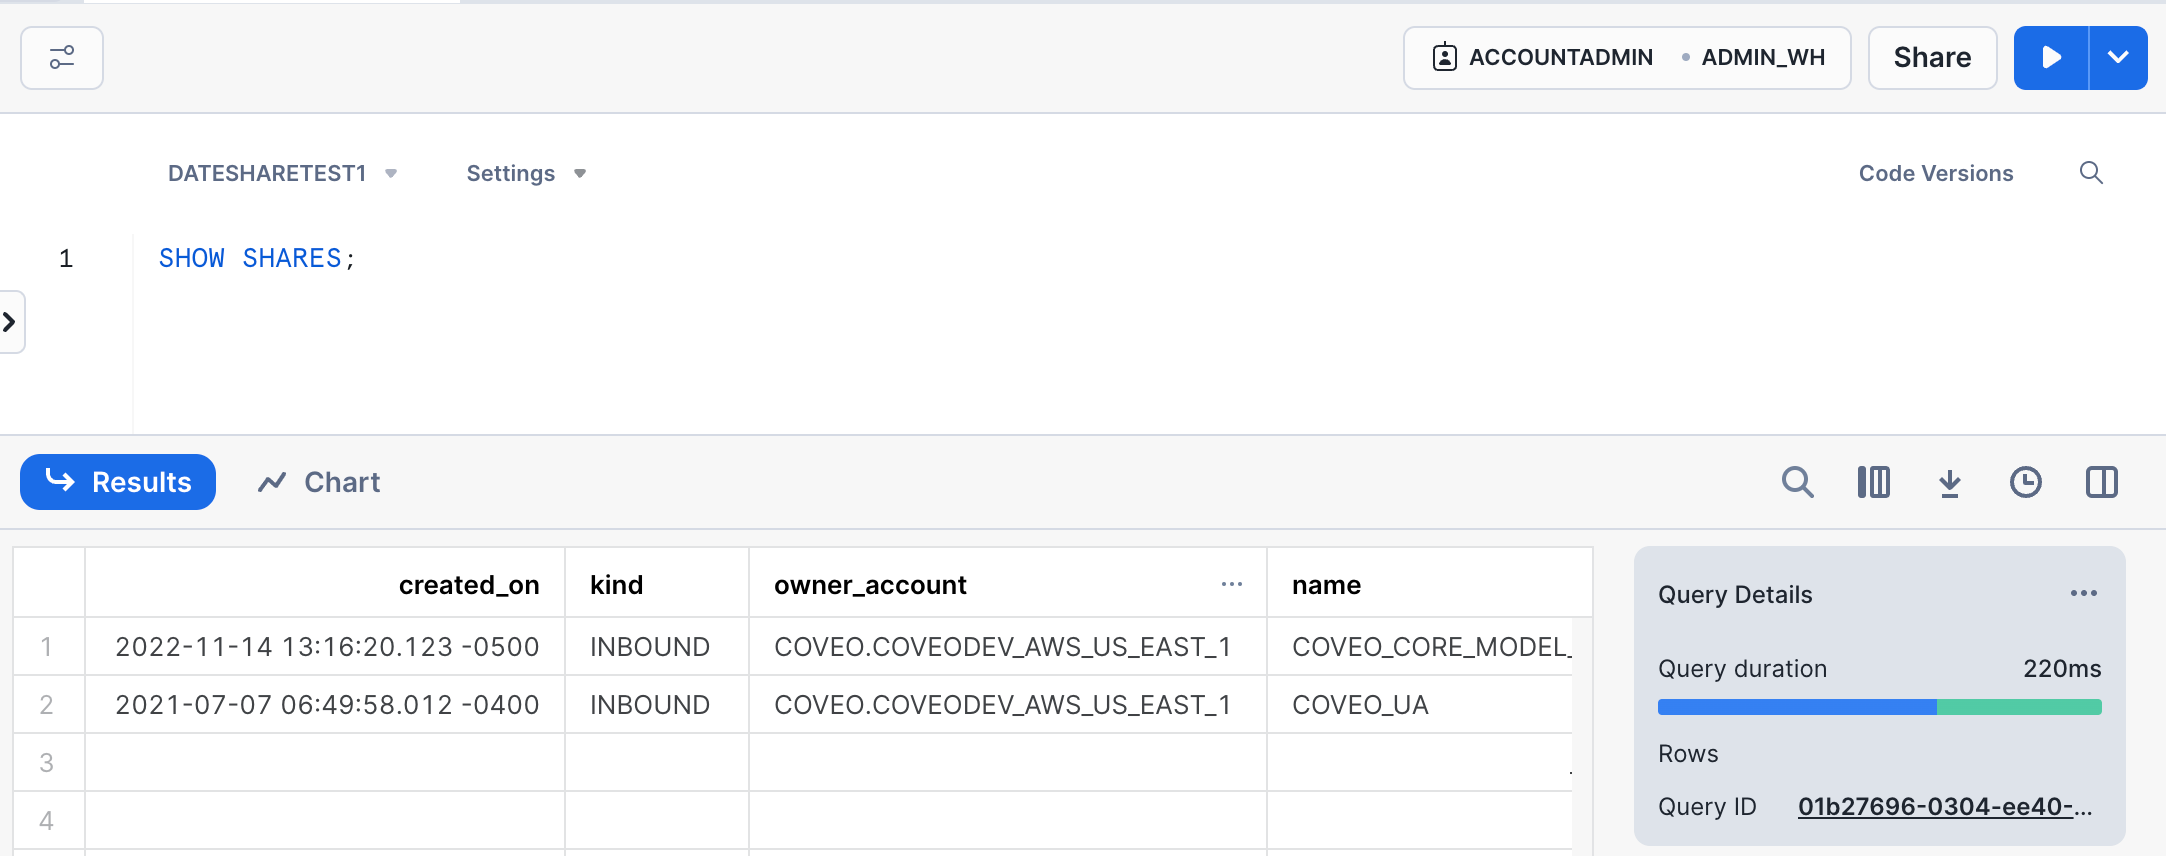
For each share, you must create a database. To do so, first take note of the information under the owner_account and the name columns.
-
Run the following query to create the database:
CREATE DATABASE <NAME> FROM SHARE <PROVIDER_ACCOUNT>.<SHARE_NAME>Where you replace:
-
<NAME>with the database name of your choice. -
<PROVIDER_ACCOUNT>with the information obtained from the owner_account column following the initial query. -
<SHARE_NAME>with the information obtained from the name column following the initial query.For example, your organization is Barca Sports, so you decide to name the database
BARCA1. The information obtained from the owner_account and name columns areCOVEODEV_AWS_US_EAST_1andCOVEO_CORE_MODEL_V001, respectively. Your query therefore would look like the following:CREATE DATABASE BARCA1 FROM SHARE COVEO.COVEODEV_AWS_US_EAST_1.COVEO_CORE_MODEL_V001
-
-
Run the following statement to grant database access to the user role:
GRANT IMPORTED PRIVILEGES ON DATABASE <NAME> TO ROLE <ROLE>;Where you replace:
-
<NAME>with the database name that you just created. -
<ROLE>with the user role to which you want to provide access (for example,USERADMIN).
-
-
-
(Optional) Repeat the previous steps until you’ve retrieved all shares.
Upon completion, you can begin exploring your Coveo data on the Snowflake console.
|
|
Notes
|
Remove data share
-
In the Snowflake console, using the
ACCOUNTADMINrole, run the following statement to remove the database:DROP DATABASE <NAME>;Where you replace
<NAME>with the database you want to remove. -
On the Data Share (platform-ca | platform-eu | platform-au) subtab of the Raw Data page, click the account name from the Data Share list, and then click Revoke.
Required privileges
privileges required to view or manage Data Share.
| Action | Service | Domain | Required access level |
|---|---|---|---|
Share data |
Organization |
Organization |
View |
Analytics |
Administrate |
Allowed |
|
Snowflake management |
Edit |
What’s next?
Create custom reports by building your own queries in the Snowflake console.