Index using Optimizely Connect Platform
Index using Optimizely Connect Platform
You can index your Optimizely content in Coveo using the Optimizely Connect Platform (OCP). This method involves creating a custom data sync destination app in OCP. The custom app manages the data transfer from Optimizely to a Coveo source using the Coveo Push or Stream API. After configuring the data sync in the OCP Sync Manager, the first sync automatically loads all your Optimizely content to Coveo. Subsequent syncs only transfer new or updated content following the sync schedule you define.
Prerequisites
-
An Optimizely account with access to the OCP.
-
A Coveo Push or Catalog source, depending on the nature of your Optimizely content:
-
For non-product content, use a Push source.
-
For product content, use a Catalog source.
-
-
Coveo fields to map your Optimizely content to.

Use the same field names as in Optimizely to simplify field mapping in the OCP Sync Manager.
-
A custom API key with the privileges to:
-
Push items to your Coveo source.
-
(Optional) Retrieve your list of Coveo fields, that is, the Content > Fields > View privilege.
 Note
NoteThis privilege is only required if you set up a dynamic schema in your OCP destination app.
-
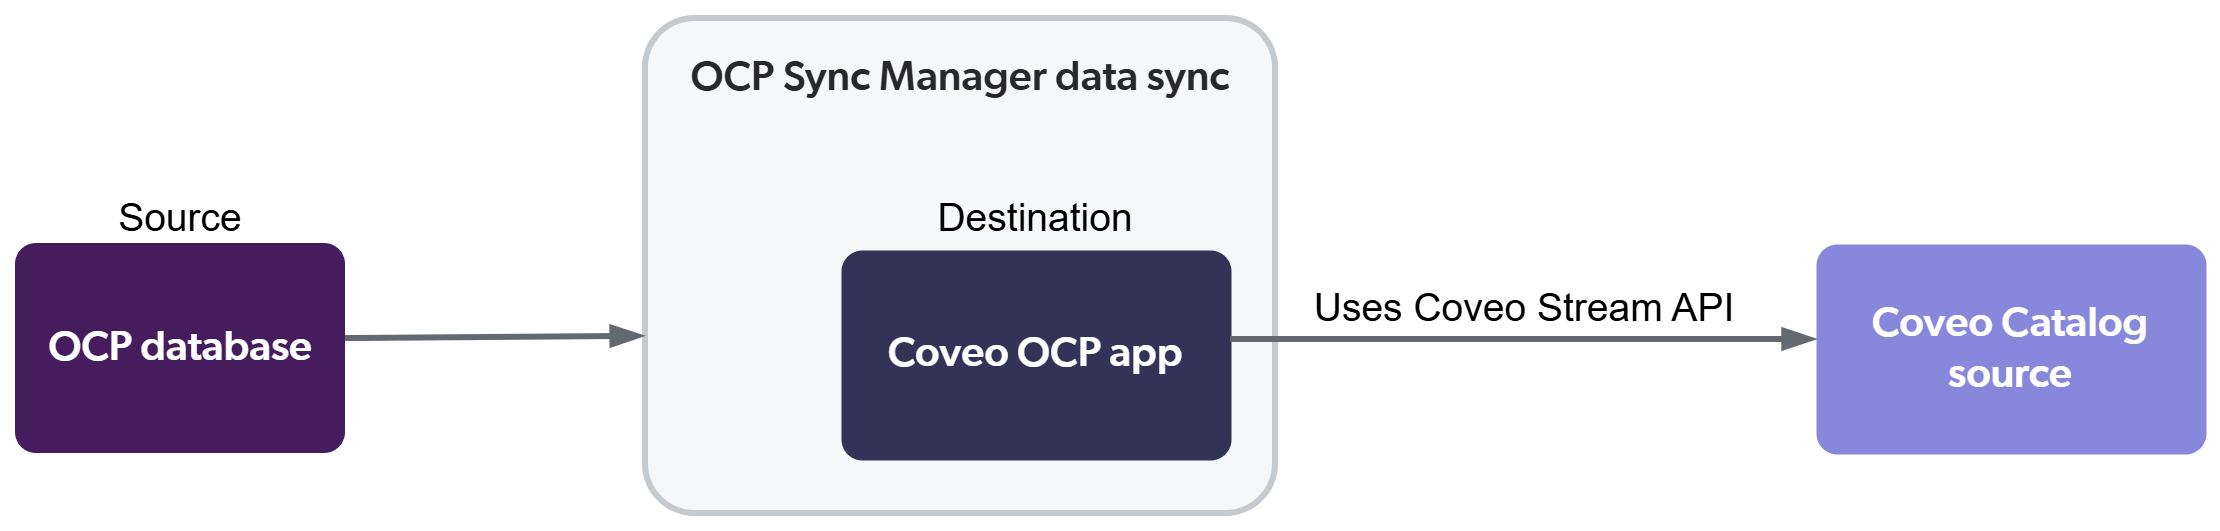
Data sync architecture and flow
The diagrams below illustrate the architecture and data flow when indexing Optimizely content using OCP and a Coveo custom data sync destination app.
Flow diagram for non-product content

Flow diagram for product content
Set up the architecture components
The following sections guide you through the steps to replicate the architecture and configure each component.
Build the Coveo OCP destination app
The indexing process uses a custom Coveo destination app in the OCP Sync Manager. Coveo doesn’t provide a prebuilt destination app. You must build one yourself or engage Coveo Professional Services to build it for you.
The destination app includes:
-
The schema which defines the Coveo fields which can accept data from Optimizely. In an OCP Sync Manager data sync configuration, the fields defined in the schema are displayed as available destination fields when adding field mappings.
NoteIf you set up a dynamic schema, your custom API key must include the privilege to retrieve your list of Coveo fields. Getting the list of fields requires a POST request to the
fields/searchendpoint for your deployment region:-
US:
https://platform.cloud.coveo.com/rest/organizations/{organizationId}/fields/search -
EU:
https://platform-eu.cloud.coveo.com/rest/organizations/{organizationId}/fields/search -
AU:
https://platform-au.cloud.coveo.com/rest/organizations/{organizationId}/fields/search -
CA:
https://platform-ca.cloud.coveo.com/rest/organizations/{organizationId}/fields/search
For more information, see List fields.
-
-
The implementation logic which handles the data transfer from Optimizely to Coveo using the Push API or Stream API.
Validate, publish, and install the destination app
Follow the OCP documentation to validate, publish, and install your custom Coveo destination app in your OCP account.
Define the app settings
OCP apps include a Settings tab that you can access after you install the app. The settings form for your Coveo destination app should include input elements for the following parameters:
-
The target Coveo organization ID.
-
The target Coveo source ID.
-
The custom API key created in the prerequisites.
Leading practiceUse the
secretform element type for sensitive information.
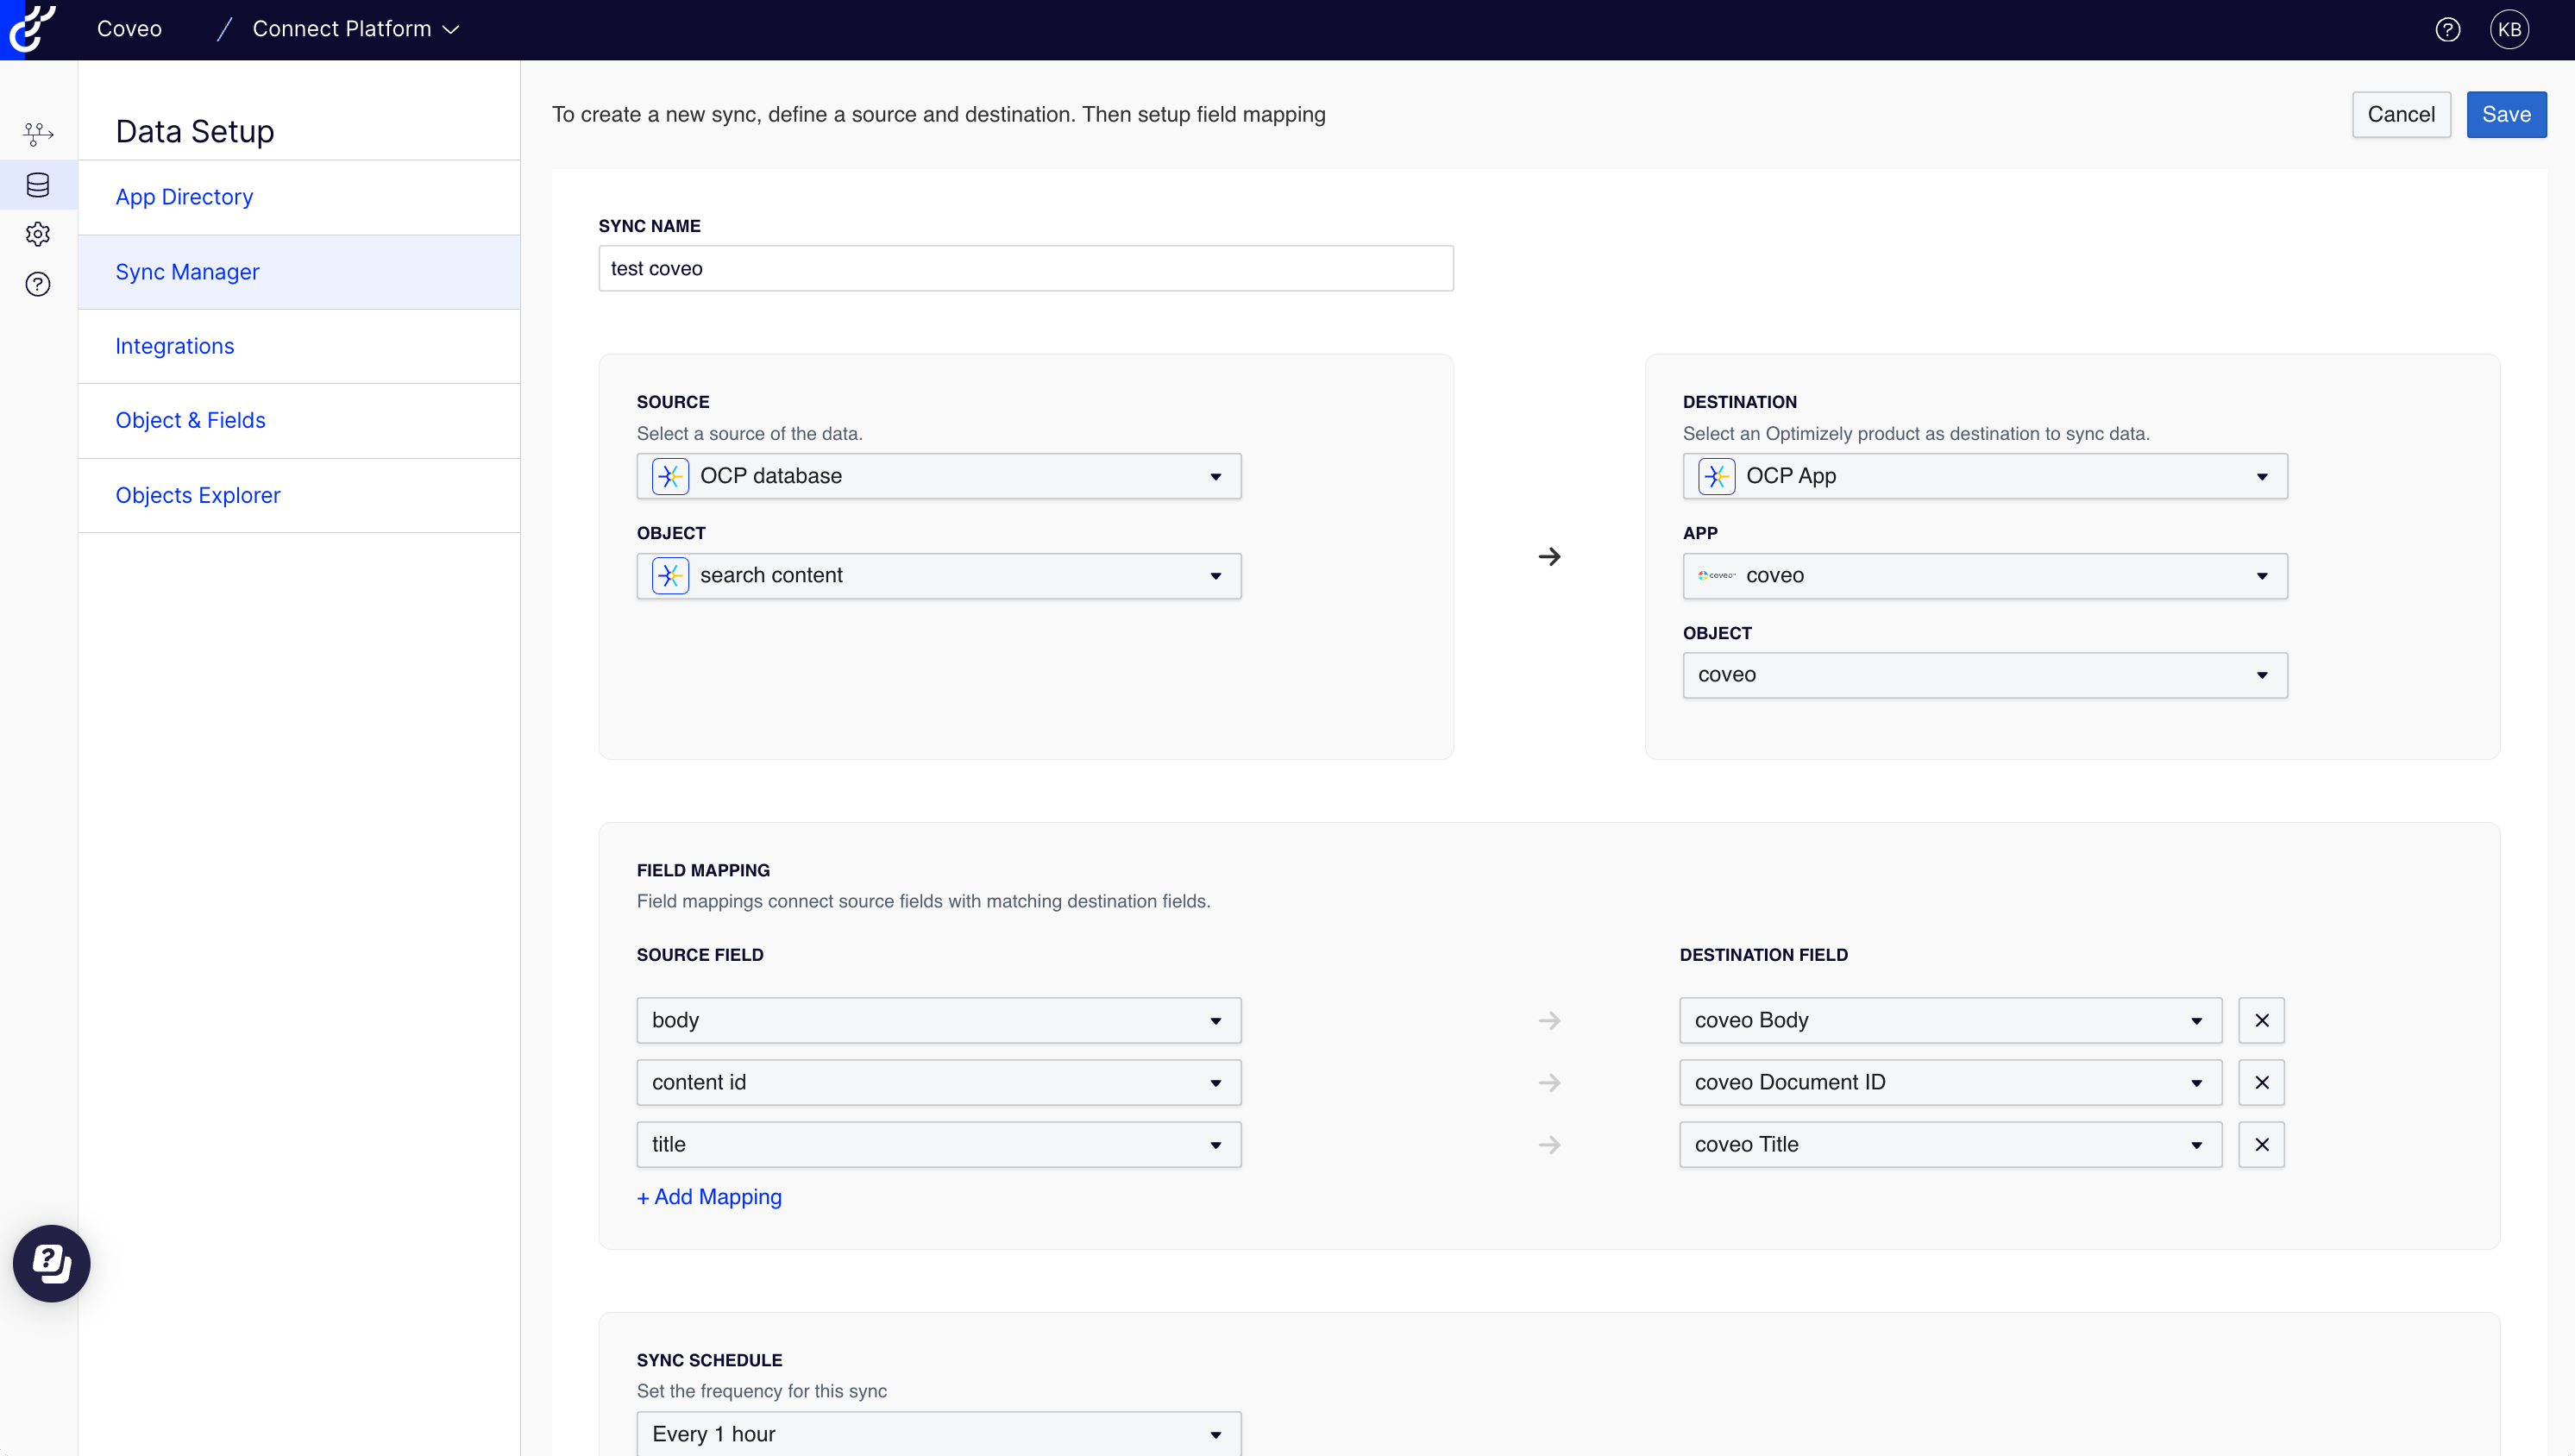
Set up the data sync in the OCP UI
Follow the OCP documentation to create a data sync configuration in the OCP Sync Manager using your app as the destination. Add the necessary field mappings to map your Optimizely content to the appropriate Coveo fields and define your sync schedule.