About the search result title selection sequence
About the search result title selection sequence

This article applies to indexing with the native connector included in the Coveo for Sitecore package.
The title of an item is the first thing you see in a search result. This article explains the default title selection sequence and how to customize the behavior to suit specific needs.
Item title information collection process
Coveo for Sitecore collects several pieces of information that can be used for the item title and sends this information as metadata to the Coveo Platform.
Then, in the Coveo indexing pipeline, a converter also extracts metadata from the item that can be used as the item title.
Collecting all this title metadata ensures each item has a metadata value which it can map to the title Coveo field.
The following diagram summarizes the default title metadata collection process of an HTML item and how the title Coveo field value is determined.
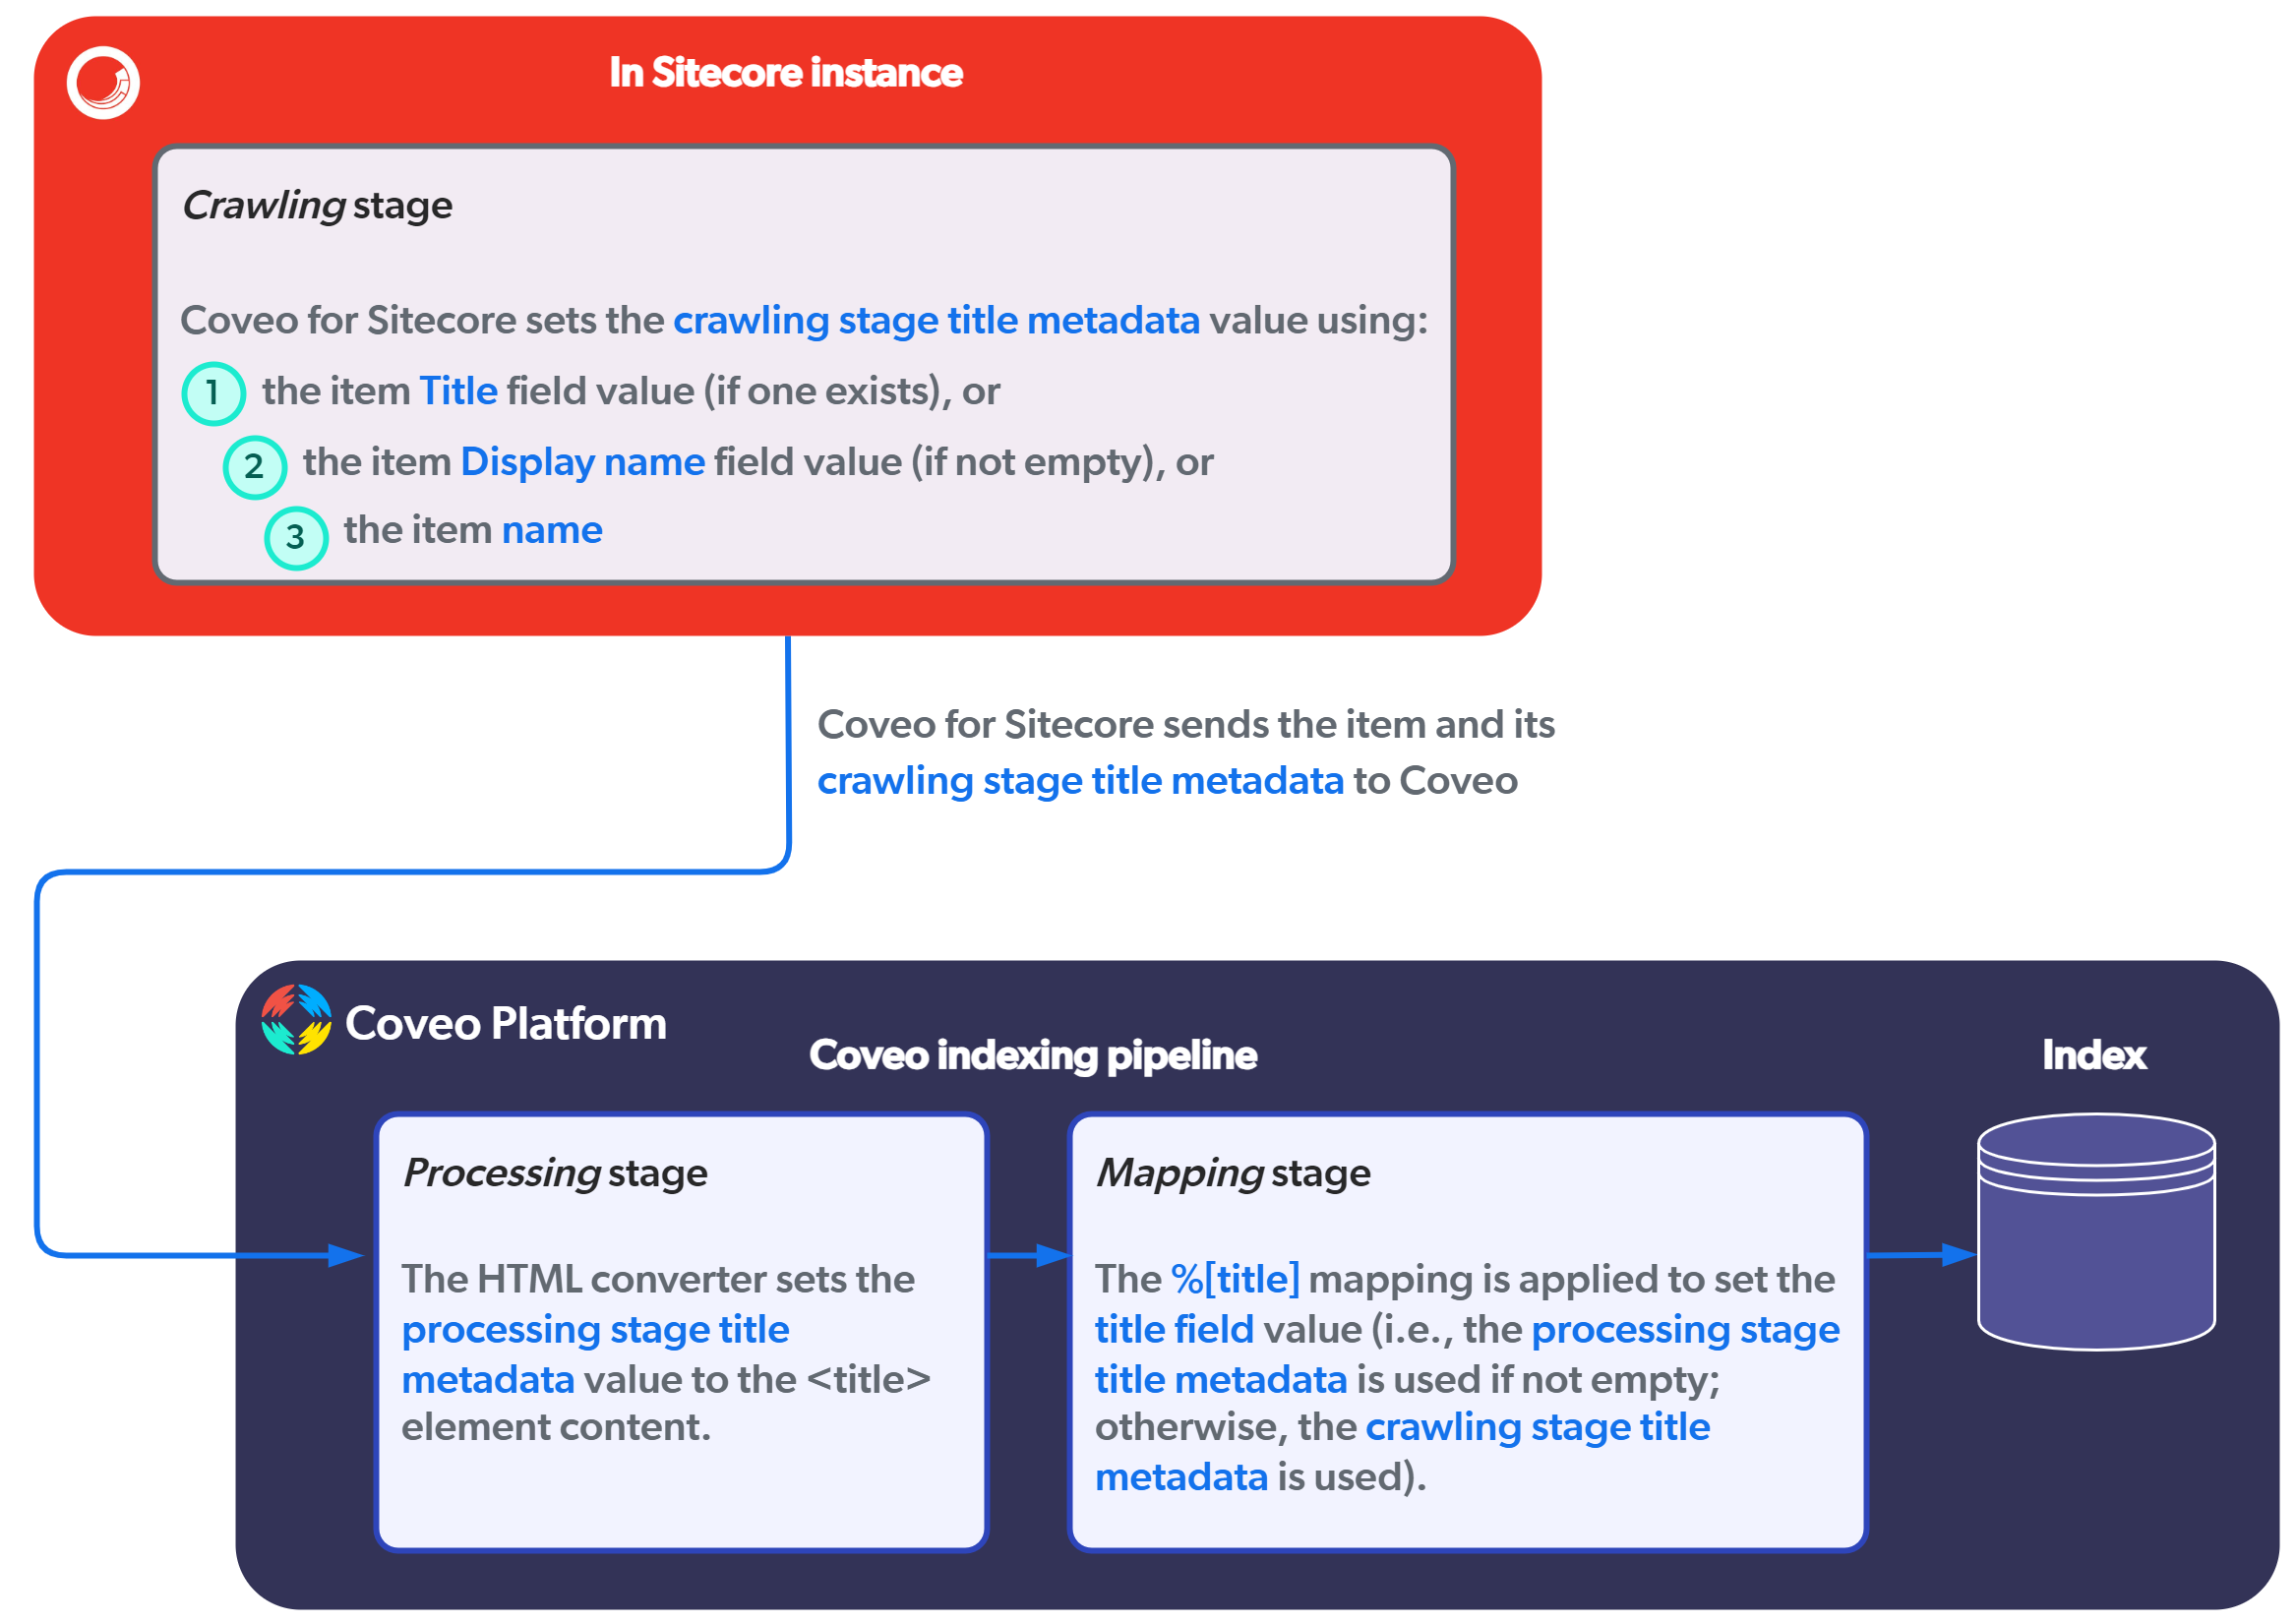
Besides the way a value is assigned to the processing stage title metadata, the process is the same for all types of Sitecore items.
This behavior yields adequate item titles most of the time. If it doesn’t in your use case, you can customize your result titles.
Customize your result titles
What determines the metadata to be used for the title Coveo field is the mapping rule configured for this field in your Coveo organization source.
Coveo for Sitecore configures sources with the default %[title] mapping rule, but you can edit this mapping to suit your needs.

|
Note
After editing the default For example, you edit the When multiple rules are defined, the first rule is applied when possible (in this example, |
You can change a mapping rule in two ways:
-
By changing the origin parameter in the rule to select the crawling stage metadata.
-
By changing the
metadatato use (that is, using a different Sitecore template field).
Use the crawling stage metadata for the item title
Coveo for Sitecore has a crawling stage title metadata fallback selection process.
Coveo for Sitecore then sends the item to Coveo with its crawling stage title metadata value.
In the case of HTML items, the processing stage title metadata extracted from the HTML content will be considered over the crawling stage title metadata.
You might want your item search result titles to be the ones Coveo for Sitecore sends as the crawling stage title metadata values.
If so, you can edit the title field mapping rule origin parameter so that it uses the crawling stage title metadata value.
To set the title field mapping rule origin parameter to crawler
-
On the Sources (platform-ca | platform-eu | platform-au) page, click the target source, and then click Mappings in the Action bar.
-
On the Common tab of the Edit mappings subpage, select the title field, and then click Edit mapping in the Action bar.
-
Change the existing rule to
%[title:crawler]. -
Click Apply mapping, and then click Save.
-
In your Sitecore instance, reindex the items you want to apply the new mapping to.
You can now validate the titles by inspecting your source items in the Content Browser.
Use another metadata (for example, Name, Display Name) for the item title
Coveo for Sitecore automatically sends the Sitecore item Name and Display name to Coveo as the _name and _displayname metadata respectively.
You can use this metadata instead of the title metadata for your item titles.
To use the _displayname metadata in the title field mapping rule
-
On the Sources (platform-ca | platform-eu | platform-au) page, click the source you want to target, and then click Mappings in the Action bar.
-
On the Common tab of the Edit mappings subpage, select the title field, and then click Edit mapping in the Action bar.
-
Change the existing rule to
%[_displayname]. -
Click Apply mapping, and then click Save.
-
In your Sitecore instance, reindex the items you want to apply the new mapping to.
You can now validate the titles by inspecting your source items in the Content Browser.

|
Other metadata you can use
You can use any included Sitecore template field as the metadata in your mapping rules, not only
Mapping rules aren’t limited to a single metadata.
You can create rules with multiple metadata names and even mix in some text (for example, |
Set the title metadata for a specific media item type
Mapping rules are usually applied to all source items. You can be more granular and apply a mapping rule only to items of a specific type.
Example:
You want to create a mapping rule so that all PDF items use the Display name value as their title.
|
|
Note
The Sitecore item |
-
On the Sources (platform-ca | platform-eu | platform-au) page, click the source you want to target, and then click Mappings in the Action bar.
-
On the Specific tab of the Edit mappings subpage, click Add item type at the top right.
-
In the Add an item type modal:
-
Under Item type name, enter
pdf.
See Find the source item type values to determine which item type names to use.
-
Under Field, select the
titlefield. -
Under Rules, add the following rule:
%[_displayname] -
Click Add item type and mapping, and then click Save.
-
-
In your Sitecore instance, perform an indexing action on your media items.
You can now validate your media item titles by inspecting your source items in the Content Browser.