Build a template
Build a template
In this article, we’ll focus on the tasks of building, configuring, and managing the templates that are used to build experiences. These tasks should be performed by a developer familiar with JavaScript and CSS.
Why use templates?
Once you have built a template, it can be used by non-technical members of your team to create experiences without the need for additional developer resources.
Building
Step 1
Select Experiences from the side menu and then New experience.
Switch to the My templates view
Select Add new and then Template
Step 2
Enter a name for the template and a description-both are mandatory
Select Save
Editing the code that will power your template
For those familiar with creating Custom experiences, the UI for editing code is very similar; you use the same editor to access and edit the JavaScript and CSS files that form the basic building blocks of each template. The JavaScript and CSS are contained in the following files:
-
triggers.js - used to determine when an experience executes
-
utils.js - used to define common functions and variables that can be reused across experience files
-
fields.json - predefined schema used to define the options that will be made available to the user creating the experience from the template
-
package.json - contains metadata about your experience, including package dependencies
-
variation.js - controls what happens once the experience has been triggered and should contain the main body of your experience logic
-
variation.css - used to inject CSS rules into a page if your variation is executed
To get started select and Edit against the template you wish to start building:
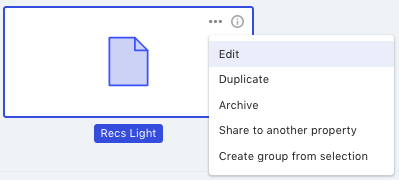
Then in Edit template, select Edit in Code:

Once you’ve finished editing the code, you must save it by selecting Save in the editor
You can then return to the templates view by selecting in the upper-right hand corner of the editor
Working with the triggers.js file
The editor includes a default code block:
module.exports = function triggers (options, cb) {
  cb()
}
This trigger will pass when cb() is called.
Any code that you wish to add must stay inside that function.
|
|
Note
Code can be asynchronous. |
|
|
The |
For more on triggers, see triggers.js.
triggers.js snippets
In this section we will look at a few examples that you can use to get started with the triggers.js file.
Remember preview snippet
This is used to persist the preview of the experience across different pages, without the necessity of adding the preview URL parameter to the URL. This will persist the preview link for 15 minutes or until another preview link is loaded.
Example:
function (options, cb) {
  require('@qubit/remember-preview')(15)
  cb()
}
Poll for elements snippet
Pollers ensure that certain elements are available before taking an action. For example, before invoking the callback, or in other words, before variation.js runs. You can poll for an array of elements or the return value of a variable or function:``` You can poll for an array of elements or the return value of a variable or function:
Example:
module.exports = function triggers (options, cb) {
  // 1.
  options.poll('.nav').then(cb)

  // 2.
  options.poll(function() { return true }).then(cb)

  // 3.
  options.poll(['.nav', '.header']).then(cb)

  // 4.
  options.poll(['.nav', 'window.universal_variable']).then(cb)

  // 5.
  options.poll(['.nav', 'window.universal_variable', function () {
    return true
  }]).then(cb)
}
The resulting targets will be passed into the callback function in the same order.
module.exports = function triggers (options, cb) {
  options.poll(['.nav', 'window.universal_variable.page.type', function () {
    return window.foo()
  }]).then(cb)
}
Get pageview count snippet
Within Experiences, we expose the options object.
Within this there are the getVisitorState and getBrowserState functions.
The following can be used to only run the experience if the visitor has more than 5 pageviews in the current session.
Example:
module.exports = function triggers (options, cb) {
  options.getVisitorState().then(function (data) {
    if (data.viewNumber > 5) cb()
  })
}
Get session count snippet
This can be used to return the total session count for a visitor.
Example:
module.exports = function triggers (options, cb) {
  options.getVisitorState().then(function (data) {
    if (data.sessionNumber > 2) cb()
  })
}
Working with the utils.js file
This file provides a convenient space for defining common functions and variables that can be reused across experience files.
See utils.js for details of how to use this file.
Working with the fields.json file
One of the key strengths of templates is that they allow you to standardize experiences and move towards an out-of-the-box approach to delivering experiences. Many times, however, you’ll want to allow non-technical members of your team to customize some parts of those experiences that use your template. This is done in fields.json.
Importantly, this customization can be done without further developer assistance or changes to experience code. See fields.json for details of using this file.
Working with the package.json file
This file is used to declare package dependencies. Declaring dependencies means that we only include those packages that are used in the Smartserve bundle, which is good for performance and bundle size.
Declaring package dependencies is covered in detail in Using Packages and you can read more about the power of packages and code re-use in Packages & Code Re-use.
Working with the variation.js file
The variation.js file contains a code block that executes if the visitor is served the experience. Of course, the visitor is only served an experience once all the trigger and segment conditions have been met.
By default, an empty function block is provided:
module.exports = function variation (options) {
}
Any JavaScript added to the page must be added inside this function block.
Example:
module.exports = function variation (options) {
  var $ = window.jQuery
  $("#navigation_sale").text("offers")
}
All the code written in the editor is locally scoped.
variation.js snippets
In this section we will look at a few examples that you can use to get started with the variation.js file.
Remember preview snippet
This is used to persist the preview of the experience across different pages, without the necessity of adding the preview URL parameter to the URL. This will persist the preview link for 15 minutes or until another preview link is loaded.
Example:
function (options, cb) {
  require('@qubit/remember-preview')(15)
  cb()
}
Get pageview count snippet
Within Experiences, we expose the options object.
Within this there are the getVisitorState and getBrowserState functions.
The following can be used to only run the experience if the visitor has more than 5 pageviews in the current session.
Example:
module.exports = function triggers (options, cb) {
  options.getVisitorState().then(function (data) {
    if (data.viewNumber > 5) cb()
  })
}
Get session count snippet
This can be used to return the total session count for a visitor.
Example:
module.exports = function triggers (options, cb) {
  options.getVisitorState().then(function (data) {
    if (data.sessionNumber > 2) cb()
  })
}
Configuring a template
Configuring the experience template is done pretty much in the same way as configuring any one of our experiences, and involves adding the goals, simple triggers, segments, etc, that control how experiences behave.
|
|
Leading-practice
Of course non-technical team members are free to change any of this configuration when they build an experience from a template. For this reason, we recommend considering whether it’s more convenient for your team to add configuration to the template rather than leaving it at the experience level. |
|
|
Traffic allocation, custom statistical threshold, Google Analytics integration, and scheduling must be added to the experience rather than the template. |
To get started select and Edit against the template you wish to configure:

Then in Edit template, select Edit in the part of the configuration you wish to edit
Refer to our documentation on configuring experiences for more information about how to do this.
Previewing a template
We recommended that you preview your template periodically during the development process to ensure it functions as expected.
Step 1
Select .
Step 2
Enter a value in the Preview URL field and define the background image to use for the banner by entering a value in the Image field
|
|
Note
This must be an absolute URL and include the prefix |
Step 3
Define the hyperlink for the banner by entering a value in the Link URL field
|
|
Note
This must be an absolute URL and include the prefix |
Step 4
Select Preview
The fields displayed above correspond to the input fields you defined in fields.json:
Example:
{
  "title": {
    "type": "url",
    "label": "Preview URL",
    "required": true,
    "description": "The preview URL"
  }
}
Publishing a template
Only published template can be used to build experiences.
|
|
Note
Any experience you build using a template will not be affected by any changes you subsequently make to that template. |
Let’s suppose you build a new template, publish it, and then build 5 experiences using that template.
You now decide to edit the template by adding the trigger Minimum pageviews, publish it a second time, and build another experience using the same template.
Only the last experience you built will include the triggers. The changes you made will not be applied to those 5 experiences you already built:

Step 1
If your template is not already open, select and then Edit
Step 2
Select Publish
Editing a template
As mentioned above, any changes you make to a template after it has been published are not applied retrospectively to those experiences built before the changes.
Step 1
If your template is not already open, select and then Edit
Step 2
Make the necessary changes to the template and select Save after each change. In the following example, the user can see that 1 unpublished change has been made:

Step 3
If you wish to publish those changes immediately, select Review and Publish. This opens a window displaying a before and after view of all the unpublished changes.
In the following example, we see that the user has removed the Revenue Per Converter goal:

Step 4
If you’re happy with the changes, you can now select Publish. Alternatively, to delete the changes, select Discard
|
|
Leading-practice
You may also choose to not publish those changes immediately. For example, if other team members are involved in building templates, you may wish to wait for a review of the change, or equally, wait for other team members to also make changes. |
Whatever the reason, you can simply close Edit template and return to the template at a later date to publish the changes.
When you do this,  will display alongside your template and the tooltip will be
 Has Unpublished Changes:

Duplicating a template
Duplicating is useful when you want to copy a template as the basis for a new one or when you want to publish a template but keep a copy as a draft that you can continue working on.
If your template is not already open, select and then Duplicate
Archiving a template
In the same way that you can archive an experience, you can also archive templates. Only published templates can be archived.
Archived templates are hidden by default, but you can show them along with all your other templates by selecting  .
.
 denotes an archived template:
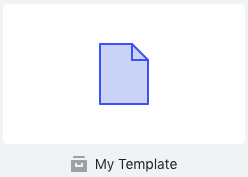
If your template is not already open, select and then Archive
To unarchive a template, select and then Unarchive
Deleting a template
If you’re certain that you no longer require a template, you can delete it. Only templates that have not been published can be deleted.
If your template is not already open, select and then Delete.
Select Delete a second time to confirm
Sharing templates between properties
You can share templates with any other properties created for your client property. For example, you might develop templates on a staging environment-counted as a property-and want to move them to your production environment.
Select and Share with other properties
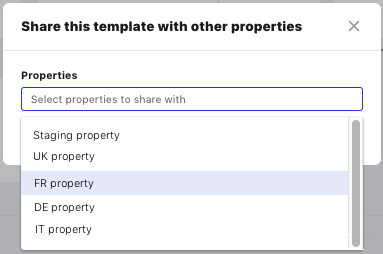
Select inside the Properties field and choose one or more properties to share the template with
|
|
Leading-practice
You can also search for a property by entering a value in Properties. |
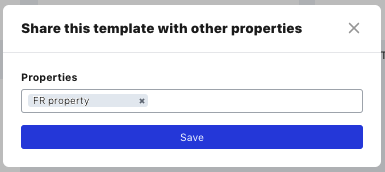
In the following example, we can see that the user has selected to share the template with the property FR property:
When done, select Save:
Creating template folders
In many cases, it will make sense to organize your templates into folders. For example, you may choose to organize your templates around experience types or campaign types.
Step 1
Select Experiences from the side menu and then New experience.
Switch to the My templates view
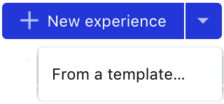
Alternatively, select the down arrow next to New experience and select From a template:
Step 2
Select Add new and Folder:
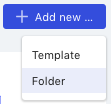
By default, your folder will be named New folder:

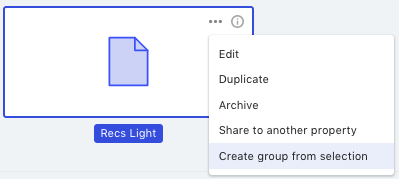
You can also create a folder by selecting the option Create group from selection:
Moving templates into folders
Once created, you can now start to move templates into the folder by dragging and dropping. In the following example, we see that the user is moving the template Recs-light to their new folder:

|
|
Leading-practice
You can move templates between folders and out of folders in the same way. |
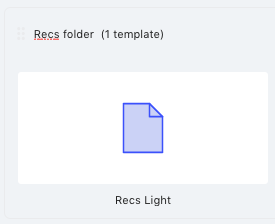
The number of templates inside a folder is shown. Selecting this number expands the folder to show the templates inside.
In the following example, we see that the folder Recs folder has one template inside:
Renaming a folder
To rename a folder, select the folder name and edit as required.
Deleting a folder
|
|
You can only delete empty folders. |
To delete, select  against the template