Manage Snowflake reader account
Manage Snowflake reader account
The Snowflake reader account is created for an individual Coveo organization, and therefore only contains Coveo Analytics data related to that organization. Access to the Snowflake reader account for user or service accounts is managed through the Reader Account (platform-ca | platform-eu | platform-au) page in the Coveo Administration Console.
By default, access to the reader account is IP-restricted. An administrator with the required privileges can manage access by creating user accounts and adding allowed IP addresses.
|
|
Note
The reader account feature is intended for clients who don’t have a Snowflake account so that they can access data through the Snowflake portal. |
Create a reader account
On the Reader Account (platform-ca | platform-eu | platform-au) page, click Create Snowflake Reader Account. The account is created automatically by using the data from your organization.
Manage your reader account
To manage the reader account, go to the Raw Data page, under Snowflake Access > Reader Account (platform-ca | platform-eu | platform-au).
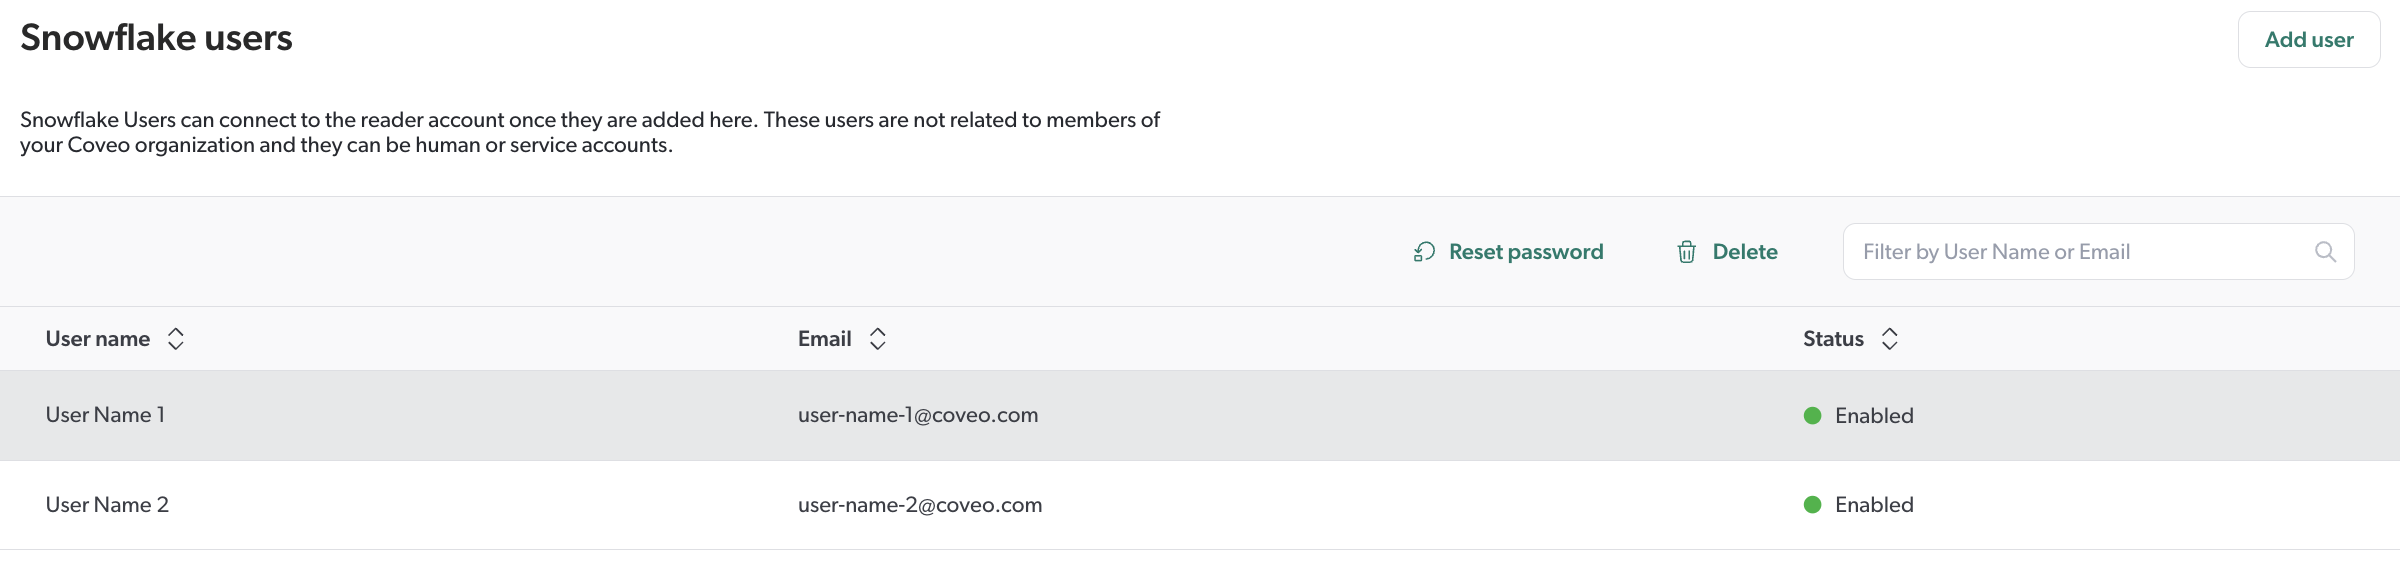
Add or edit users
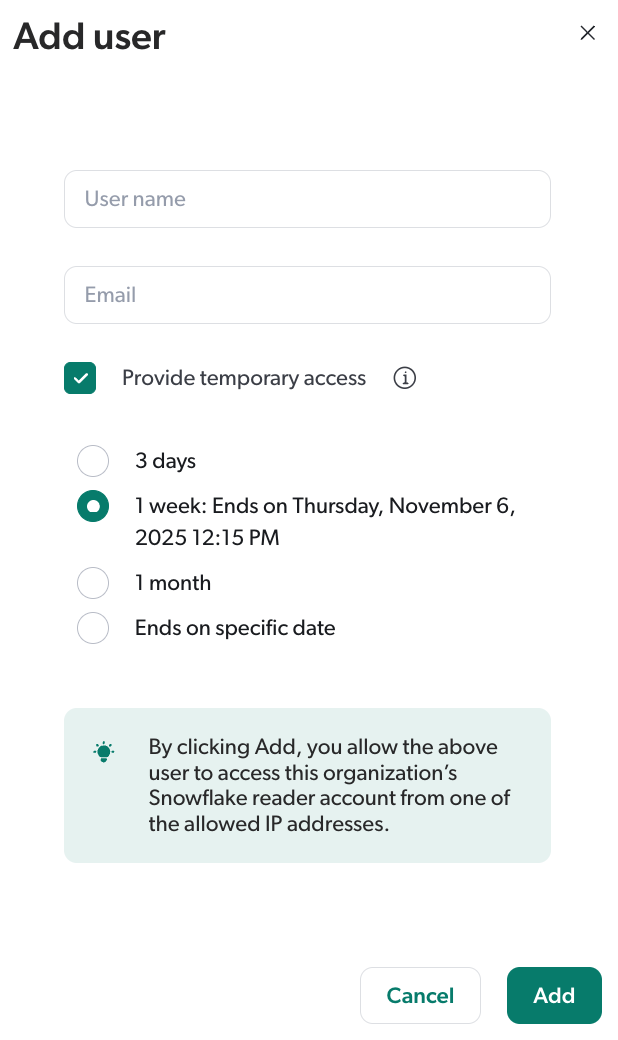
To add or edit users who can access the reader account:
-
In the Snowflake users section, click Add user.
-
In the Add user panel that appears:
-
Enter a user name and email.
-
(Optional) If you’re granting temporary access to the user, select the Provide temporary access checkbox.
-
In the list that appears, select the applicable duration.
-
If you select Ends on specific date, select the date from the calendar that appears.
-
-
Click Add.
The user is added to the Snowflake users list.
-
-
Snowflake account password setup: Once a user has been added, an email containing a temporary link to set the account password will be sent to the user. Once the password setup is complete, the user must use an allowed IP address to access the reader account.
-
To edit an existing user, click the user name you want to edit, and then click the desired option in the Action bar.
-
Reset password: Resets the password of the selected user account. The user will receive an email with a temporary link to reset the account password.
-
Delete: Deletes the selected user account. The user will receive an email notifying them that their account has been removed from the Snowflake users of your Coveo organization.
-
Reactivate user account: Reactivates an inactive user account. This option is displayed only if the Status of the selected user account is
Expired. During reactivation, the option to provide permanent or temporary access will also be provided.
-
|
|
Note
Snowflake users aren’t the same as members of your Coveo organization. They can either be user accounts or service accounts. |
|
|
|
Add or block IP addresses
All IP addresses are blocked by default. To ensure that the newly added user can access the reader account, add their IP address to the Allowed IP addresses list. If there are specific IP addresses that you want to block within an allowed range, add them to the Blocked IP addresses list.
-
In the Network policies section, under Allowed IP addresses, click Add item.
-
Enter the IP addresses that you want to allow.
-
Under Blocked IP addresses, enter the IP addresses you want to block.
-
Click Save.
|
|
Notes
|
Snowflake credits
In the Reader Account (platform-ca | platform-eu | platform-au) subpage, the Snowflake credits resource monitor displays the monthly credit consumption for the reader account. As an authenticated administrator, you can view the remaining credits based on your account’s consumption for the current month. Credit consumption is determined by the usage of the reader account’s warehouse.
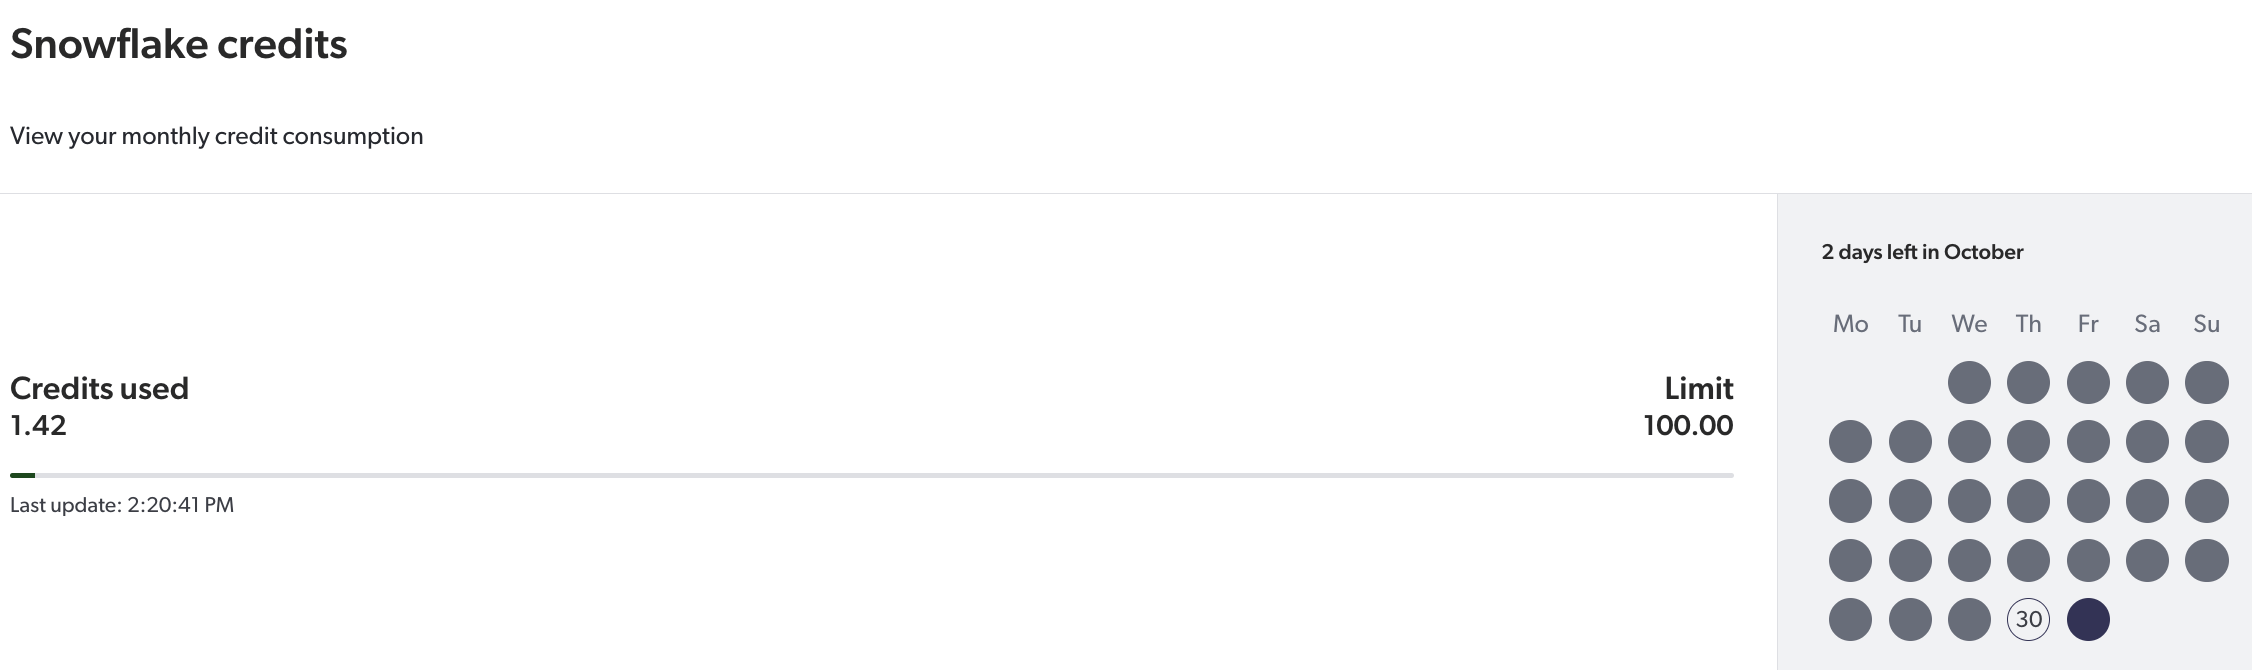
The default size of a warehouse assigned to a reader account is x-small.
It contains 10 credits, equivalent to approximately 10 hours of data processing.
For more information regarding warehouse sizes and how their respective credits are computed, see Understanding compute cost.
A reader account that’s linked to a Coveo organization is automatically assigned a customer_wh warehouse.
The warehouse is required to execute SQL queries.
The credits consumed by the warehouse count toward your monthly limit.
| Actions | Credit consumption |
|---|---|
View dashboards and reports, and generate CSV exports in the Coveo Administration Console. |
|
Perform API calls to the UA Read API. |
|
Connect an external BI tool to the reader account. |
|
Perform queries in the Snowflake console. |
|
Perform queries against Snowflake with a user created on the Reader Account page. |
|
Access the reader account
To access the reader account from the Coveo Administration Console:
-
On the Reader Account (platform-ca | platform-eu | platform-au) page, click
 , and then select Access Snowflake.
 -
In the Sign in to Snowflake page, enter your Snowflake username and password.
Enable key-pair authentication
A key-pair authentication for the Snowflake reader account is recommended if you’re using an external integration, such as Snowflake Connector for Python, or a driver, such as Snowflake JDBC.
To set up key-pair authentication
-
Generate an RSA key-pair:
-
On your device, open a terminal window.
-
Verify whether your integration requires an encrypted or non-encrypted key, then run one of the following commands:
-
For an encrypted key:
openssl genrsa 2048 | openssl pkcs8 -topk8 -v2 des3 -inform PEM -out rsa_key.p8 -
For a non-encrypted key:
openssl genrsa 2048 | openssl pkcs8 -topk8 -inform PEM -out rsa_key.p8 -nocrypt
-
-
Retrieve and store the private key from the
rsa_key.p8file, which is automatically saved in the current working directory where you ran the command. -
Generate a public key from the private key:
openssl rsa -in rsa_key.p8 -pubout -out rsa_key.pub -
Retrieve and store the public key from the
rsa_key.pubfile, which is automatically saved in the current working directory where you ran the command.
-
-
Register the public key with your Snowflake user:
 Note
NoteYou must have the
CUSTOMER_READWRITErole to register the key.-
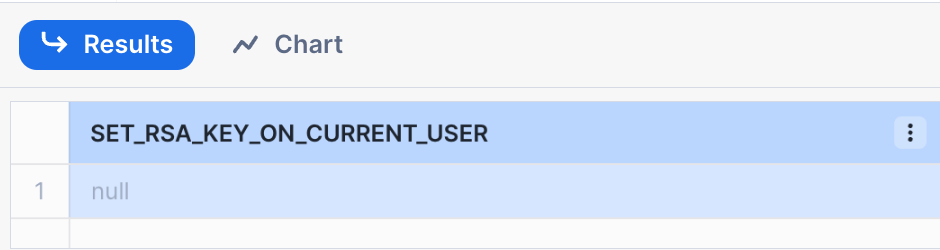
In a Snowflake worksheet, run the following command:
CALL CUSTOMER.PROCEDURES.set_rsa_key_on_current_user('<RSA KEY>');where you replace
<RSA KEY>with the public key you retrieved from thersa_key.pubfile.
Notes-
The key must be in a single line and must not contain any line breaks.
-
-----BEGIN PUBLIC KEY-----and-----END PUBLIC KEY-----are delimiters and aren’t part of the key.
The result will look like this:
-
-
Now that the public key is registered, you can use your username, your private key, and your password (if you encrypted your key) to authenticate with Snowflake.
Delete the reader account
You have the option to delete your organization’s reader account. Deleting the reader account is rarely necessary, and is typically only done if you decide to switch to using your own Snowflake account.
|
|
|
To delete the reader account:
-
On the Reader Account (platform-ca | platform-eu | platform-au) subpage, click
, and then select Delete Snowflake reader account. -
In the Snowflake Reader Account Management panel that appears, click Delete.
Security recommendations
To ensure the reader account remains secure, consider the following practices:
-
Monitor and remove inactive users to prevent unauthorized access to the reader account.
For increased security, set a network policy.
-
For advanced features, security, and long-lived solutions, consider using your own Snowflake account for added flexibility and control.
-
Reader account passwords don’t expire. Therefore it’s important to encourage users to create strong and unique passwords. Since a password reset isn’t enforced, it’s equally important to manually reset them periodically.
Required privileges
The following privileges are required to view or manage the Snowflake reader account.
|
|
The Snowflake reader account must be enabled in your organization license. |
| Action | Service | Domain | Required access level |
|---|---|---|---|
View and export data |
Analytics |
Snowflake Management |
View |
Organization |
Organization |
View |
|
Add or edit users |
Analytics |
Administrate |
Allowed |
Snowflake Management |
Edit |
||
Organization |
Organization |
View |
|
Add or block IP addresses |
Analytics |
Administrate |
Allowed |
Snowflake Management |
Edit |
||
Organization |
Organization |
View |