Previewing experiences
Previewing experiences
Once you’ve created and configured an experience, the next step is to preview it on-site. This is a critical step, which should be undertaken before publishing, to ensure that the experience fires correctly according to the designed triggers, displays correctly, and crucially that it functions according to your expectations.
By previewing, can you interact with an experience in a similar way to an actual visitor and test its effectiveness.
Getting started
We recommend using Qubit Explorer to preview an experience. This feature-rich tool not only enables you to preview single experiences, it also allows you to preview multiple experiences simultaneously.
By previewing multiple experiences at the same time, you can get a better understanding of how your experiences play out together on your site, highlighting any potential functional or design issues, and providing a window onto to a typical visitor journey.
|
|
Leading-practice
Qubit Explorer can also be used to validate events and test your segments. |
Starting Qubit Explorer
To start Qubit Explorer, select Experiences from the side menu and select Launch Explorer:

Alternatively, open your experience from you list of experiences and select  in the upper-right hand corner of the page.
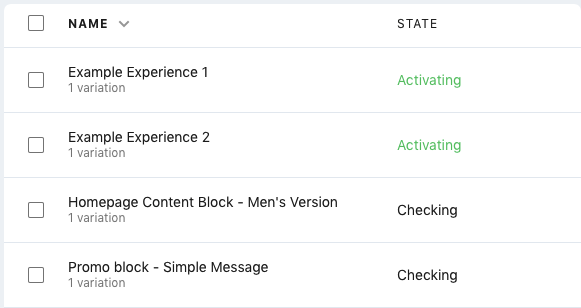
By default, your most recently updated live experience will display at the top of the list and will be selected for preview:
|
|
Note
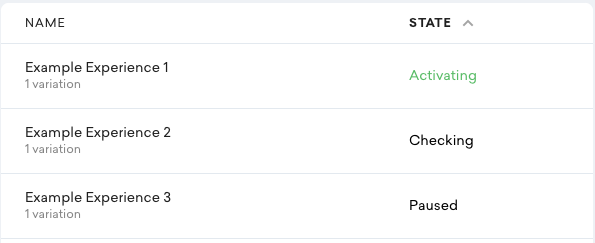
By default the list of experiences is ordered by alphabetically by state. You can change which column is used to sort experiences by selecting it once, to order in ascending alphabetical order, so A to Z, and a second time to order in descending order Z to A. |
In the following example, the user has chosen to sort the experiences by name and in ascending alphabetical order:
Using Qubit Explorer to preview experiences
So, we’ve opened the Explorer from the platform and we can see a list of our experiences. Depending on the reported state, we should now be able to see the experience on the site and begin our QA process to ensure that the experience meets our expectations, both functionally and from a design perspective.
Previewing single experiences
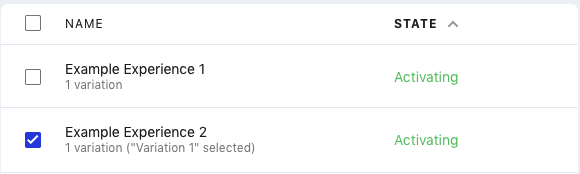
As mentioned, by default, the Explorer will preview the most recently updated live experience. To preview a different experience, deselect the original experience, select the one you’re interested in, and click Preview selected:
To preview a draft experience, select the Draft tab and follow the same steps.
|
|
It’s not possible to simultaneously preview live and draft experiences together. You can preview multiple live experiences and multiple draft experiences, but you can’t preview a mixture of live and draft experiences. |
Previewing multiple experiences
In the same way that you can preview single experiences, you can preview multiple experiences. This is really good way of understanding how your visitors might interact with all the possible experiences they might be served, and highlight any functional or design issues that arise when experiences are triggered on the same page for example.
By default, the selection of multiple experiences is disabled.
To enable it, click ![]() next to one of your experiences, then select Preview multiple experiences.
You can now select one or more from the list and select Preview selected.
The displayed number indicates the number of experiences you’ve selected to preview.
next to one of your experiences, then select Preview multiple experiences.
You can now select one or more from the list and select Preview selected.
The displayed number indicates the number of experiences you’ve selected to preview.
In the following example, the user has chosen to preview 2 experiences simultaneously:

|
|
Leading-practice
At any point whilst previewing, you can jump back to your list of experiences in the Qubit platform.
To do this, select |
Understanding states
We report the state of each of the experiences shown in the list. There are 3 possible states:
-
Activating: This means that the experience’s triggers have been met and the site is attempting to serve the experience. If it’s not served, it’s likely that there’s something wrong with the
variation.js. -
Checking: This indicates that the experience’s triggers are being evaluated but haven’t yet been met. If, after a period of time, the state doesn’t change to Activating, it’s worth investigating to make sure you’re on the correct page, that you have met session criteria, or that the element on the page that’s being polled for is present
-
Paused: This denotes that the experience has been prevented from being served because you’re previewing other experiences.
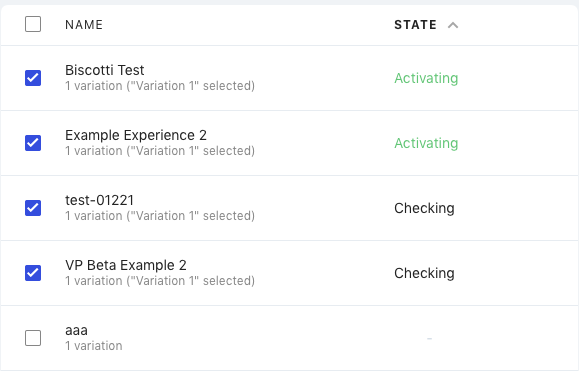
In the following example, we see that 2 experiences have the state Activating, 2 have the state Checking, and 1 has been prevented from being served:
Highlighting content augmented by experiences on your site
It’s not always obvious which parts of your site are augmented by experiences.
Explorer has a handy feature to help with that, which you can enable by selecting  and Highlight experiences . This will highlight content areas of the page registered by active experiences.
In order to register a content area on the page, experiences can use the registerContentAreas API:
module.exports = function variation (options) {
  // This tells explorer which parts of the page this experience will be interacting with
  // When this experience is active, the experience highlighter will highlight these areas
  options.registerContentAreas(['.header', '.footer'])
}
You can also dynamically register and unregister content areas while the experience is executing:
module.exports = function variation (options) {
  options.registerContentAreas(['.header', '.footer'])
  setTimeout(() => {
    options.unregisterContentAreas(['.footer'])
  }, 500)
}
Minimizing the Explorer window
To give you a better view of your site and the experiences being served, you can minimize the Explorer window by selecting 
Resetting experiences
When you preview an experience, you’re forcing your site to serve it to you artificially, in a way that doesn’t reflect a true visitor journey. In essence, you’re jumping into an experience, bypassing segmentation conditions, traffic allocation settings, and any other experience configuration, in a way that a visitor to your site can’t.
To preview your experiences in the context of the visitor journey, you can reset them by clicking Reset at the bottom of the Explorer window.
When you perform a reset, you can continue to preview experiences as you navigate through your site, but they will only fire if all the triggers, traffic allocation, and segmentation conditions have been met. Resetting experiences is therefore a useful method of replicating the visitor journey through your site.
Other ways of previewing your experiences
Previewing by entering the preview URL
It is also possible to preview experiences by entering the preview URL and experience Id(s) directly into your browser’s address bar as either search parameters, using ? or hash parameters, using #.
To launch a preview, you need to provide 2 parameters, options qb_opts and experiences qb_experiences.
Options parameter arguments
qb_opts accepts the following list of comma delimited arguments:
-
preview: Turn on preview mode for experiences -
bypass_segments: Bypass segment checks for all experiences -
bypass_activation: Bypass activation checks for all experiences -
remember: Set a cookie to remember the current settings for the rest of the session
Experiences parameter arguments
qb_experience accepts a comma delimited list of variation master Ids.
Previewing single experiences
To preview an experience variation with a master Id of 123456, enter the following:
Example: www.yoursite.com?qb_opts=preview&qb_experiences=123456
Previewing multiple experiences
You can also preview multiple experiences at the same time. To do this, enter a comma delimited list of variation master Ids.
Example: www.yoursite.com?qb_opts=preview&qb_experiences=123456,987654
Persisting settings for all pageviews
Some experiences run across pageviews, so it is sometimes useful to persist these settings and apply them to all pageviews.
The qb_opts parameter also accepts a remember argument, which will persist the setting to a cookie for the rest of the session.
Example: www.yoursite.com?qb_opts=preview,remember&qb_experiences=123456,987654
Closing the preview
When you have finished previewing the experience, you can close the browser tab or window.
If you used the remember argument, you’ll need to delete a cookie called qb_opts to clear the preview settings.